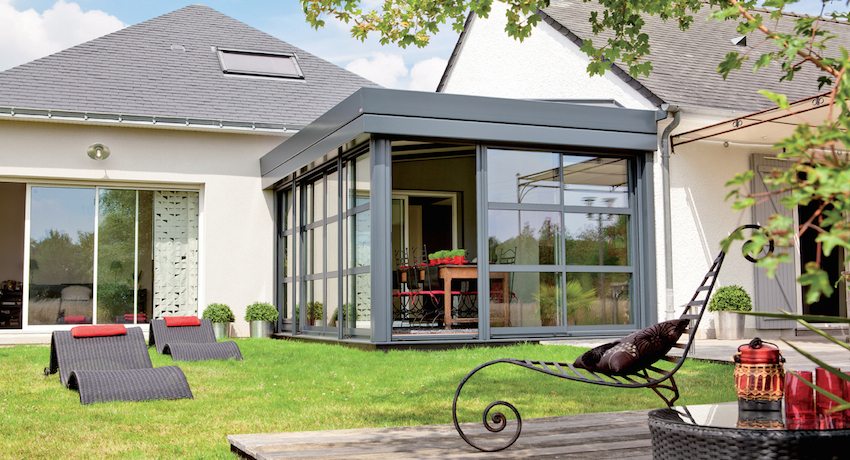
Many homeowners consider the veranda to be something like an unheated storage closet. They store tools, bicycles and bags of cement there. But in fact, this is a good opportunity to build a comfortable area for family recreation. Especially if you attach a veranda to a polycarbonate house. Photos of such premises delight the eye with their lightness and elegance.
Content [Hide]
Types of verandas
Classic veranda is a closed cold room attached to the first floor of the building. Its volume should be comparable to the size of the house.
Advice! The average area of the outbuilding should be up to 6 m in length and up to 3 m in width. Small verandas have an unpresentable appearance, they are difficult to use for their intended purpose.
Usually the veranda is built-in, i.e. erected together with the house, on the same foundation. If the moment was missed, then it is quite acceptable to attach a polycarbonate veranda to the house. Photos will help with the choice of design.
Related article:
Metal canopies: photo and description of how to build. The process of building a canopy. Tools, material selection, site preparation, earthworks, wall and roof framing.
By the way, the installation of a light extension on a single foundation with the building is still a controversial issue. These structures are too different in weight and, as a result, give different shrinkage. Experts believe that on soft soils, buildings can move away from each other. Therefore, in some cases, a polycarbonate veranda attached to the house is preferable. Photos of transparent structures are presented on this page.
Extension forms
Polycarbonate verandas attached to the house can have various configurations:
- square, rectangle, polygon, including those with rounded and beveled corners. The roof of the extension can be inclined, gable, pyramidal. The minimum degree of inclination is 40. Flat roofs are not made of plastic - snow cannot roll off them;
- semicircle with an arched roof. The bending radius of the roof must be at least 6 degrees;
- circular (belt around the entire building);
- the terrace is a polycarbonate open veranda attached to the house. A photo of a summer vacation taken on the terrace will be pleasant to view on winter evenings.
The form annexes must match the design of the house. Austere building in the Gothic style or "Fachwerk"belted with a transparent semicircular "skirt" will cause some bewilderment.On the other hand, the precise and consistent silhouette of the veranda will emphasize the characteristic features of the classic style.
Properties of polycarbonate
Polycarbonate is a transparent fiberglass sheet, monolithic or cellular (honeycomb). For the construction of verandas, material with cells is usually chosen - it is cheaper and more reliable. The sheet consists of two or several thin plates, between which are built-in bridges - stiffeners. They provide structural strength.
Advice! Do not chase the lightness of the material. The more the sheet weighs, the stronger it is. The cheap "economy option" is short-lived, unstable to snow and wind loads.
The main qualities of plastic:
- resistance to mechanical stress. The sheet is able to withstand hammer blows;
- transparency. Light transmittance reaches 90%;
- light weight. Polycarbonate is 16 times lighter than glass;
- flexibility. Heated plastic can be given any complex shape;
- fire resistance. The coating begins to melt at t 120 degrees;
- good sound and heat insulation. Inside verandas heat or coolness is retained for a long time;
- environmental Safety. Fiberglass, which is in the temperature range from -100 to +100 degrees, does not emit any substances or odors;
- ease of processing. Thermoplastic can be drilled with a drill, cut with a saw, jigsaw, grinder. If you are going to attach a veranda to a polycarbonate house, choose plastic with a thickness of 10-18 mm.
Advice! If it is decided to cut polycarbonate jigsaw, you need to choose the optimal tool speed. At high speeds, the sheets will melt; at low speeds, they will burst. Better to practice on the trim first.
How to attach a veranda to a polycarbonate house. Photos of construction stages
To attach a veranda to a polycarbonate house, you need a foundation. For light structures, the basis is arranged according to a simplified scheme. But this does not mean that the process technology can be violated. The procedure for pouring the strip foundation:
- along the perimeter of the projected extension, we dig a trench 50 cm deep, 30 cm wide;
- on the bottom of the pit we lay a sand cushion 20 cm thick and spill it with water;
- pour concrete into the trench, laying it with reinforcement;
- let the foundation stand for a month or two. In hot weather, the concrete surface is watered and covered with foil to avoid cracking;
Assembling the frame
Next, a basement of the required height is laid out on the foundation. Its surface is covered with roofing material and the base beam is laid horizontally (with a section of 100 × 150 mm). At the corners, 4 high vertical supports are attached to it. On top of them they are tied with a horizontal bar.
Vertical posts are screwed between the upper and lower bases, with an approximate pitch of 630 mm. It turns out a frame that can be sheathed with polycarbonate. All wooden parts of the building are pre-coated with an antiseptic, drying oil, or painted with oil paint. Using the same technology, you can assemble a box from a shaped pipe. Such a structure will be much stronger and more durable.
Roof assembly
Rafters are placed on the two upper parallel supporting beams. They can be made from a 40 mm thick board laid on the edge. The step between the rafters is chosen based on the width of the polycarbonate sheet. The joints of the sheets must lie on the rafters. The transverse lathing is made of a 20 × 10 mm board.
Polycarbonate sheathing
The cellular plastic is cut so that the inner channels are directed downward towards the ground. This will facilitate the removal of dust and condensation. The correct orientation of the material must be observed - the UV side facing outwards.

Sliding compartment doors on the veranda allow you to regulate the flow of fresh air into the room
The ends of the sheets are covered with a profile or sealed with adhesive tape. Otherwise, internal condensation will drastically reduce the transparency of the plastic. Next, holes are drilled for self-tapping screws and the cut sheets are sewn to the frame. The joints are connected using a special split profile.
Advice!The polymer requires thermal play. Therefore, the holes are drilled slightly larger than the required diameter. Self-tapping screws do not tighten until they stop. Otherwise, the plastic, deforming from temperature changes, will weaken the attachment points. Rubber washers are placed under the heads of the fasteners.
Fiberglass care
You need to wash polycarbonate with warm soapy water using a soft sponge. It is not recommended to use sharp objects when cleaning - plastic is easily scratched. Do not use aggressive detergents that contain abrasives, alkalis, chlorine. The service life of the polycarbonate veranda is practically unlimited. With proper care, the material retains its structure, color and transparency for a long time.


