Ondulin is one of the most convenient roofing for installation. The dimensions of the ondulin sheet allow the construction of a roof from this material, even alone. The use of these soft, but at the same time sufficiently strong sheets is justified in various areas of civil engineering, from private homes to small shops and office buildings. Therefore, the instructions for installing ondulin will be useful to everyone who plans to carry out roofing work.
Content [Hide]
Dimensions of the sheet of ondulin and its consumer properties
The production of this roofing material has been carried out since 1994. Then it was invented in France. In our country, he appeared relatively recently, but he has earned his popularity well deserved. Euroslate production technology, as we also call ondulin, based on impregnation of compressed cellulose with bitumen. The sheets are made wavy, similar to the usual familiar slate.
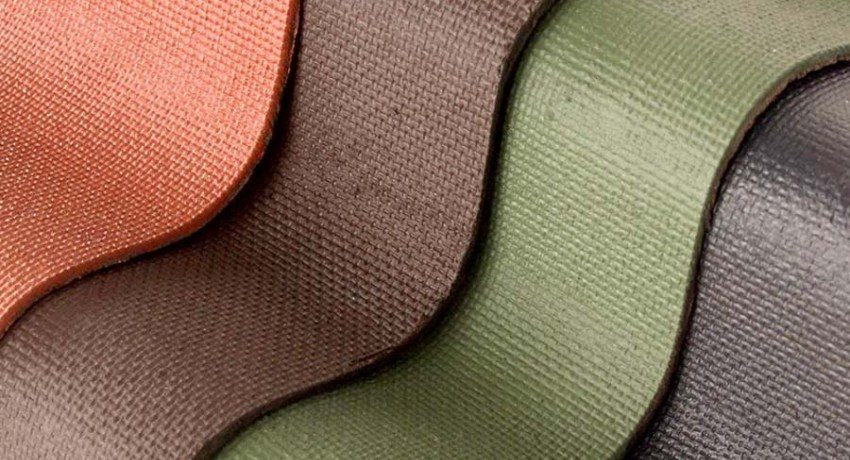
The color of the sheets depends on the pigment added to the bitumen impregnation, as well as on its saturation. The surface of the sheets is treated with thermal resin and other mineral components. This provides moisture resistance and strength.
Ondulin, a photo of which can be found in various online stores, consists of several substances:
- Mineral fillers.
- Thermal resin with mineral pigments.
- Bitumen purified from impurities.
- Cellulose fibers.
Helpful advice! Since bituminous components prevail in the composition of ondulin, when heated, it emits a persistent smell of oil products. For this reason, it is not recommended for use in childcare facilities and in places where the air does not circulate well.
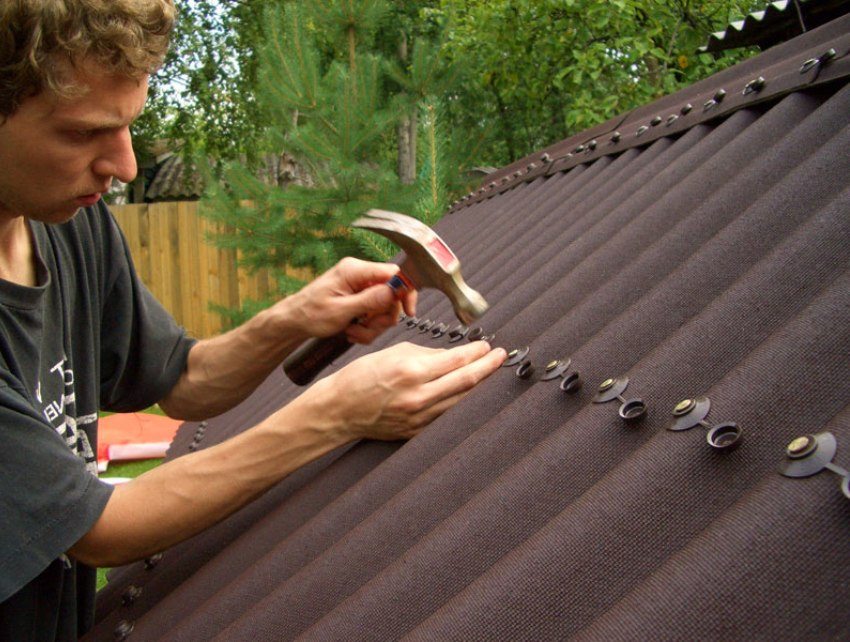
The difference lies in the weight, which is significantly less, and the shallower wave height. It is weight that is the main advantage over other roofing materials. After all, the details of the rafter system for an ondulin roof can be much thinner. Since this material can be conditionally attributed to a soft type of roof, its installation is very convenient. Attach the sheets to the crate with nails with large heads. You can cut them with a regular hacksaw or a circular saw.The dimensions of ondulin allow it to be laid alone or together, which greatly reduces the cost of installation work. As disadvantages, we point out: the smell when heated and a low fire safety class.
Installation instructions for ondulin
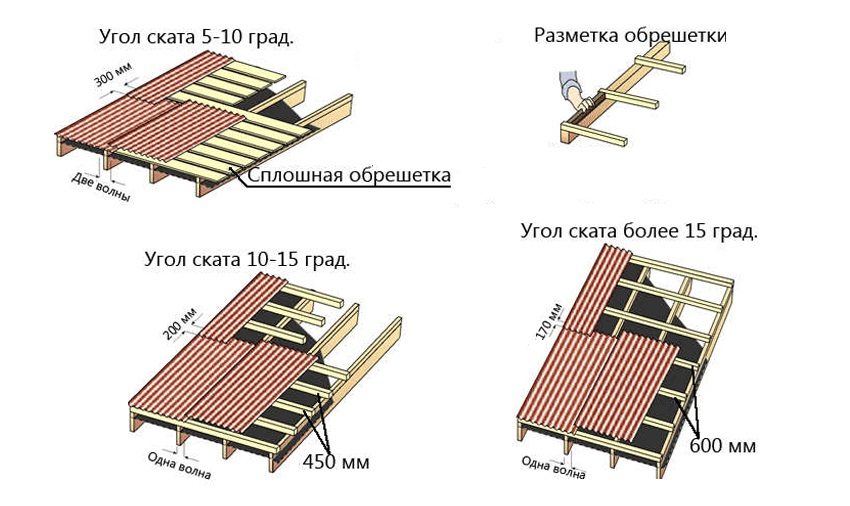
The technology for installing this material on a pitched roof strongly depends on the angle of its inclination. If it lies in the range from 5 to 10 degrees, then they make a solid crate. It can be made of plank with a thickness of 15 to 25 mm or plywood. Between themselves, adjacent sheets are overlapped by 2 waves. Sheets from adjacent rows are superimposed on each other by 300 mm. The top sheet is placed on the bottom one until they reach the top of the slope. The standard dimensions of ondulin allow three rows of sheets to be laid on a 5 meter slope.
If the angle of inclination of the planes of the roof slopes increases to a range of 10 - 15 degrees, then the crate can be made not solid. An interval of 45 cm is taken along the axes. That is, this is the distance between the upper edges of two adjacent boards. The overlap at the ends is 200 mm, and at the sides in 1 wave. Angles of inclination greater than 15 degrees allow the use of battens with an axial spacing of 60 cm, an overlap at the ends of 170 mm and on the side in 1 wave.
Each batten board is nailed parallel to the eaves board. To do this, a reference "interval" is made from the bars, which is used to mark the attachment point of each next sheathing board. To accurately mark the wavy sheets, you need to take a small piece of ondulin with a straight edge and draw on it with a colored pencil. This will allow accurate lines to be drawn.
Helpful advice! When cutting sheets of ondulin, the hacksaw must be lubricated with machine oil. This will prevent it from getting stuck in the viscous structure of the material.
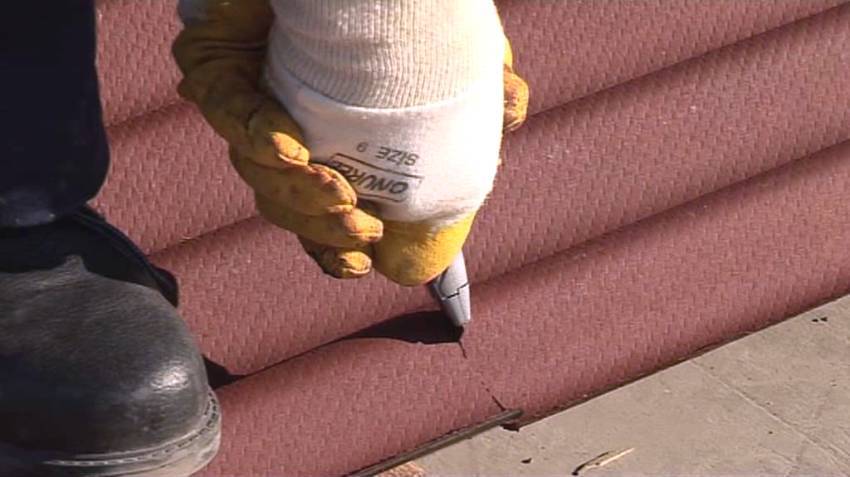
Ondulin is a soft material, it can be easily cut with a construction knife. It is not so difficult to make a roof of ondulin with your own hands.
Step-by-step algorithm for installing an ondulin roof
Further instructions for installing ondulin are as follows:
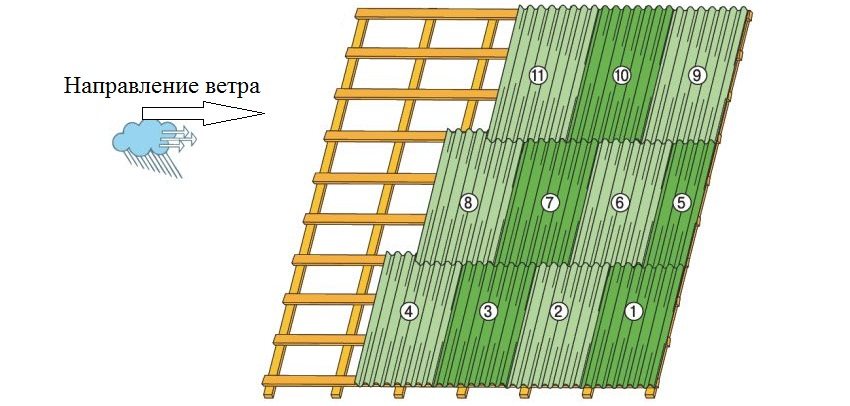
- Determine the edge of the roof that is on the other side of the prevailing winds in your area.
- From the selected edge of the roof, we begin to lay the first row. In this case, you need to pay special attention to the first sheet. Its bottom section must be absolutely parallel to the cornice. Attach it first to one nail in order to correct the position if necessary.
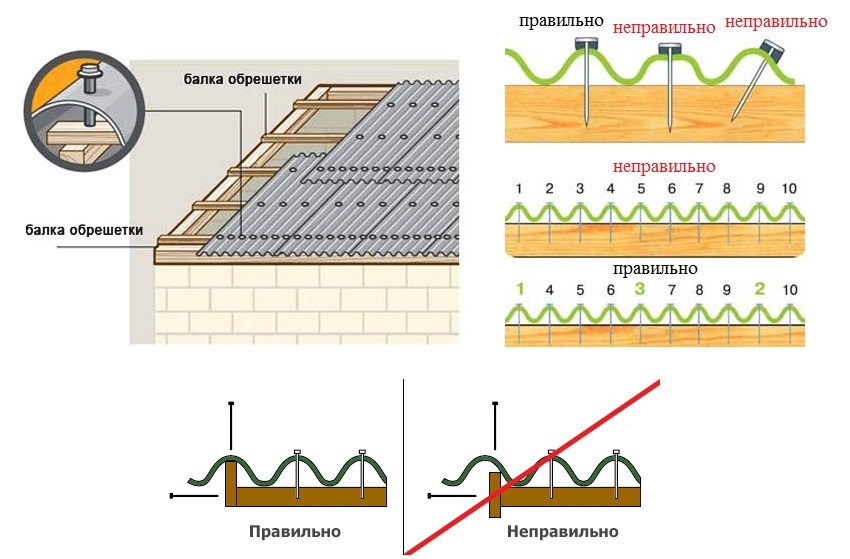
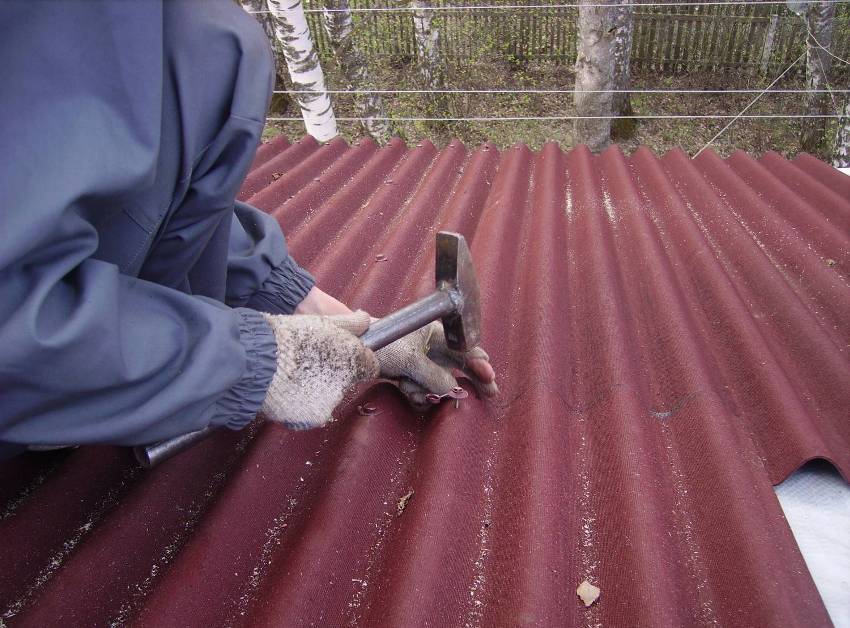
- The sheaths stretch the rope along the entire length of the board. This is necessary in order not to miss the board with a nail. When 3 sheets are laid, and you are sure that they lie parallel to the curtain board, nail them. About 20 nails must be driven into each sheet. At the ends of the sheets, nails are driven into each wave, in the middle it is possible through one, and the side overlap is attached on both sides.
- After the initial row is securely nailed, you can start laying the second one. Particular attention should be paid to nailing the overlap. The sheets in these places should not have any backlash. All subsequent rows are laid similarly. ondulina... When moving on the sheets with your feet, you need to step only in places where there are crate boards and only in soft shoes, and better barefoot, if the weather permits.
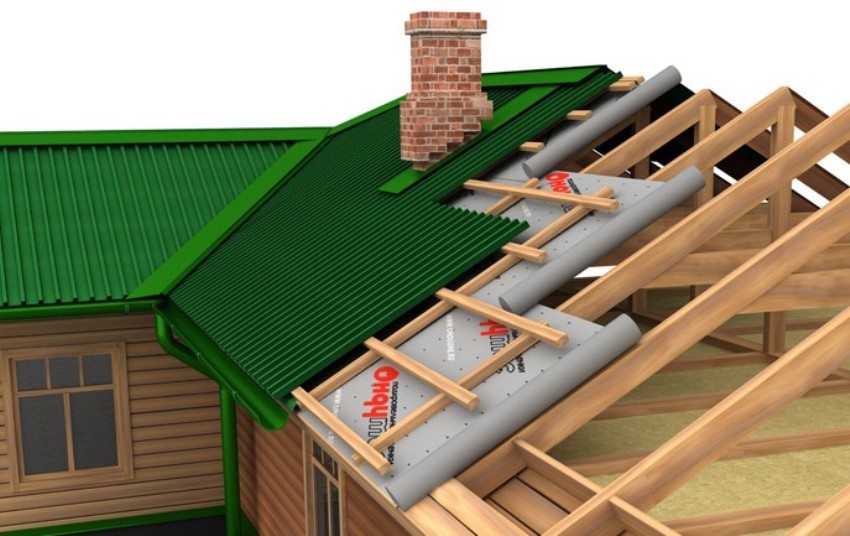
- When the sheets on both roof slopes are fully fixed, proceed with the installation of the ridge element. It is made of the same material and is therefore very malleable. They begin to fasten it from the same side from which they began to lay the sheets. The overlap is made at least 125 mm. A skate is nailed into each wave of all sheets on both sides.
- After that, valleys are drawn up, if any, which are produced and sold together with sheets. A special crate is made for their device.
- The roof ends are closed with a tongue or ridge ondulin, which begins to be nailed from below. It is mounted both from above and from the side. If there are various elements on the roof or vertical walls, then the joints with them can be decorated using the same valley. At the same time, it is necessary to organize good waterproofing in this place so that ondulin does not leak. Owner reviews are sometimes negative due to the fact that this point has not been given sufficient attention. The leak always began in such places.
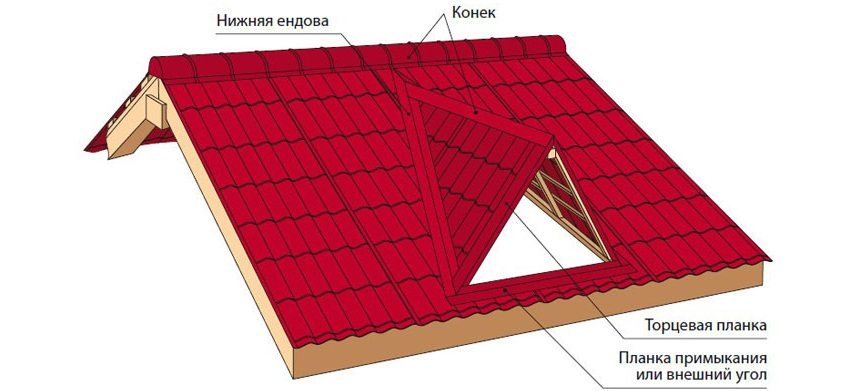
The final stage in the arrangement of an ondulin roof is the installation of a ridge element, a valley and an end strip
- If the roof is complex or hipped, then you will have to cut the ondulin at an angle. The dimensions of the sheet are such that it is not difficult to do this. The lower edge of the first sheet is aligned with the beginning of the slope. In this case, the cut of the inclined ridge will be the line along which this sheet must be cut. We perform the same manipulation with all subsequent sheets above. The corner joint is closed with a ridge element and pierced with nails into each wave.
Helpful advice! The installation instructions for ondulin suggest a vapor barrier under it. Builders recommend using a vapor barrier membrane made by the same manufacturer as the sheets themselves.
What other additional details can be used when installing an ondulin roof
Since this material tends to emit a strong odor when heated under the sun's rays, the roof and the attic need regular ventilation, especially during the hot season. For this purpose, manufacturers produce various roofing fans that are combined with ondulin. They are fastened anywhere on the roof plane with nails in each wave. At the same time, the joints are well waterproofed.
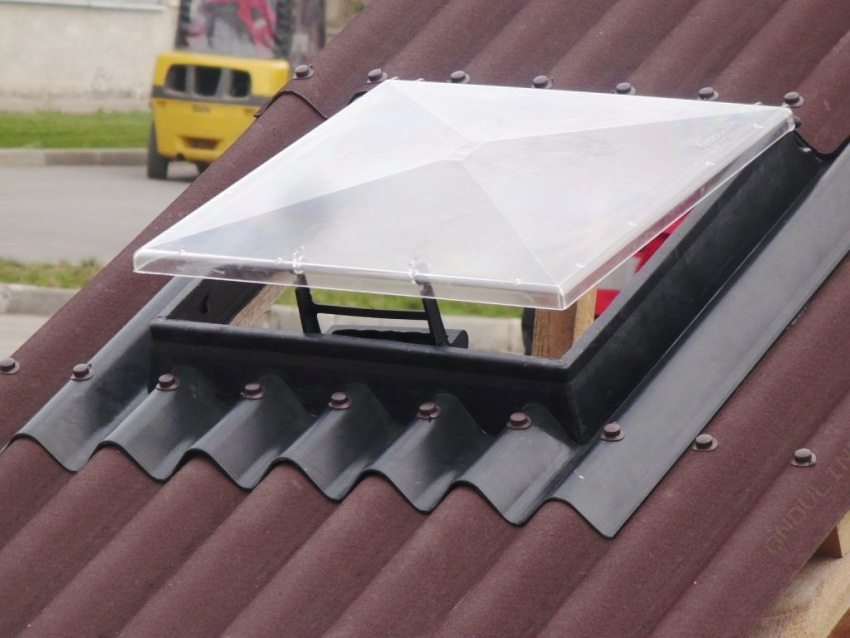
Roof windows are used to illuminate the attic space. When installing them, it is necessary that the top sheet overlaps on the base of this element. The windows are also fastened with nails for ondulin. The owners' reviews indicate that the use of such windows is completely justified, since in addition to lighting, they make it possible to go out onto the roof if necessary.
Another useful element is cornice filler. This is a gasket that is placed under the ondulin at the level of the cornice or under the ridge element. It is needed to prevent birds from entering the attic.
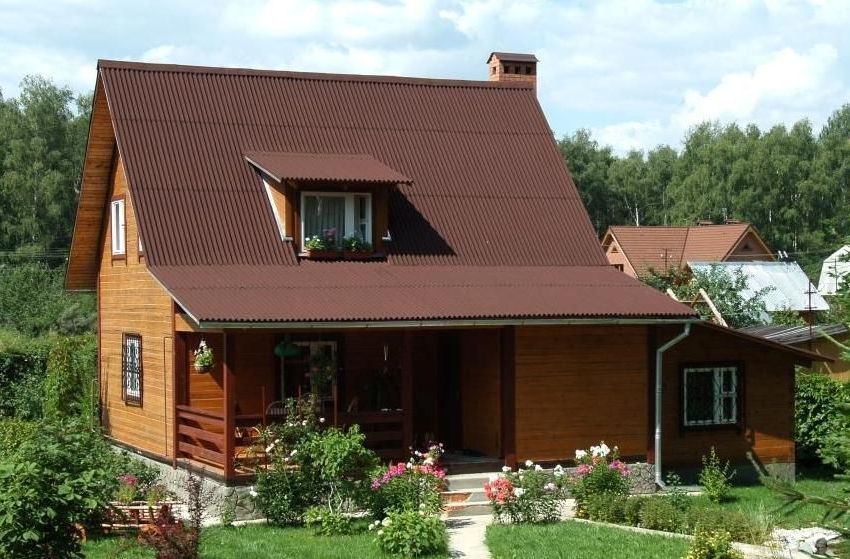
Ondulin roofs, photos of which can often be found when viewing finishing options, allow you to save not only on the cost of the material itself, but also on the details of the rafter system. Moreover, no additional people are needed for installation. After watching the video on how to cover the roof with ondulin with your own hands, you can cope with everything yourself.
