The erection of a frame for a hipped roof is a time consuming and complex process with specific features. This will require accurate calculations and a strict sequence of installation. However, the result will amaze with the solidity and reliability of the design with a spectacular shape. Before you start creating this frame, you should study the features and algorithm of actions by which the gable roof rafter system is being erected.
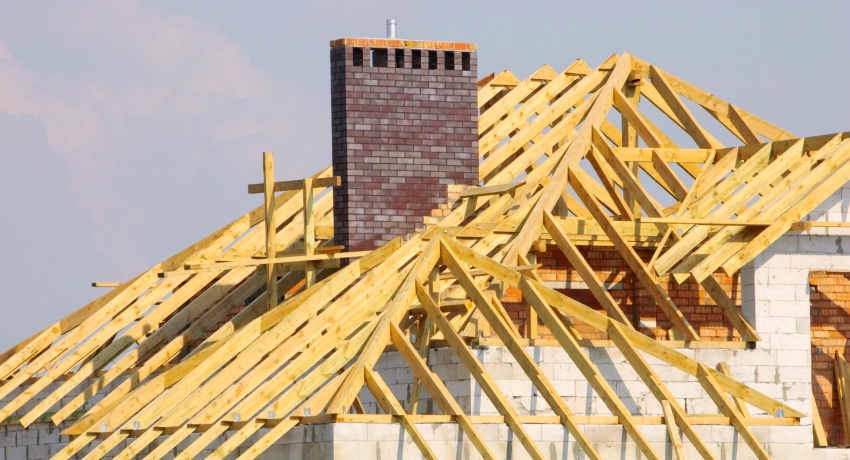
The hipped roof design is not only more resistant to intense atmospheric influences, but also allows you to get a spacious attic room
Content [Hide]
- 1 Rafting system of a hipped roof: components and design advantages
- 2 Varieties of hipped roofs. Photos of interesting options
- 3 How to calculate a hipped roof?
- 4 How to make a hipped roof of a house with your own hands?
- 5 Do-it-yourself hipped roof for a gazebo
- 6 The sequence of work on the construction of the roof truss system. Video instructions
Hip roof rafter system: components and design advantages
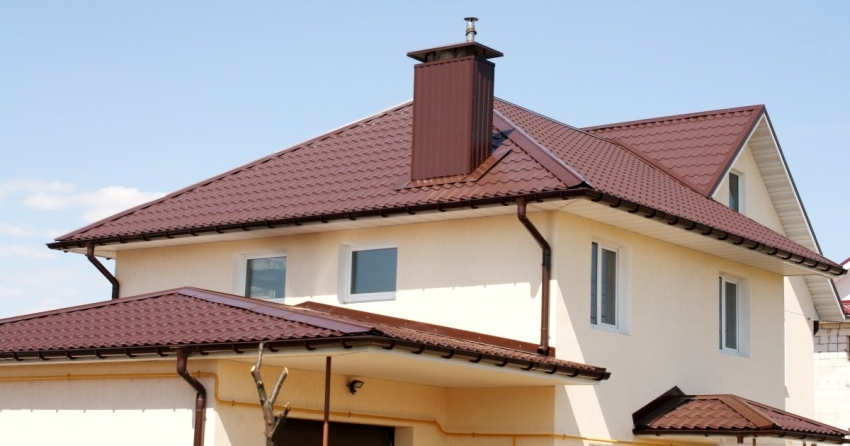
The hipped roof consists of a rectangular base and four sloping ramps. The two end faces are triangular in shape. They replace the gables as on a gable roof. The other two slopes are called front slopes. Their shape resembles a trapezoid. The angle of inclination of the surfaces is in the range from 15 to 60 degrees. Dormer or dormer windows, bay windows, cuckoos are placed on inclined slopes, which creates an even more respectable look of the roof.
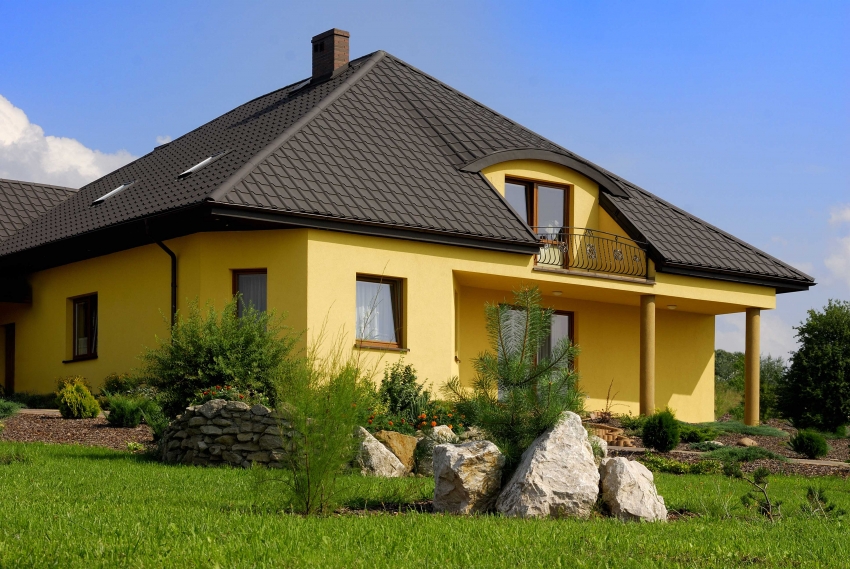
During the construction of a hipped roof, wood is used, which allows you to choose any roofing material
This design has its advantages over other types of mansard roofs:
- the design is more resistant to intense gusts of wind, which occurs due to the lack of gables;
- due to the large number of slopes, rain and melt water is more efficiently removed from the roof surface;
- the special design of the rafter frame allows you to get a spacious attic room, which is especially important for one-story houses with a hipped roof;
- thanks to the use of wood to create the roof frame and the ability to choose any roofing material, the construction of a four-slope structure will not be much more expensive than the construction of a two-slope one.
The structure of the hipped roof structure includes the following mandatory elements:
- the ridge, which is located at the top of the roof and is the intersection of inclined slopes;
- four inclined surfaces that are located at a certain angle to the rectangular base of the roof and are covered with roofing material;
- overhangs are parts of the roof, formed by fillies or lengthening the rafter legs protruding beyond its perimeter, which protect the walls from moisture;
- rafter frame that forms the geometry of the roof and hidden under the roofing material;
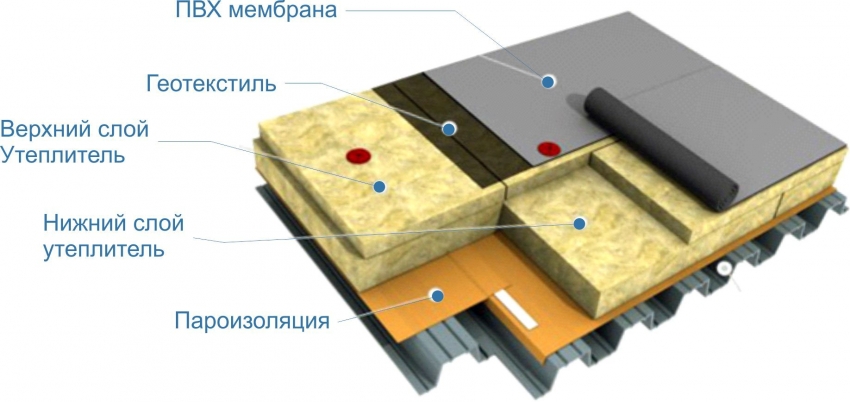
- roofing cake, consisting of a hydro, heat and vapor barrier layer, which is arranged on a rafter frame in order to insulate the building and protect it from the negative effects of the environment;
- a drainage system that ensures the removal of excess water from the roof surface. It is represented by an external drain, which includes a gutter, a water intake funnel and a vertical pipe;
- snow guards are small horizontal sides located at the edges of the sloping slopes and prevent the snow mass accumulated on the roof from falling.
The scheme of the hipped roof allows you to more clearly and in detail study its structure.
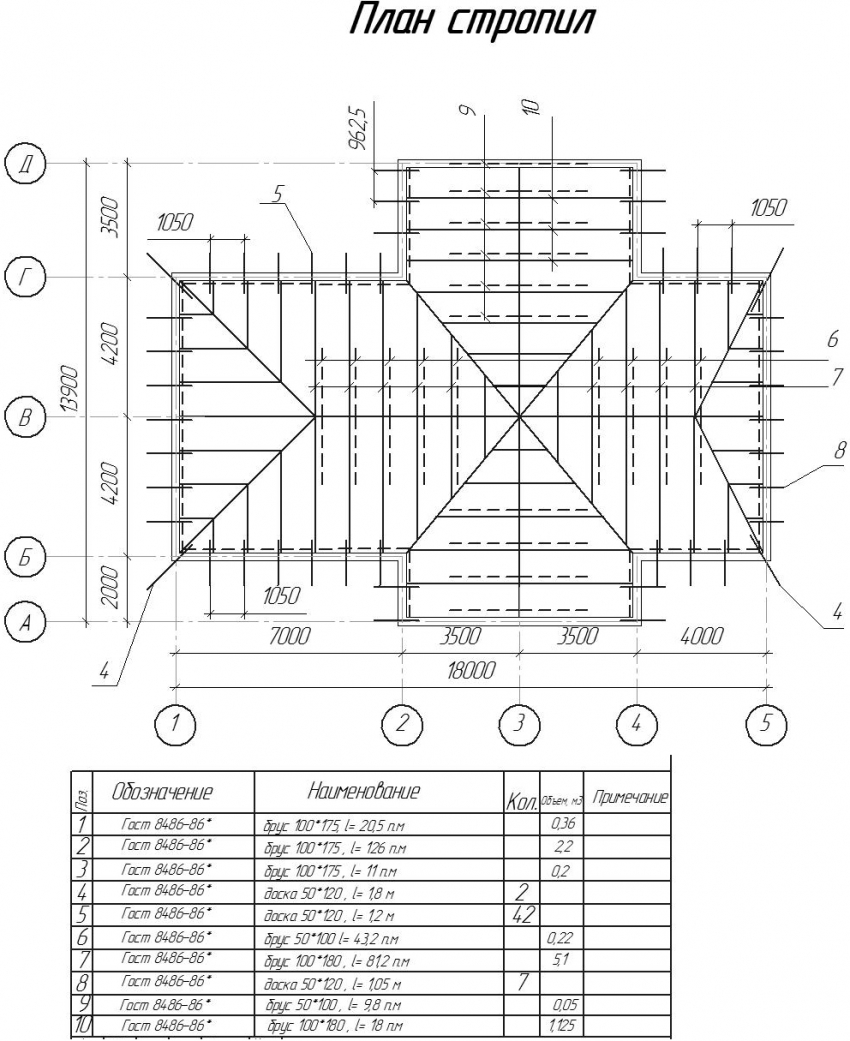
The scheme of the rafter system of the hipped roof allows you to accurately calculate all dimensions and the amount of material required
The device of the roof truss system from wooden elements
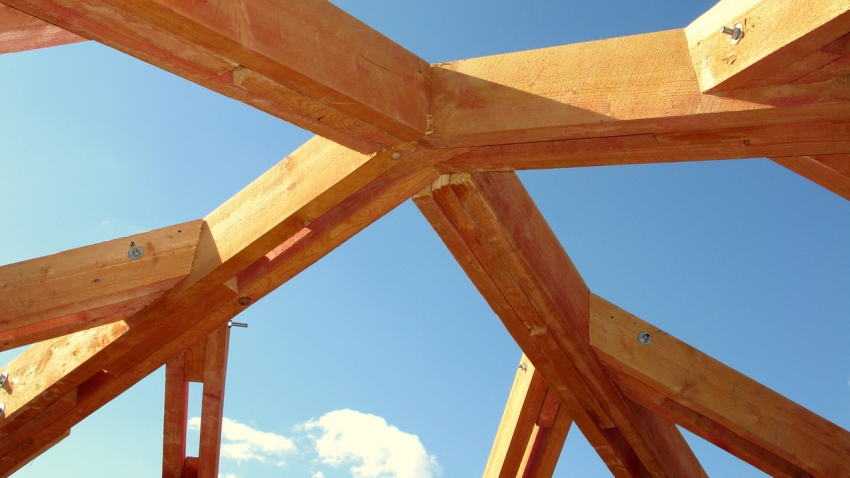
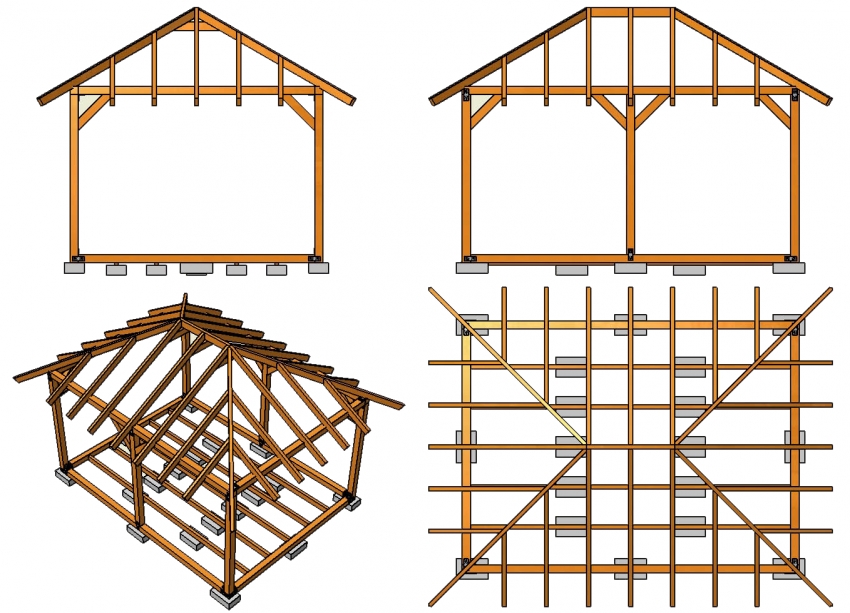
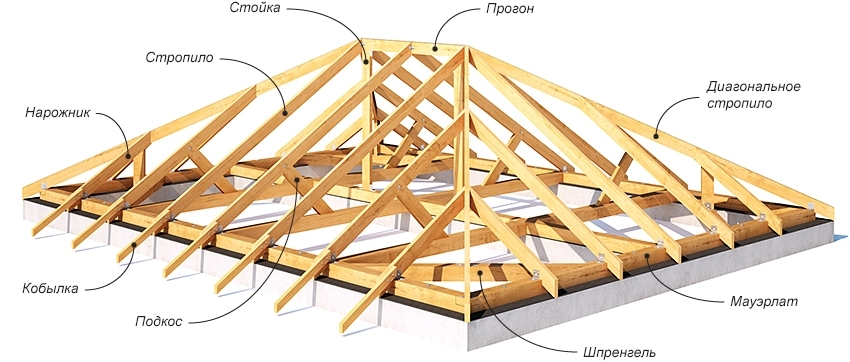
The rafter system, the photo clearly shows this, is a wooden frame on which the hipped roof rests. It includes many mandatory and auxiliary elements, which are made mainly from coniferous wood. The drawing of the rafter system of a hipped roof shows the following elements:
- Mauerlat in the form of four beams with a section of 10 × 10 cm or 15 × 15 cm, located along the perimeter of the load-bearing walls, is designed to take the load from the roof and distribute it evenly on the load-bearing walls of the building;
- log - a wooden beam that is placed on the inner load-bearing wall and serves as a support for the racks used in the layered rafter system;
- rafter legs in the form of wooden planks with a cross section of 5 × 5 cm or 10 × 15 cm set the geometry of the inclined slopes and are the basis for the roofing cake.
- The ridge girder is the highest point of the roof and is represented by a wooden beam resting on vertical posts. Rafter legs are attached to them;
- the racks are represented by vertical supports installed on the bed, and serve to support the ridge girder and the middle of the rafter leg;
- struts, wooden bars attached to the rafter legs at an angle and preventing them from bending;
- the crossbar and the fastening are represented by horizontal bridges made of metal or wood, which connect the pairs of rafters, while reducing the load on the walls. The crossbar is installed at the top of the rafter legs, and the tightening is at the bottom.
- truss trusses - vertical risers for overhead rafters;
- the lathing is the basis for the installation of roofing material. It can be solid or lattice, which is determined by the type of roofing.
During the installation of the rafter system of the hipped roof, layered, rafter and ordinary rafters are used. Inclined elements diverge from the ridge into two opposite corners of the house. They form triangular end sloped surfaces. Ordinary rafters are mounted along the ridge girder in pairs. They form trapezoidal façade slopes. Popular elements, having different lengths, rest on the layered rafters with their upper part.
Varieties of hipped roofs. Photos of interesting options
Several types of structures can be attributed to hipped roofs, which have the same number of inclined surfaces, but a different device.
The classic design is the hip design, as can be seen in the photo of a house with a hipped roof. It consists of two triangular slopes and two trapezoidal ones. The place of their connection is called the ridge, which has a length much shorter than the length of the house. Hip roof is a structure of increased complexity, in which design and installation is a very time-consuming and complex process that requires certain skills and experience.
This structure is suitable for the base of a rectangular building. This is the most aesthetically pleasing roof option. However, it is also the most difficult, both in terms of necessary calculations and in terms of construction technology, since a complicated rafter frame is used here, which is proved by the rafter system diagram, which requires additional measurements and adjustment of the material on site.
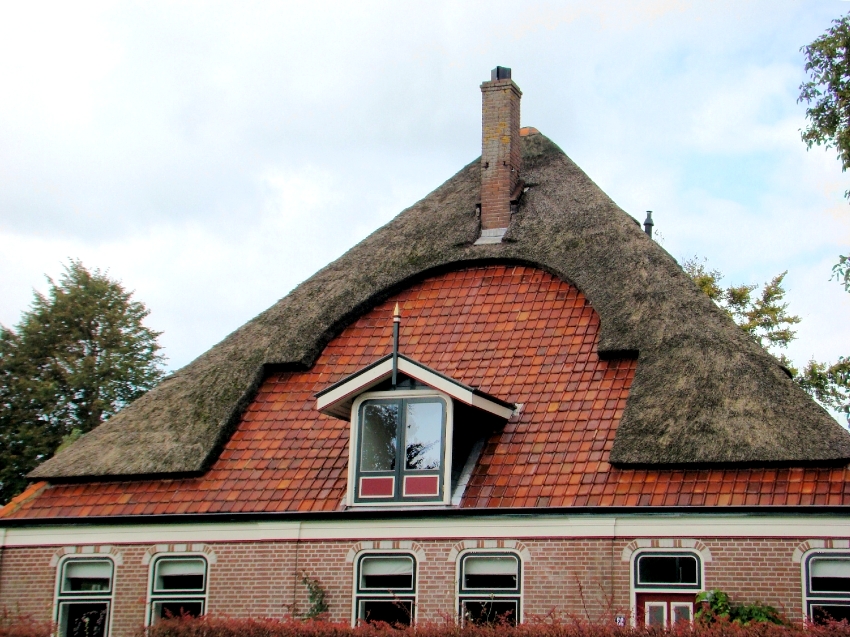
The semi-hinged Dutch roof at the same time refers to a gable and four-pitched structure. It consists of two oblique trapezoidal slopes and two truncated triangular hips. Small hips do not completely replace gables, which makes it possible to install simple vertical windows, which are much cheaper than attic windows. In the photos presented on the Internet, you can see various projects of houses with a hipped roof of this type.
The semi-hip Danish design has four trapezoidal ramps, which differ in size. The truncated hips do not extend from the ridge, but slightly lower, leaving room for a triangular pediment. There is usually a dormer or vertical window for additional natural light, as can be seen in the photo of a house with a hipped roof. This design is the most resistant to strong winds. Therefore, it is advisable to arrange it for houses located in areas with increased wind activity.
The four-pitched mansard roof consists of two triangular hips and two broken surfaces with a varying angle of inclination. Such a complex structure helps to obtain an overall attic with a high ceiling, which is especially important for one-story houses. Projects with a hipped roof of this design are a clear confirmation of this.
The hipped roof is erected on square-shaped buildings, mainly used for frame houses. The rafter system does not provide for a ridge run. The structure consists of inclined surfaces of the same size and triangular shape, which are connected at a peak.
The hipped roof consists of four surfaces of the same size and triangular shape, which are connected at a peak
How to calculate a hipped roof?
Before building a hipped roof, it is necessary to make all the calculations, where the amount of material for the construction of the rafter frame, the device of the roofing pie and the laying of the roof is determined. The calculation can be carried out using special computer programs and a drawing of a hipped roof. However, it is better to do it yourself, using elementary mathematical formulas.
Before calculating the area of a hipped roof, you should draw up a construction plan with all the required dimensions.
Helpful advice! At this stage, you should choose a roofing material, on which the angle of inclination of the roof will depend. The sharper it is, the longer the roof slope and the higher the material consumption.
At the first stage, the angle of inclination of the slopes is determined.It depends on the climatic characteristics of a particular region, the purpose of the attic space, the choice of roofing material, the calculation of which can be seen on the diagrams located on specialized sites on the Internet.
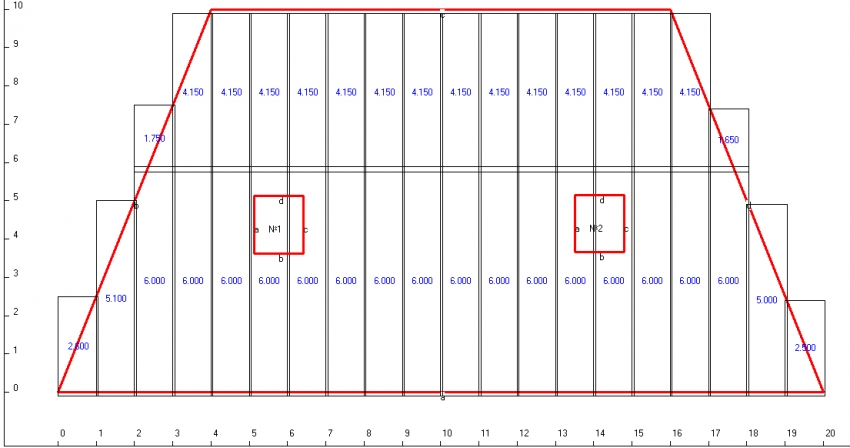
Correct calculations of the dimensions of the hipped roof and possible loads allow you to avoid additional costs for materials and increase the operational life of the structure
The tilt angle can be in the range from 5 to 60 degrees. For regions with abundant precipitation and strong winds, you should choose an angle of inclination in the range from 45 to 60 degrees. If the region is characterized by winters with little snow, rare rains and low-intensity winds, then the angle can be chosen much smaller.
For an angle of inclination of 5-18 degrees. preference should be given to roll materials, for an angle of 14-30 degrees. it is advisable to use asbestos-cement sheets or rolled metal.
Next, the height of the roof ridge is calculated. For this, special tables or trigonometric formulas for a right-angled triangle are used. After that, it is necessary to calculate the rafters, the section of which is selected taking into account the load. It takes into account the weight of the rafter structure, the roofing cake, the angle of inclination of the slopes and the impact of the environment. Next, the step of the rafters is determined, followed by checking their bearing capacity.
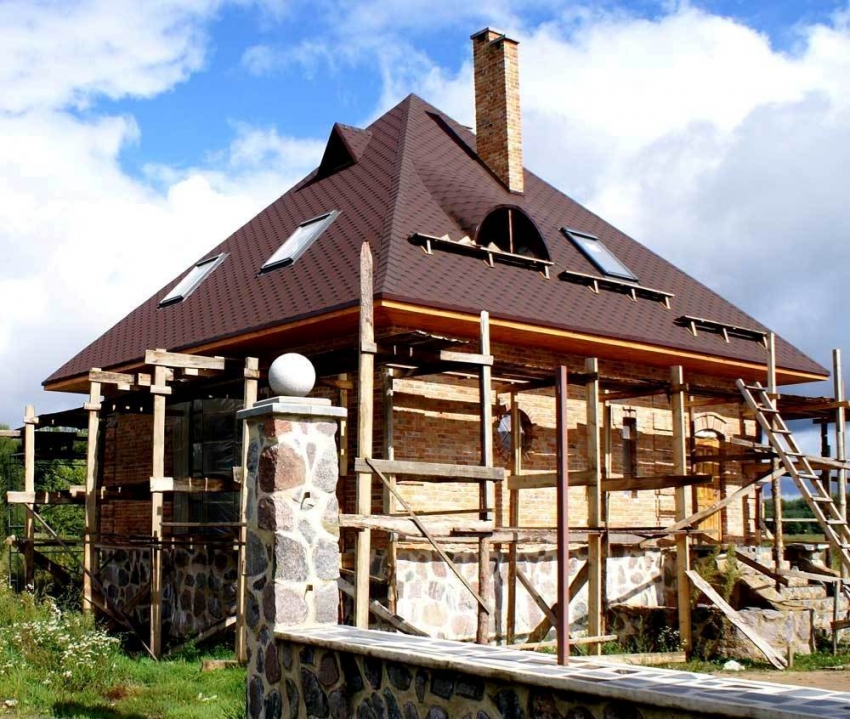
The shape, type and size of the roof cannot be chosen based on the characteristics of the building and the weather conditions of the region
When drawing up a drawing of a hipped roof, you should decide on the device of the rafter system. The type of rafter system, the diagrams clearly reflect this, is selected based on their method of attaching the rafters. Houses with load-bearing walls or pillars support the use of layered rafters. Where it is not possible to arrange a support, hanging rafters should be made.
Related article:
Hip roof rafter system: design features and installation nuances
Design and advantages of hip roofs. Basic elements, diagram, models with a bay window. Calculation and development of drawings. DIY installation.
How to calculate the area of a hipped roof and calculate the roofing?
The calculation of a hipped roof is carried out in compliance with certain rules:
- The general drawing of the device of the rafter system of the hipped roof must be decomposed into separate geometric shapes with all dimensions applied.
- The length of the slope is determined by measuring the distance from the ridge to the extreme line of the eaves.
- The calculation of the area of all figures is carried out using mathematical formulas.
- Each sloped roof slope is calculated using the formula, where the area of the figure should be multiplied by the cosine of the angle that corresponds to the location of the roofing material.
- If the inclined slope has the shape of an irregular triangle, it must be broken into regular shapes and the calculation performed.
- After receiving data for each of the elements, the final values are summed up.
When calculating the total area of a four-pitched roof, you do not need to subtract the area values for small elements such as ventilation ducts, skylights, chimneys, skylights or parapets. Their areas are so small that they will not lead to high financial costs.
Next, you can start calculating the footage of the selected roofing material.
Important! It should be remembered that the area of the roof does not match the area of the roofing material.
Each roofing material has the peculiarity of overlapping, the value of which depends on the specific type of product, which, accordingly, increases the material consumption.
When calculating the roofing material, it is necessary to add 15% of the material stock to the total roof area, which overlaps.You should also consider the amount of waste, for which you need to add another 20%.
Having obtained the result, it is necessary to correctly calculate the amount of sheet roofing material. For this, the total value is divided by the area of one sheet. Determination of the length of the sheet of material is made by the height of the slope. However, it should be remembered that the longer the sheet, the more difficult the process of transporting it. Therefore, based on the roof area, the most suitable size is selected.
If the roof has large dimensions, it is better to give preference to soft roofing materials, the use of which generates a minimum amount of waste. However, it should be borne in mind that these coatings require a continuous sheathing, which increases additional costs.
How to make a hipped roof of a house with your own hands?
Do-it-yourself erection of a hipped roof structure, drawings and photos presented on the Internet will help in this matter, is a laborious, but doable process that requires correct calculations and a certain sequence of actions.
The roof truss system is a powerful and durable frame that can withstand all roof loads, including roofing cake and roofing. The reliability and strength of the roof depends on the correct and accurate calculation of the load on the rafter system.
It must withstand permanent and temporary influences. Constants include the weight of the roof, the weight of all elements of the rafter frame, and the weight of the roofing pie. Temporary influences include the influence of the environment, the weight of workers and equipment during repair work on the roof.
Having in front of you a diagram of the rafter system, you can start building a wooden frame. First, you need to install the main structural elements on which the rafter legs are attached.
Do-it-yourself installation of the rafter system structure begins with the arrangement of the foundation for the future frame. For this, a Mauerlat is installed, which is erected along the perimeter of the upper row of load-bearing side walls. Next, you should install the bed for the ridge support and mount the vertical posts. They should be located strictly at an angle of 90 degrees. The slightest deviations can lead to deformation of the entire structure. The step of the racks is no more than 2 m. It is necessary to fix the ridge beam to the racks, the cross section of which is selected taking into account the load of the central part of the rafter frame.

In order for the structure to be strong, it is necessary to check the correct angle of the rafters on the Mauerlat
Helpful advice! For large-sized roof structures, it is advisable to install several beds.
Further, based on the drawing of the rafter system, you should proceed with the installation of the rafter legs in the following sequence:
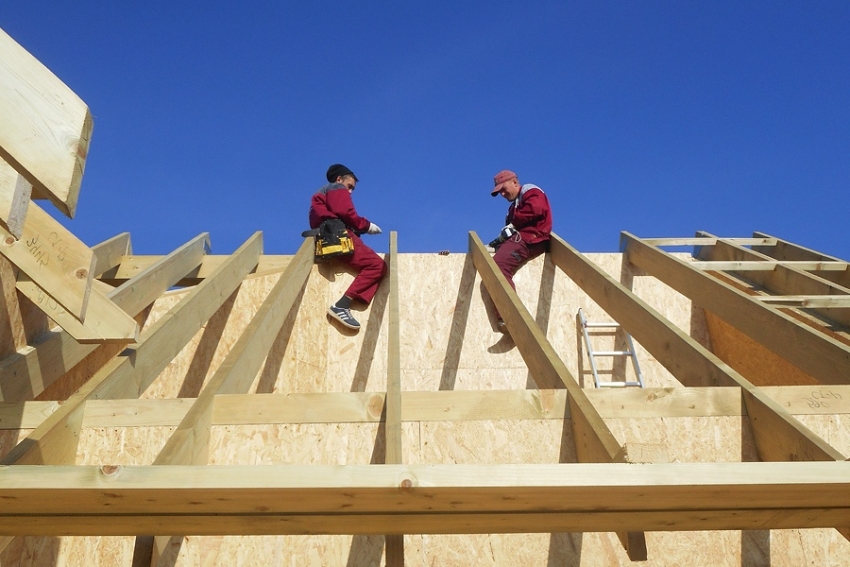
- installation of diagonal rafters, the lower part of which is attached to the Mauerlat by cutting;
- installation of central rafters;
- installation of corner rafters, which are attached to diagonal beams;
- installation of a tightening, which is used to secure the legs at the skate;
- installation of central posts, which are attached to the ridge at one end, and to the tightening (crossbar) at the other;
- installation of struts, which are fixed on the rafter leg and crossbar;
- installation of a truss, one part of which is attached to the Mauerlat, and the other to the rafter leg.
After that, the installation of the lathing is performed. Then the roofing cake is laid. It consists of a waterproofing, thermal insulation and vapor barrier layer. This is followed by work on the outer covering of the roof with the selected roofing material, observing the features of its installation.
Important! The durability and reliability of the entire structure directly depends on how well each attachment point for the roof truss system will be made.
If it is not possible to carry out the work on your own, you can use the services of specialists for the installation of the rafter system, the price of which depends on the complexity of the structure, the total area of the roof, the type of roofing, the height of the building, the configuration of the roof and the location of the object. The price per m2 of installation of the truss system starts from 400 rubles.
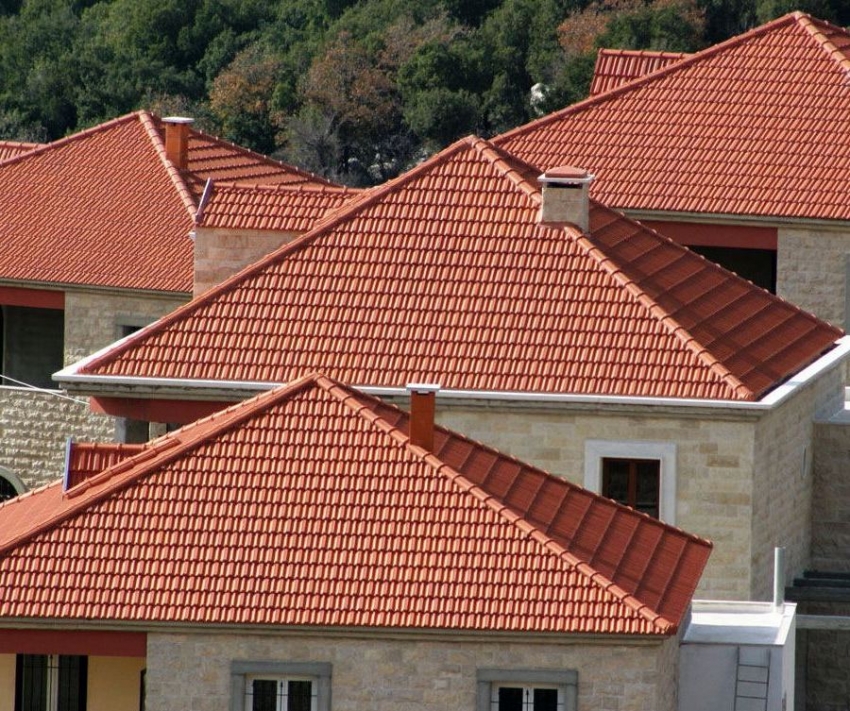
The classic version of the hipped roof is a simple design, but still requires knowledge of construction and accurate calculations
Installation of roofing cake
The roofing cake of a hipped roof consists of several layers, laid in a specific sequence. It is installed on the rafter frame, and consists of the following layers:
- a vapor barrier layer in the form of a protective film that prevents moisture from the room from entering the roofing system;
- a heat-insulating layer in the form of a heater placed in the space between the rafters;
- a waterproofing layer in the form of a special material that prevents moisture from entering the room;
- lathing in the form of boards, to which the roofing is mounted.
Important!The quality and durability of the entire roof directly depends on the laying of the layers of the roofing cake in a strict sequence.
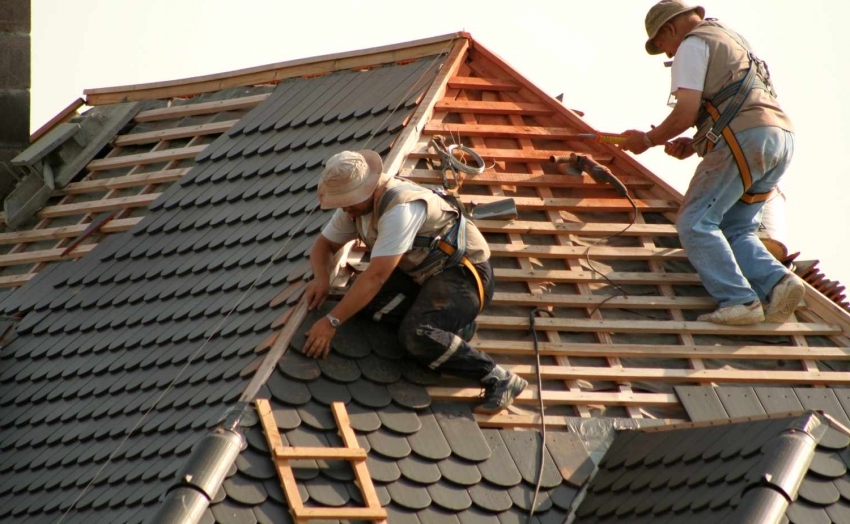
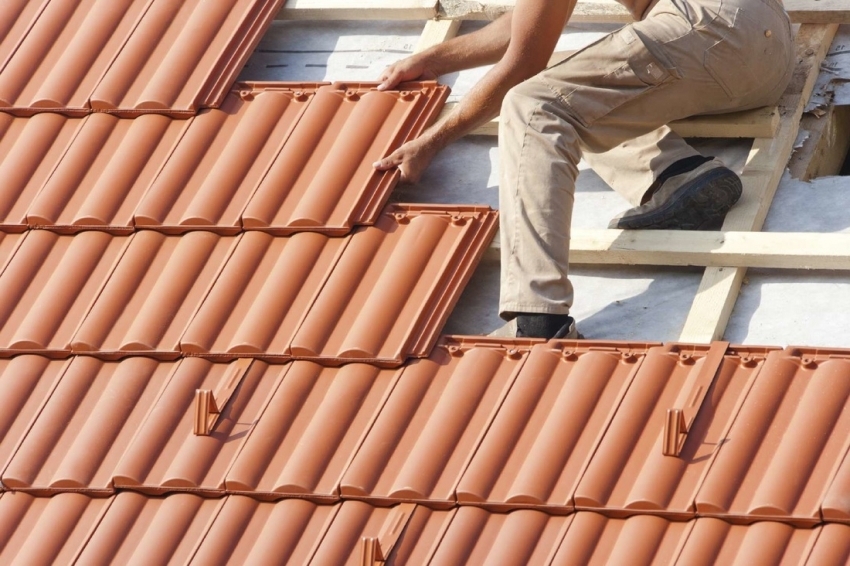
Flexible shingles in the form of a coating allows you to use the roofing material as economically as possible, without significant waste
The lathing in the form of wooden beams with a cross section of 50 × 50 mm is transversely fastened with nails to the rafter legs in a continuous layer or with a certain pitch, depending on the roofing. Next, a vapor barrier overlap is attached to the crate with a stapler. Installation of insulation is carried out in the inter-rafter space. Next, a waterproofing layer is attached, the installation technology of which is similar to a vapor barrier layer.
Important! Particular attention during installation deserves the ridge part, where the greatest probability of accumulation of condensate vapors.
Do-it-yourself hipped roof for a gazebo
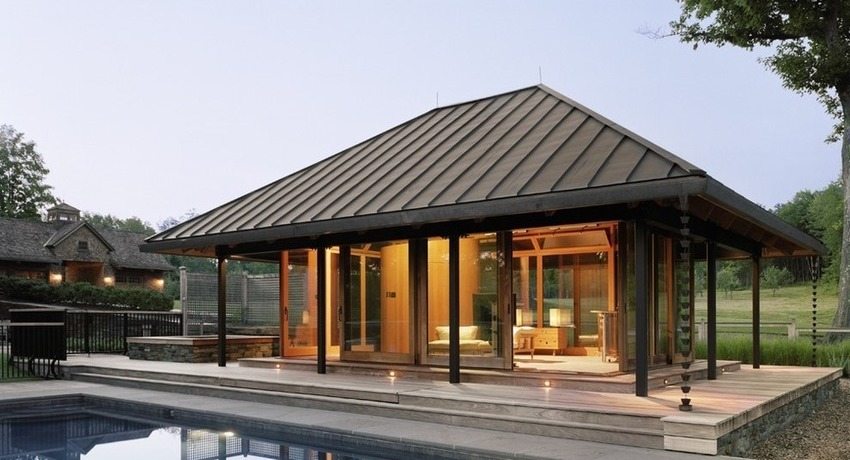
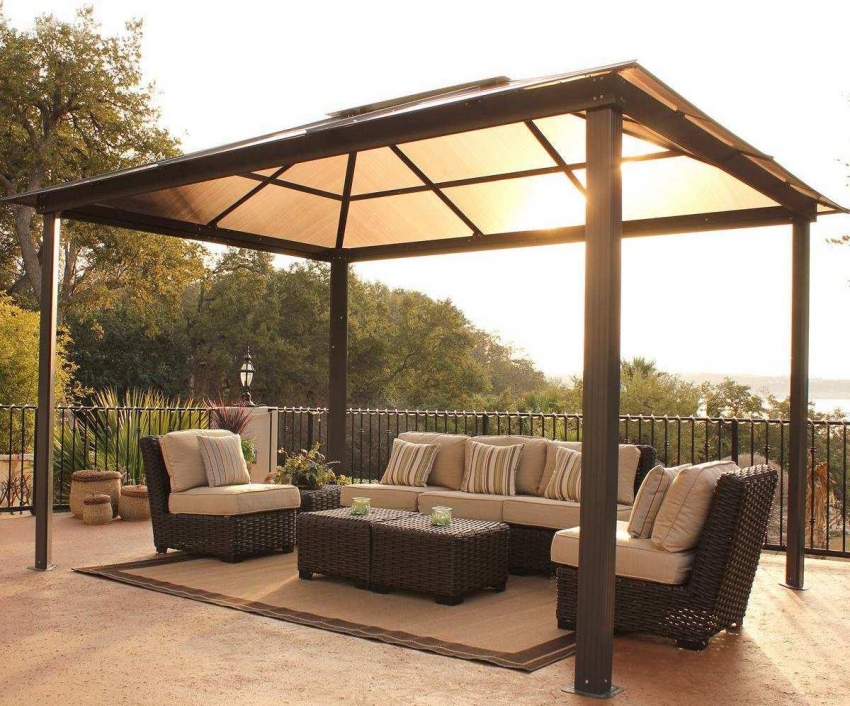
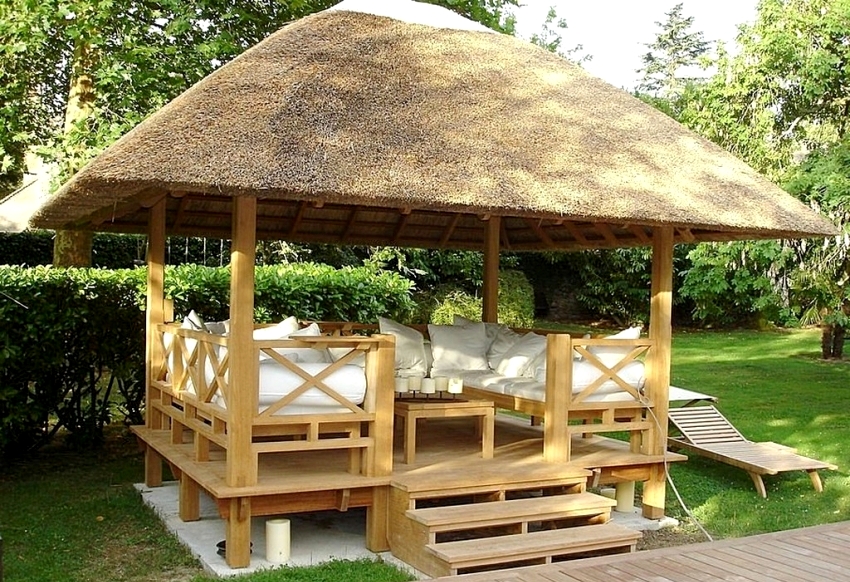
The construction of a cozy gazebo on a personal plot is an ideal option for creating a comfortable recreation area. Depending on the geometric shape of the structure, you can choose the most suitable type of hipped roof.
For a square gazebo, it is advisable to build a hipped roof with four triangular slopes of equal size, connected at one point. For rectangular structures, hip-type hipped roofs are ideal.
Despite the fact that this design is more expensive and more complicated than the gable, it is this design that is the most suitable option for a gazebo. A hipped roof is the most appropriate solution for this task for a number of reasons:
- due to the large number of inclined slopes, effective protection from atmospheric precipitation is provided;
- large overhangs are able to retain heat for a long time, which accumulates during a sunny day;
- inclined slopes protect well from the penetration of intrusive sunlight, without blocking the horizon;
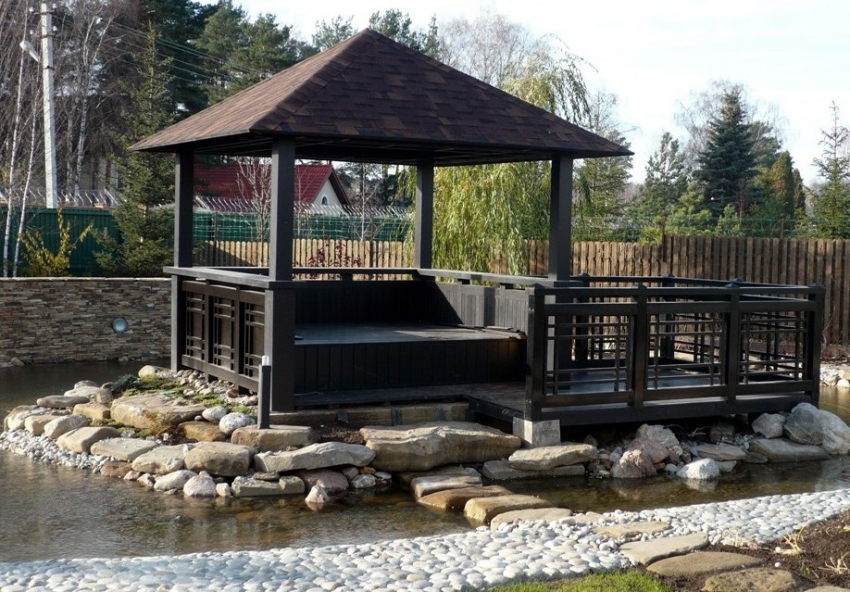
The hipped roof for the gazebo is convenient because the slopes protect well from the sun's rays, while maintaining a good view
- reliable and rigid construction guarantees minimum maintenance and maintenance;
- affordable building materials make this option an ideal and inexpensive solution for installing a gazebo;
- due to the fact that the gazebo is a small structure, all installation work on the construction of a hipped roof can be done independently.
How to make a hipped roof for a gazebo?
Before proceeding with the construction of the rafter system for the gazebo, it is necessary to calculate the angle of inclination of the slopes, the height of the ridge and the load for the correct choice of the rafter section. Having received the result, it is necessary to draw up a drawing of the rafter system, which displays all the dimensions and the relative position of the elements of the rafter frame.
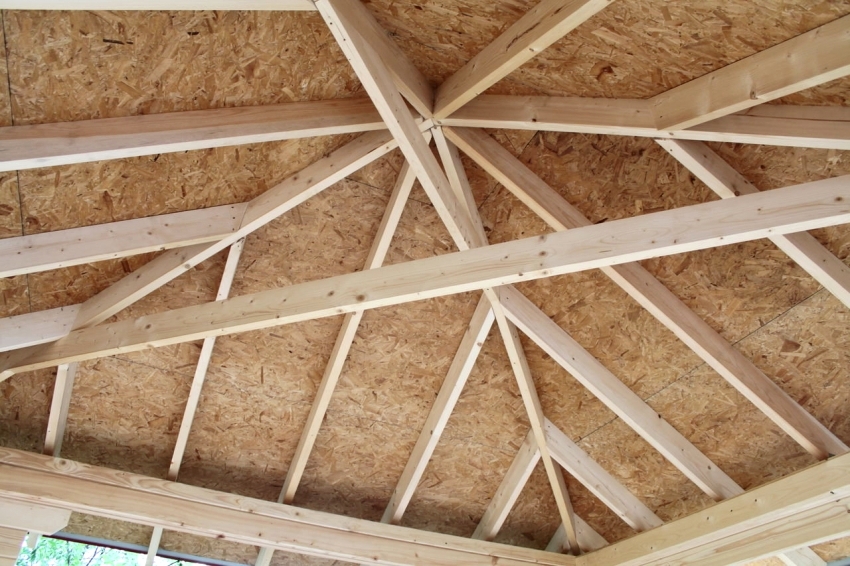
The size and section of the rafters depends on the size of the roof itself, as well as on the angle of inclination of the slopes
Based on the drawing, the necessary elements are prepared and their subsequent assembly. The device of a hipped roof for a gazebo consists of the following sequential actions:
- Reinforcement with a board of the upper harness of the arbor frame.
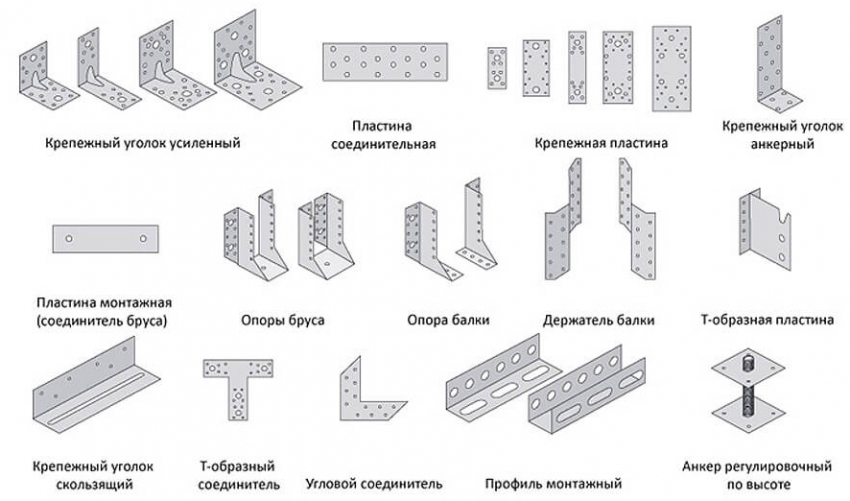
- Fastening to the strapping of the tightening beam using metal corners.
- Having retreated from the middle of the tightening the same distance (about 50 cm), it is necessary to install two wooden stands with a height of 100 cm each.
- The connection of the tops of the posts with a ridge run.
- Installation of ordinary rafters with the selected pitch.
- Securing the diagonal rafters with nails to the ridge so that they continue the ridge run.
- Installation of external rafters, which are attached with one side to the diagonal legs, and the other attached to the upper strapping of the structure. The step between the rafters is about 60 cm.
- Laying the waterproofing coating on the rafters with an overlap of one side to the other about 10 cm and fixing it with a stapler. Fastening of waterproofing along the rafters is carried out using counter battens.
- Installation of the lathing.
- Installation of roofing material with the treatment of all joints with a sealant.
Having familiarized yourself with the design features, you can safely proceed with the construction of the selected type of hipped roof. However, it should be remembered that in order to obtain a reliable, strong and durable structure, one should not neglect the preliminary calculations of the structural elements and strictly observe the algorithm for performing the work.
