Keeping a tool in good condition is a matter of honor for any professional and home craftsman. For cutting applications, perfect edge functionality is paramount. The drill sharpening device allows it to be kept in proper condition. It can be purchased ready-made or made yourself. How to do this and what you need to know for this - in the materials of this article.
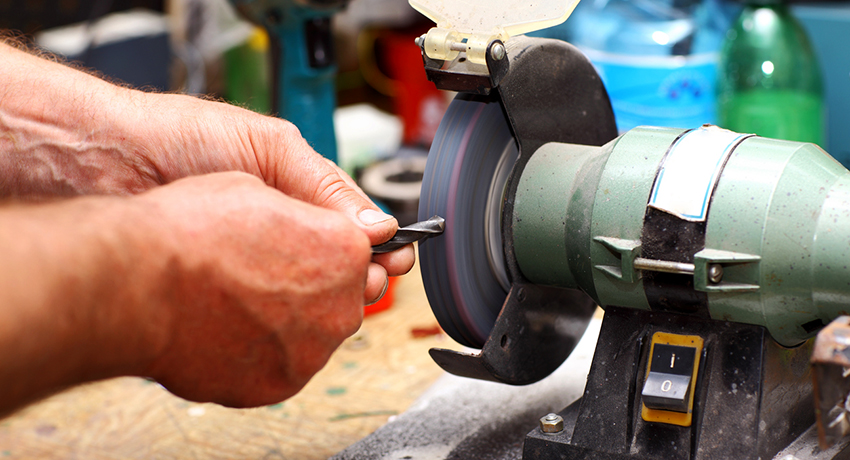
Drill sharpeners needed to maintain the tool in good condition
Content [Hide]
- 1 The main types of factory grinding machines for drills
- 2 Tips for making DIY drill sharpeners
- 3 The specifics of sharpening drills with different shapes of the cutting part
- 4 Drill sharpening stand: design features
- 5 Homemade tool for sharpening drills from a nut
- 6 Drill attachment for sharpening drills: basic elements
- 7 Grinder attachment: pros and cons of different options
- 8 Simple tool for sharpening door hinge drills
- 9 Homemade device for sharpening spiral drills
- 10 Drill sharpener: safe use
The main types of factory grinding machines for drills
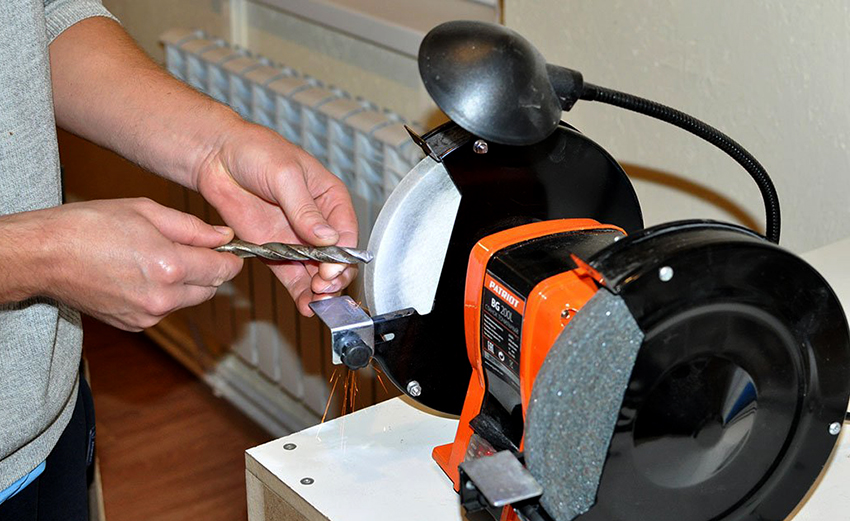
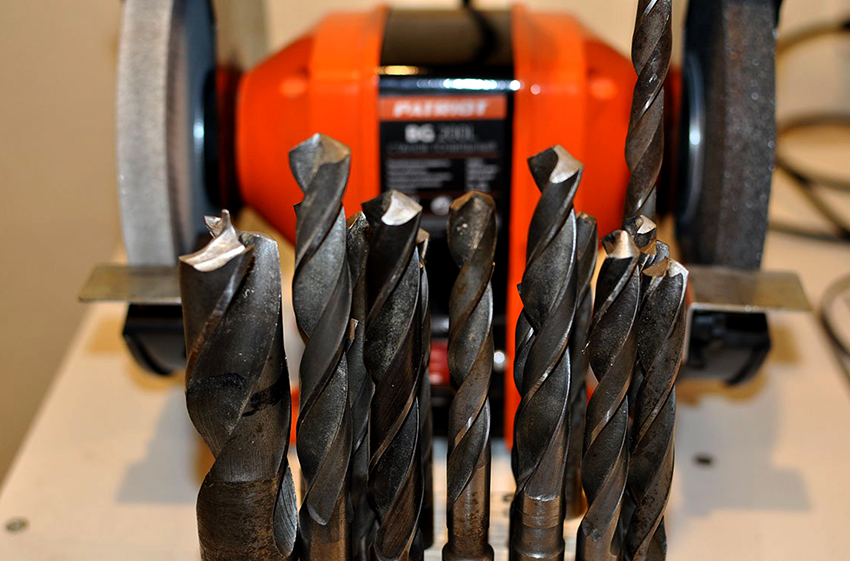
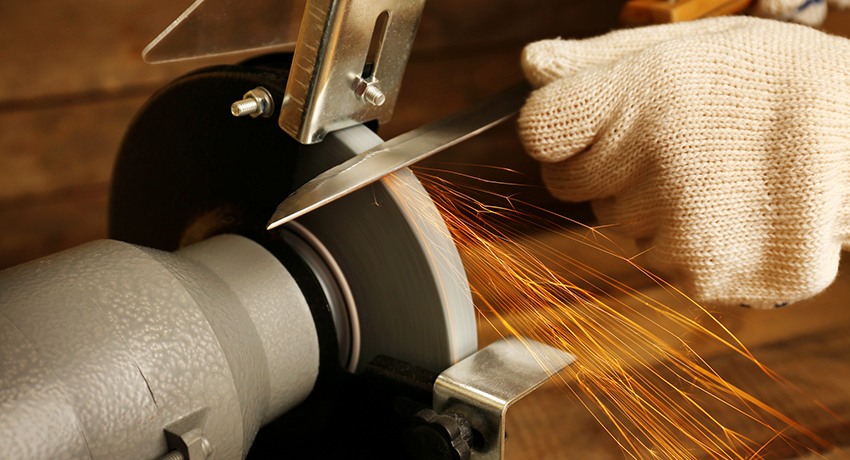
Any tool used in the work requires technical support. This is the replacement of exhausted parts, consumables, preventive actions, restoration of the functional usefulness of elements. The nozzles used for drilling and cutting need sharpening, that is, their cutting part must be renewed.
Drill sharpeners can be divided into two types:
- with the ability to adjust parameters (angle, diameter);
- with established and fixed dimensional indicators.
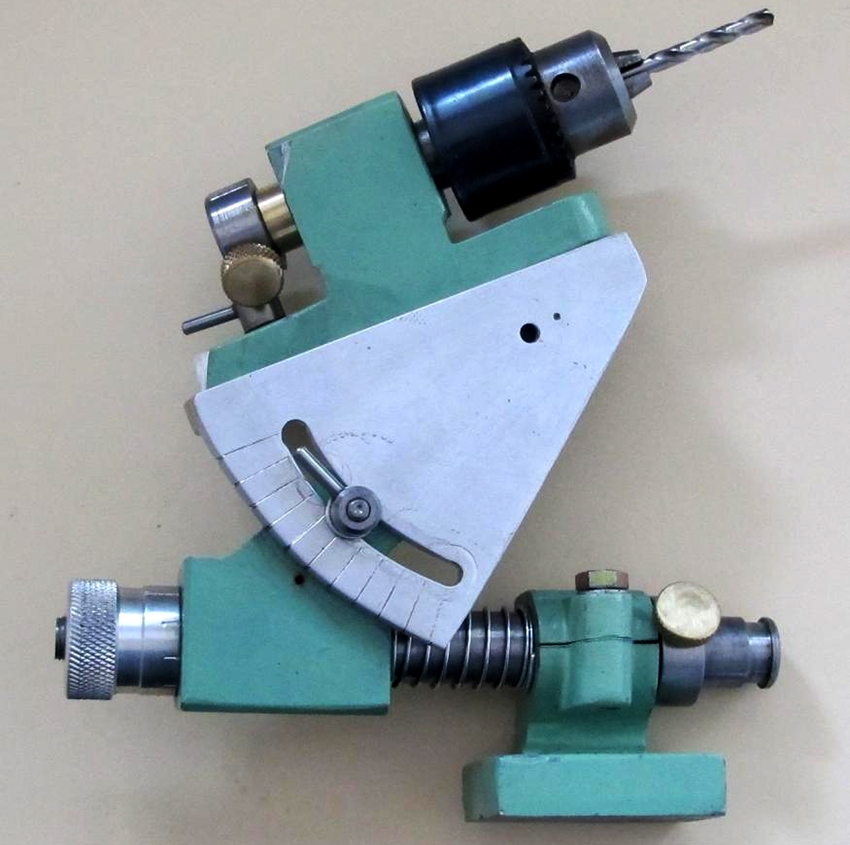
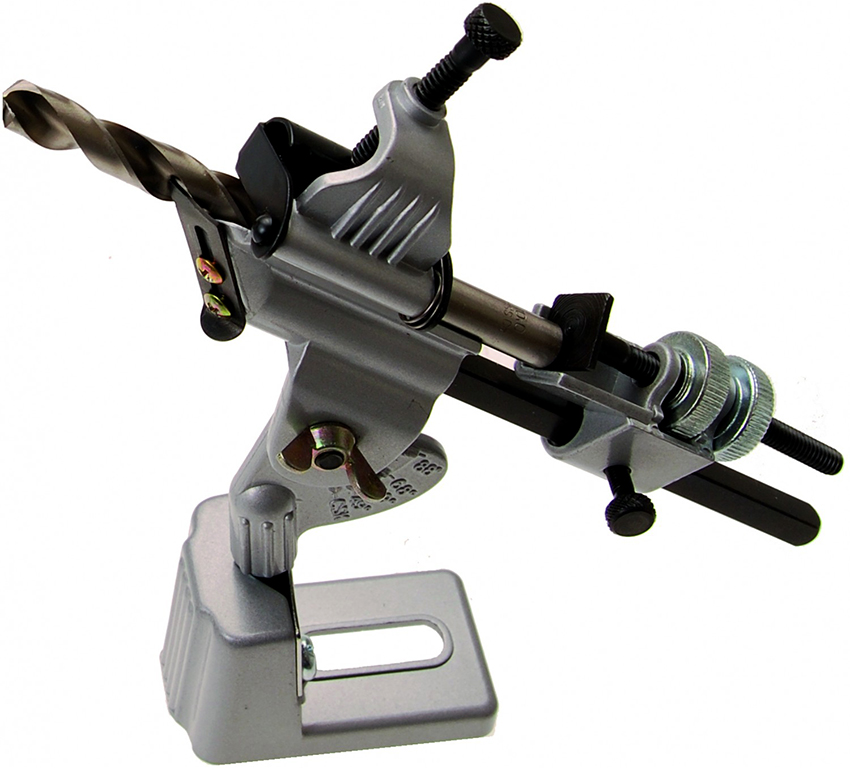
The first ones are characterized by the strength of the material for making the body, which is made of metal, by a stationary installation (the machine is fixed to the surface of the workbench with bolts) and wide functionality: it is possible to restore the cutting edges of drills of various diameters on it. Machines of the second type often have a plastic body, a small grinding wheel and a jig with holes corresponding to a certain size of drills.
The industry produces a huge variety of grinding machines. It should be noted that the specifics of the designs of these devices are quite understandable for skilled people. That is why many people prefer to use homemade tools for sharpening drills. This approach has several advantages:
- cost savings;
- the use of unclaimed elements;
- the possibility of realizing personal abilities and gaining additional experience;
- creation of a device for specific purposes and tasks.
It is about the manufacture of tools for sharpening with your own hands and their use that will be discussed in this article.
Tips for making DIY drill sharpeners
It is worth noting that drills used for working on wood, plastic, drywall and other materials with a relatively low density (with the exception of hard tree species: oak, hornbeam, white acacia, etc.) rarely need sharpening. A similar tool for metal behaves quite differently. Here, cutting edge restoration may often be required, depending on the intensity of work and the characteristics of the material being processed.
Oddly enough, but more often it is professionals who prefer to use their own devices. Sharpening a drill for metal with your own hands requires certain professional skills:
- developed eye;
- knowledge of the features of electrical devices;
- understanding the specifics of metalworking of specific products.
Manual processing is ineffective, even with a high level of professionalism, for the very reason that it takes a long time. An improvised device must be mechanized. For its manufacture, it is necessary to make certain calculations, select an electric motor and additionally manufacture other structural elements that meet technical requirements.
In order to end up with a device with the desired functionality, you should first complete the drawing. There are quite a few tools for sharpening drills today. If there are difficulties in terms of design, you can turn to the Internet, where many schemes of homemade grinding installations are proposed.
Useful advice! The drawing of the future grinding device should contain the dimensions of all structural elements, including fasteners.
The specifics of sharpening drills with different shapes of the cutting part
The first sign that the drill needs sharpening is the characteristic squeak at the beginning of its work. This indicator cannot be neglected, because it can have further negative consequences:
- the edge of the drill will begin to crumble;
- the motor will be overloaded;
- burrs will appear on the treated surface.
The question of how to sharpen the drill correctly will be considered using the example of a spiral version. The sharpening method depends on the shape that you want to give the cutting part. The type of sharpening can be as follows:
- single-plane;
- two-plane;
- cylindrical;
- conical.
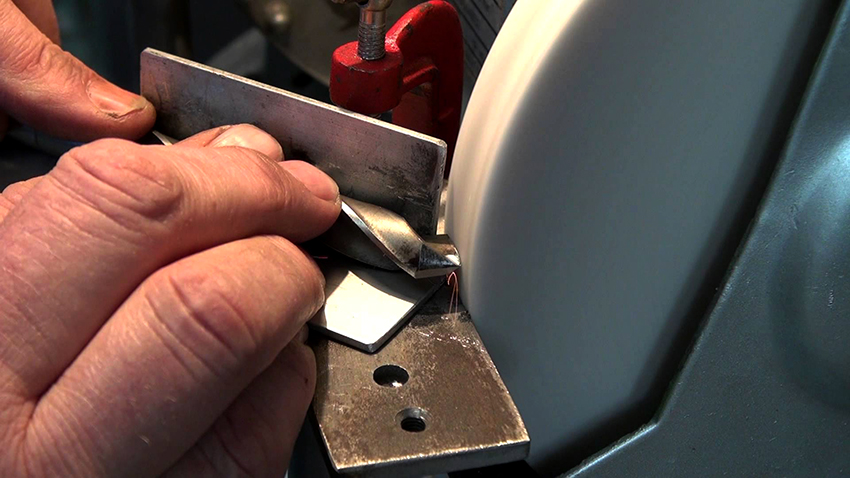
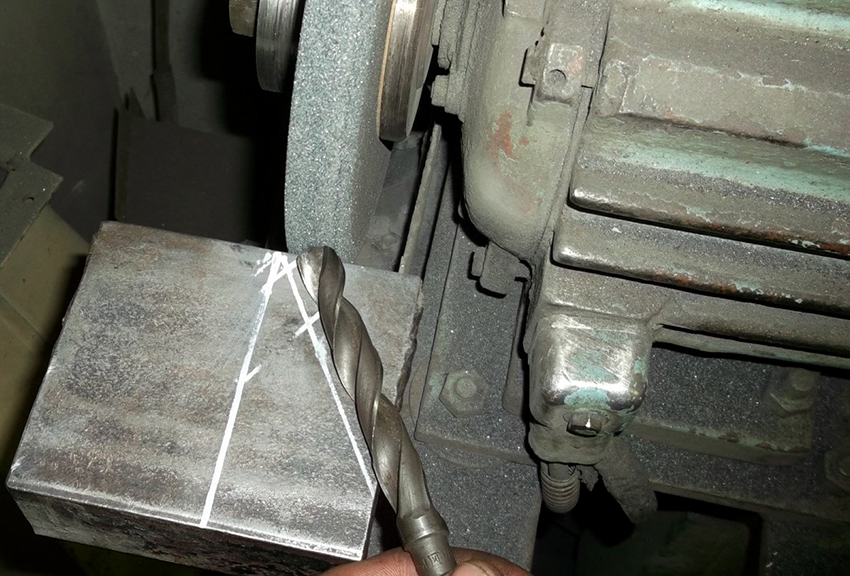
In the course of single-plane sharpening, the drill is simply placed parallel to the abrasive wheel, it does not move. In this simple way, drill bits up to 3 mm can be sharpened. Two-plane sharpening is done in a similar way.
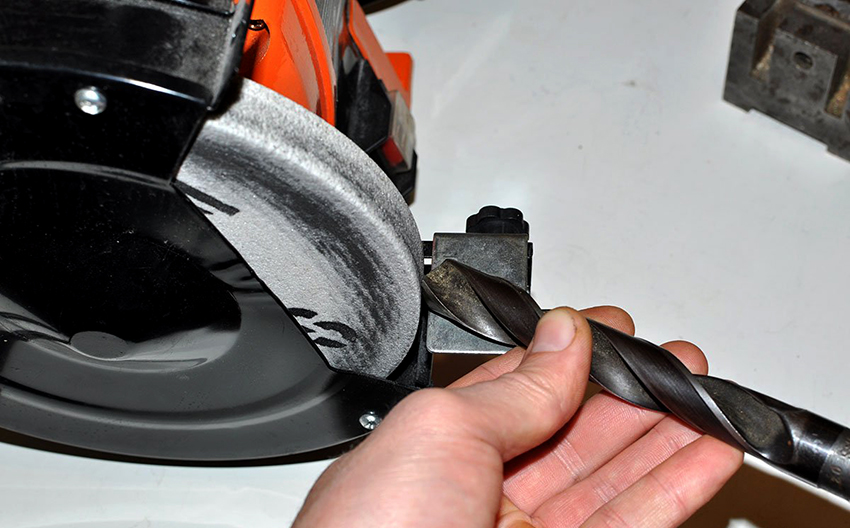
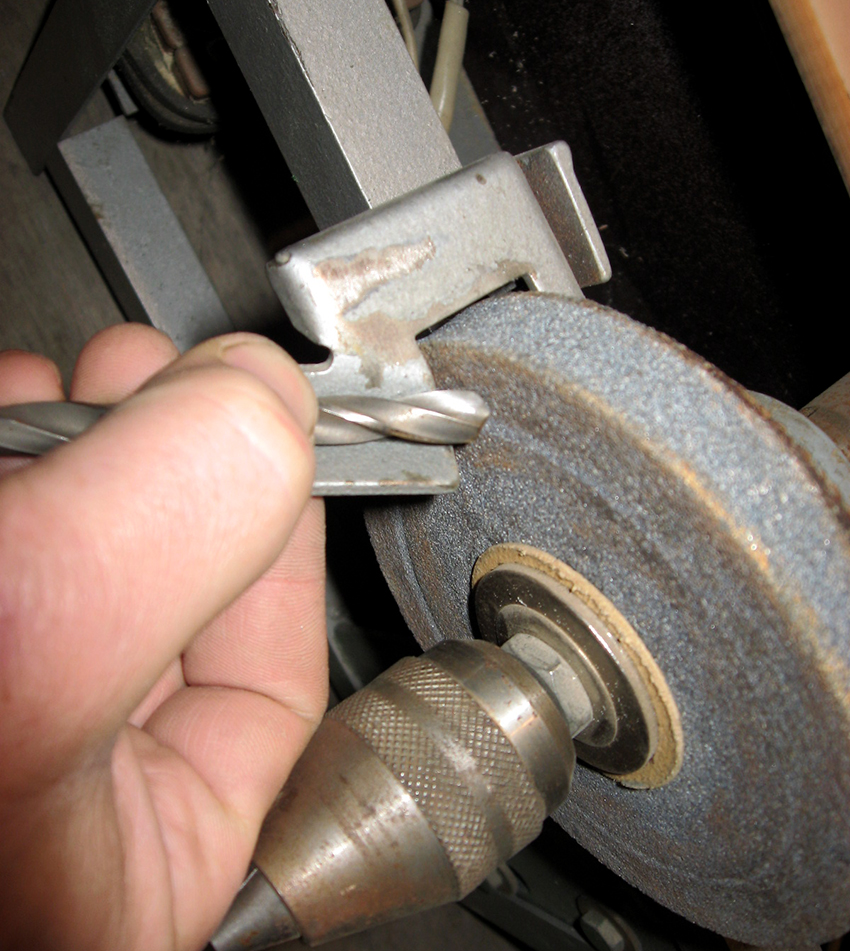
Conical sharpening is somewhat more difficult. The drill should be taken with both hands: with the left - closer to the tapered working part, with the right - by the shank. It is necessary to press the tool against the end part of the grinding wheel with the cutting edge and the back plane. Swing the drill with your right hand. Cylindrical sharpening is performed in a similar way.
Useful advice! If this is the first time the operation is being carried out, before sharpening the drills suitable for the application, it is better to do a test treatment on the used tool.
How to sharpen the drill correctly: possible errors and their prevention
Despite the large amount of information on how to sharpen drills for metal, even with sufficient theoretical and sometimes practical knowledge, many make a number of mistakes. It is not difficult to predict the consequences: when turning, the cutting edge crumbles, the tool overheats, the cut has dimensional errors, roughness and irregularities on the processed surfaces are possible.
Typical errors in sharpening drills include the following deviations from the norm:
- Different lengths of cutting edges. The drilling center is offset from the tool axis. A drill sharpened in this way will experience a runout, it will become extremely difficult to get exactly in the center. Most often, such drills break during operation.
- Asymmetry of angles with a precisely aligned center. After such processing, the tool will have only one working edge. The drill will heat up, and the hole made by it will acquire a diameter larger than that of the tool.
The errors listed above are most of all the result of an incorrectly designed grinding device. And here again it is worth returning to the drawings. A do-it-yourself drill sharpener should have a functional sharpening angle holder. Its use will ensure correct processing of cutting surfaces.
Indicators of the magnitude of the angles of sharpening drills for metal
Regardless of the device on which sharpening is performed, the process must be controlled. In this regard, the most advanced machines with electronic control. The possibility of adjustment on electromechanical devices also allows high-quality processing.
A very important indicator is the size of the sharpening angle. It is not the same for different materials, since the latter differ in the level of density and specific structure.
Table containing information on correct sharpening angles of drills:
| Processed material | Sharpening angle |
| Steel, cast iron, carbide bronze | 115-120° |
| Soft bronze, brass alloys | 125-135° |
| Red copper | 125° |
| Aluminum and soft alloys based on it | 135° |
| Granite, ceramics | 135° |
| Wood of any species | 135° |
| Magnesium and its alloys | 85° |
| Silumin | 90-100° |
| Plastic, textolite | 90-100° |
It is convenient to control the correct sharpening of drills using templates.
Useful advice! When buying or making do-it-yourself devices for sharpening drills, you should immediately take care of the availability of sample templates. Treatment of cutting surfaces with a reference to visual memory will most likely not bring the desired results.
Drill sharpening stand: design features
Racks, like other devices for sharpening drilling tools, can be of an industrial or household type. Industrial ones are distinguished by their large size, extended functionality, which allows processing drills in various ways. Households are much more compact, but have fewer options.
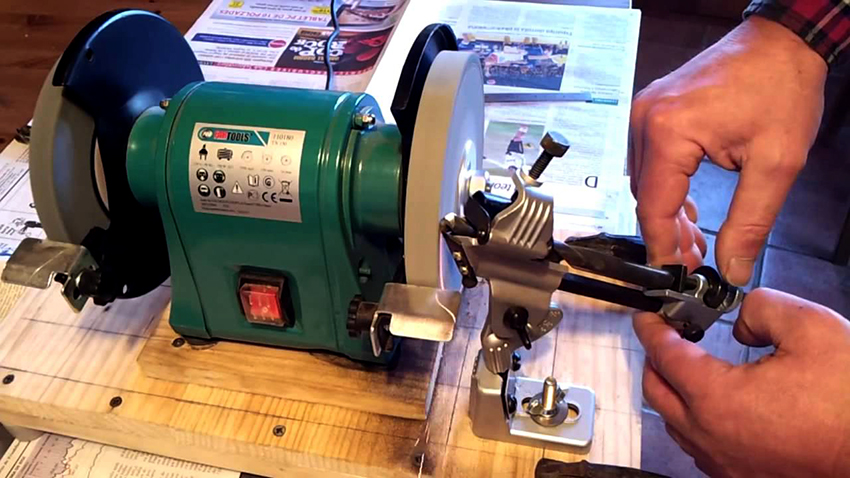
Usually the racks come complete with grinding machines. They are attached to the bed with bolts and nuts. The drill to be sharpened is fixed in the clamping device of the rack.
The main structural elements are:
- base;
- a rod, directly to which the drill is attached by means of mobile and stationary clamping devices;
- emphasis;
- carriage and feed adjustment screw;
- clamping screws and nuts.
By analogy with the factory version of the racks, craftsmen are trying to make a similar device for sharpening drills with their own hands. In such cases, special attention should be paid to two structural units and their functioning:
- the position of the drills is set using the axis and the adjustment screw;
- the required angle is created by the corresponding inclined position of the base.
The most difficult point in self-assembly of the device is to ensure processing accuracy. In the racks manufactured at the factory, these functions are performed by a special scale, which is part of the structure. In homemade designs, the most reliable will be the use of templates.
Homemade tool for sharpening drills from a nut
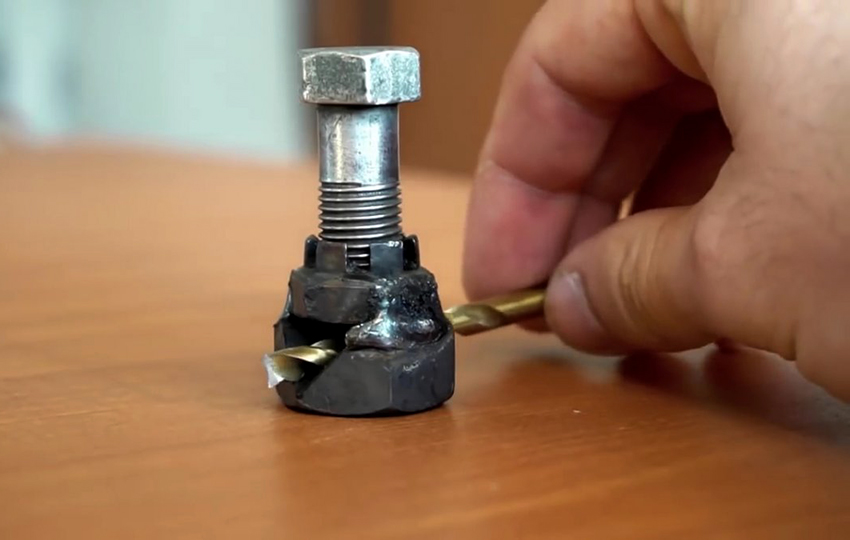
One of the simplest and most affordable tools for sharpening drills is a nut device. The manufacturing algorithm can be as follows:
- You need to take two nuts of different sizes. On the larger one, measure 9 mm on three sides of one face, draw with a marker. Do the same on the opposite side. Then clamp the nut in a vice and cut out the traced fragments.
- Next, lay the drill and make sure that the sharpening angle of the tool, which is 120 °, and the edges of the nut coincide.
- Using welding, weld the smaller nut onto the larger one by attaching it to the notched surface.
- A bolt must be screwed into the smaller nut, which will fix the drill. You will get a do-it-yourself sharpening angle holder.
Useful advice! When making a device for sharpening drills from nuts, one should not simplify the structure by replacing the clamp with a bolt simply by fixing it by hand. This will greatly complicate the processing process.
The inserted and clamped drill bit is brought up to the emery and ground. The nuts keep the correct angle and do not allow more than necessary to grind off.
There are many skeptical views on the functioning of this device. First of all, there are concerns that the metal of the nut, from touching the abrasive wheel, will also undergo grinding, and quite intensively, since it is soft. As a result, the device will not last long.
Related article:
Knife sharpeners: an easy and quick way to sharpen the blade
The main types and characteristics of devices. What materials are used to make sharpeners. How to sharpen different knives correctly.
Drill attachment for sharpening drills: basic elements
Almost all drill bits for turning drills on the market have the same design. This is a plastic case, where a sharpening element of a certain shape is placed, which allows processing the cutting surface of the tool at the desired angle. The device rotates with a drill. The connection to the shaft is carried out by a special coupling.
The housing cover has holes into which drills of corresponding diameters are inserted. The holes are made so that the cutting edge comes into contact with the emery wheel only in the required places. The absence of such a jig cap significantly complicates the sharpening process, since the drill has to be held manually.
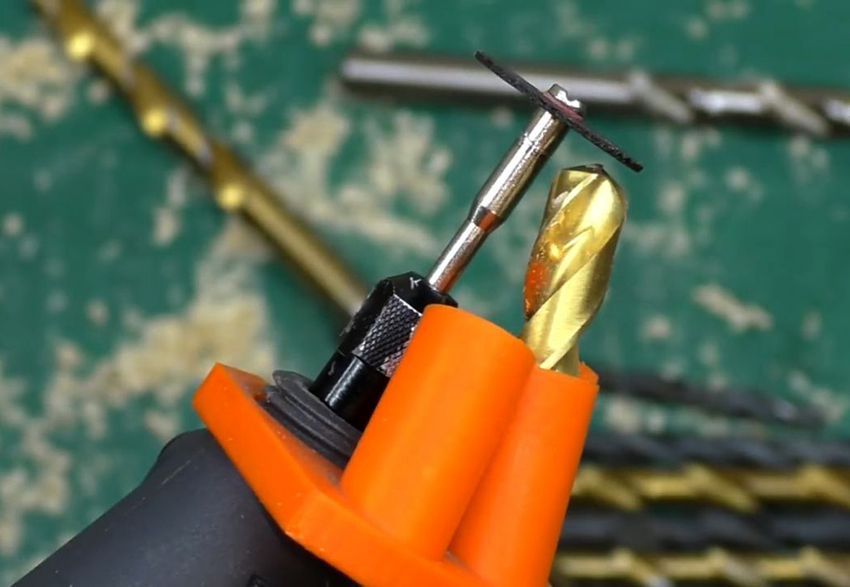
A device for a drill for sharpening is a plastic nozzle in which a sharpening element and a drill are placed
There are a lot of demonstration videos "Drill sharpening devices" on the Internet. Before using the purchased attachment, you should refer to the video with instructions, this will help to avoid mistakes.
By analogy with factory ones, home-made devices are most often made:
- the body is made of metal;
- the drill chuck and the emery wheel are connected with a mounting ring;
- the emery element is given the shape of a cone, which is usually created on a lathe;
- the cover with holes of different diameters can be made of wood, metal, polymer with additives.
The most difficult step when making a do-it-yourself drill bit is to create a cover.
Grinder attachment: pros and cons of different options
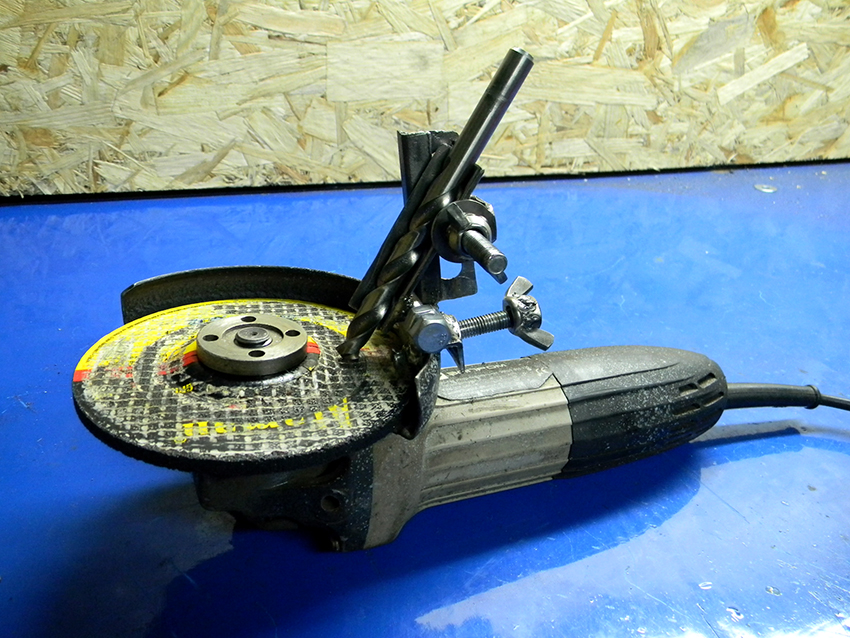
As a power tool that is successfully adapted for sharpening drills, the grinder is. There are a lot of applications. There are two main ways:
- the drill holder is a separate structure;
- guides and fasteners are fixed directly to the grinder.
As for the first option, a large number of such devices for sharpening drills with your own hands should be noted. Videos on the Internet, containing instructions, demonstrate the manufacturing process in detail and in an accessible way.
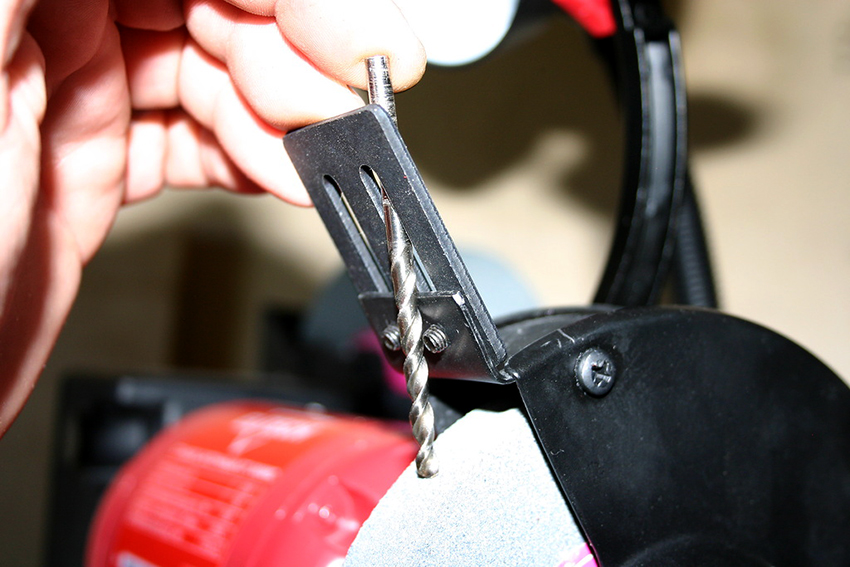
The second method is less common. That is why it is worth telling a little more about it. The device is fixed to the cover of the power tool. The guide is made of a metal corner, the position of the trailing edge is fixed manually. The device as a whole is compact, consisting of quite affordable components.
Like many home-made devices, this device has also been severely criticized. A laborious manufacturing method is noted. There are concerns that, without speed control, the drill will overheat during machining. The most acute remarks relate to the destructive effect of sharpening on the side parts of the circle. Damage to the reinforcement layer can result in the disc scattering into separate pieces.
Important!Turning a working grinder towards the user is strictly prohibited by safety regulations.
Simple tool for sharpening door hinge drills
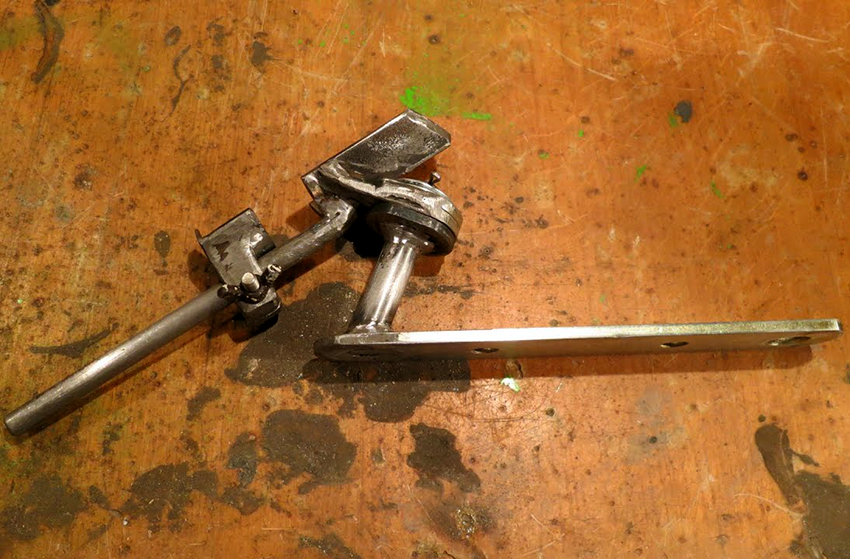
A video demonstrating the manufacture of a do-it-yourself device for sharpening drills from a door hinge has gained particular popularity. Although the process itself and the result are considered by many to be technically imperfect, the idea deserves attention:
- The door hinge is shortened, one part is used for fixing to the handcuffs, the second (cut off element) makes it possible to set the required sharpening angle.
- A corner is welded to the larger side of the loop, a thread is cut into it, a bolt is inserted - this part of the structure will fix it to the handcuffs.
- Next, a corner is exposed and welded, which will become a guide.
The design is complemented by a stud, which is secured by welding, a nut and a washer. The nut and washer will allow you to firmly position the turning drill.
The main complaints about this rather simple tool for sharpening drills with your own hands are as follows:
- The drill is fed from top to bottom. This makes the back surface completely flat. Such a tool will overheat during operation.
- The device serves solely for orienting the drill. The quality of the sharpening is questionable.
This manufacturing method may well be improved, given the technical comments. A device made from scrap materials can acquire better functionality.
Homemade device for sharpening spiral drills
A sleeve can be used as a simple tool for sharpening spiral drills. Its internal dimensions must correspond to the diameter of the tool.
Important! The drill, installed in the sleeve, should not wobble, even slightly. A deviation from the required angle by 1 ° will already lead to poor-quality sharpening.
It is better to immediately prepare various copper or aluminum tubes, the diameters of which will correspond to the dimensions of the drills available in the home workshop. Guides for turning the tool can be made and much easier - from a wooden block. Such a device was used in the last century. With some refinement, it can still be applied today. The holes in the wood should be made at a certain angle, allowing the drill installed in them to take the necessary position for correct sharpening.
A self-made device for sharpening drills with your own hands must have a handyman:
- it ensures the correct position of the drill in relation to the grinding wheel;
- serves as a stop for the processed tool.
When mounting a sharpening device, you should pay sufficient attention to the selection of the grinding wheel. Most drills are made from high speed steel. As an abrasive, silicon carbide wheels (marked with 64C) with a grain size of 8H-16H are most suitable. Such sharpening stones can become very hot, so the contact between the sharpener and the drill should not be long.
Drill sharpener: safe use
Working with any power tool requires strict adherence to certain rules of safe use. When making homemade tools for sharpening drills, many neglect the provision of structures with protective elements. This is completely unacceptable, since the degree of injury during the use of these devices can be significant.
The main safety requirements include:
- Work in clothes with buttoned sleeves, in comfortable shoes fixed on the legs, in gloves.
- Turning should be carried out in special protective glasses.
- It is allowed to use grinders only with metal protective covers.
- Use for cooling water requires that the engine be protected from liquid spillage.
- Before switching on the device, it is necessary to check the strength of the existing connections. Poorly fixed parts can fly in different directions.
- Sharpening drills with your own hands should be done on machines with grounding, which will exclude the possibility of electric shock. A small device can be grounded using the power plug or with a separate wire.
- The grinder should be positioned at a comfortable level for the user. The need to reach or bend down will contribute to physical overload, which can affect the correctness and accuracy of movements.
- The area where the grinder is installed must be well lit. Lack of light can negatively affect the process of monitoring the operation of the device.
There are quite a few ideas on the Internet for making do-it-yourself tools for sharpening drills. Do not always make exact copies of devices. It is necessary to understand the basic principle of the mechanism and take into account possible problems and consequences of technical inaccuracies. Any device can be improved. Having in front of you ready-made developments, this is much easier to do.
