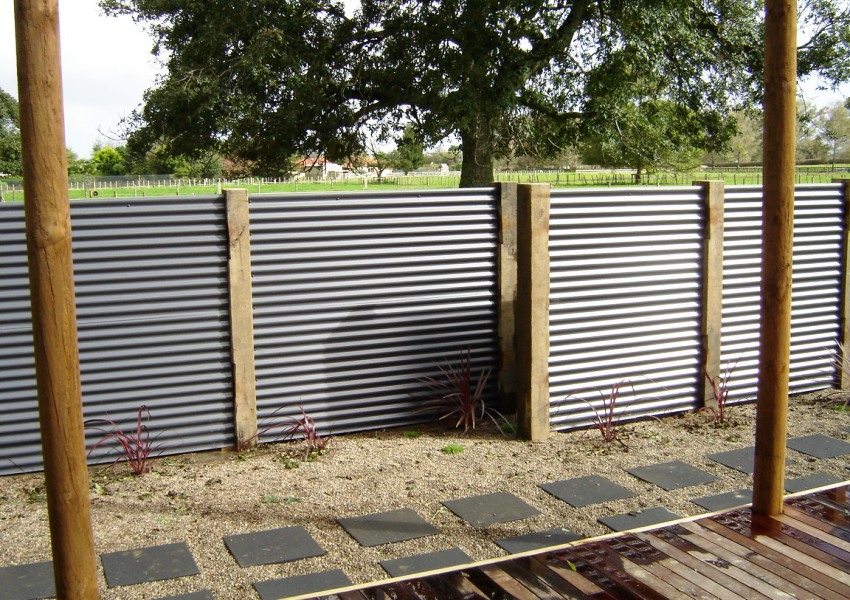
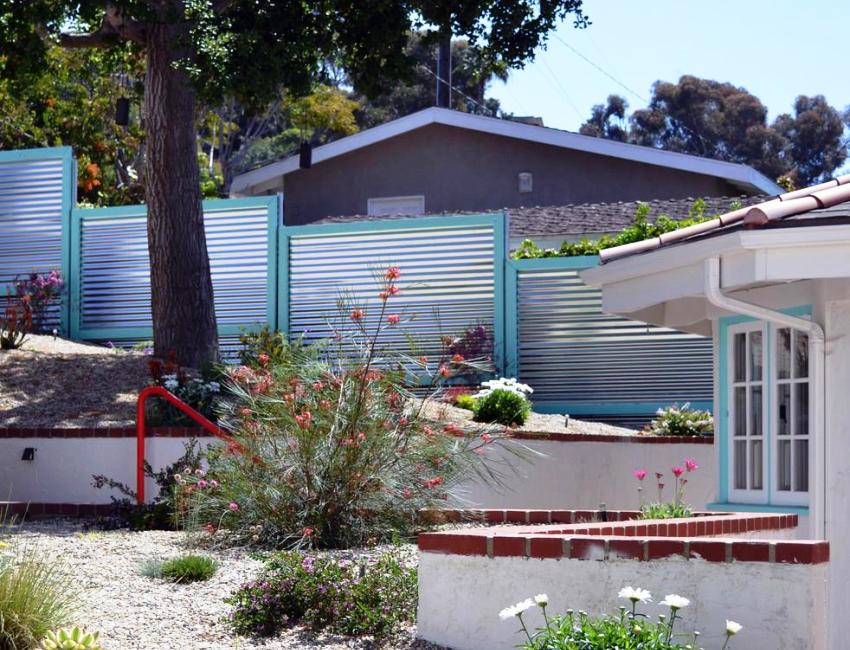
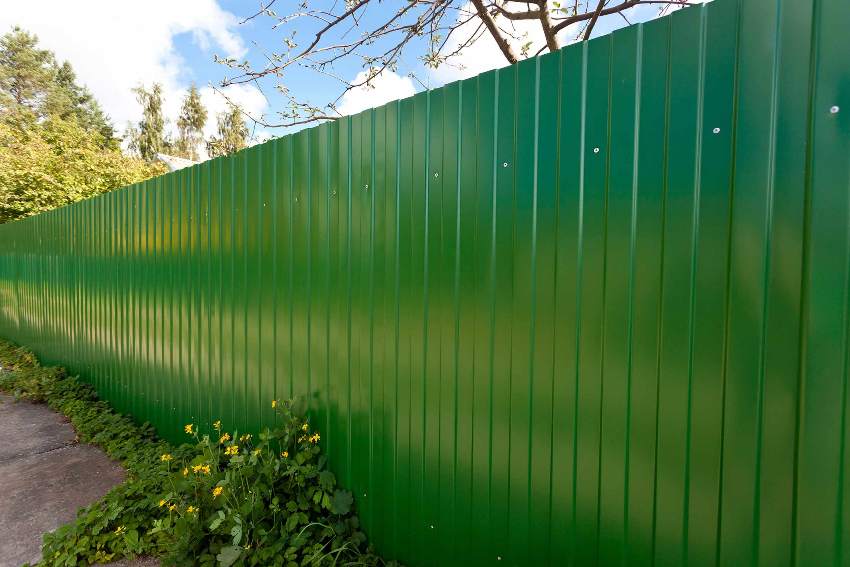
The familiar fences made of wooden picket fences are gradually disappearing into the past. Increasingly, residents of summer cottages and city houses use metal profile structures to fence their plots. And this is quite reasonable. Decking is a durable material, resistant to deformation and in the form of a fence has a very aesthetic appearance. Moreover, a do-it-yourself fence made of corrugated board with columns can be mounted by every more or less skilled owner.
Content [Hide]
Decking: universal qualities
Due to their high anti-corrosion performance, versatility in application, easy and quick installation, profiled sheets are becoming increasingly popular.
The service life of corrugated board with a polymer coating is up to 50 years. Structures made of metal profiles look aesthetically pleasing, stylish and modern. Corrugated sheets are widely used in construction: hangars, supermarkets, warehouses, roofs, fences, canopies, awnings and more.
Related article:
Do-it-yourself gate. Drawings, photos. Video materials of the installation process. Advantages and disadvantages of swing and sliding gates, features of their installation. Schemes with dimensions and photos.
Due to the fact that the corrugated board is made from rolled raw materials, the dimensions of the sheets can be ordered individually. Profile width - from 0.98 m to 1.85 m, depending on the manufacturer. The thickness of the profiled sheet affects its resistance to damage and durability. The most commonly used thickness is 0.5 mm or 0.7 mm. For wall cladding and do-it-yourself fence devices, sheets with a wave height of 8-20 mm are used.
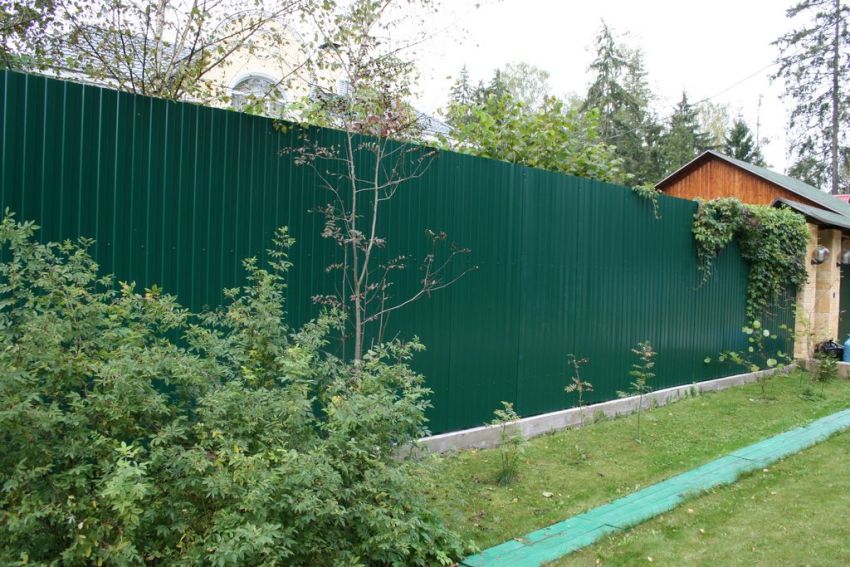
Decking is widely used for construction fences for private houses and summer cottages
Another advantage of corrugated board is the variety of colors (about 30). You can choose a color on the scale of the RAL color standard, focusing on your taste. In the places where the metal profile is sold, you can always purchase a spray paint of the appropriate color for treating places of accidental damage or scratches.
When choosing a corrugated board for self-installation, you need to focus on the manufacturer so as not to doubt the quality of the material.
Fence tools and materials
For the device of a fence made of corrugated board with your own hands with columns, you will need materials:
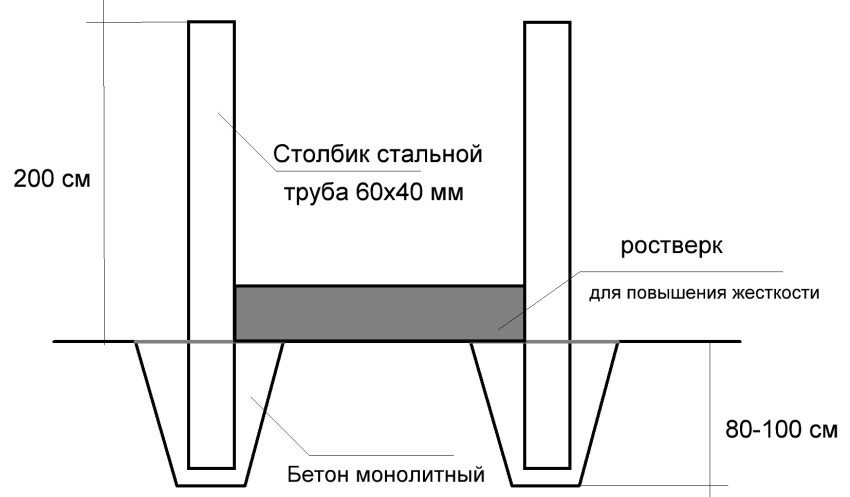
- metal pipes with a square or rectangular profile, measuring 4x6 cm or 6x6 cm, metal thickness at least 2 mm. The pipes will be used for the support pillars;
- square or rectangular metal pipes, cross-sectional dimensions 4x2 cm, metal thickness 2.5 mm. They will serve for the device of transverse logs;
- profiled corrugated sheets, it is desirable that the wave height does not exceed 21 cm, and the thickness is in the range of 0.4 - 0.7 mm;
- special self-tapping screws with gaskets - for fixing the corrugated board to the frame. Provided with a polymer coating that prevents corrosion of fasteners, matched to the color of the sheets.
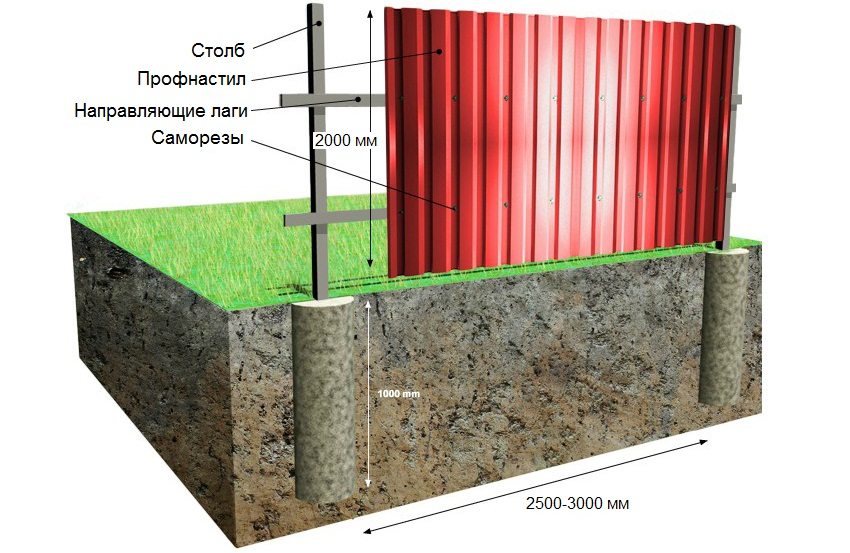
3D construction project fence with concreting of metal posts
Surely everyone in the house has a certain set of tools for doing work with their own hands. But so that work does not stall due to the lack of any fixture, below is a complete list of the necessary tools and equipment:
- welding machine - will be needed to connect the supports with transverse pipes;
- building level - to determine the vertical and horizontal of the mounted elements;
- measuring tape - preferably up to 50m long (for data accuracy);
- scissors for metal - in the case of cutting profiled sheets;
- nylon thread - necessary for marking the perimeter fence;
- grinder - with the help of which pipes are cut and docking places are ground;
- screwdriver - used to screw in self-tapping screws during installation;
- a gas drill for wells or a hand drill - if you plan to use pipes under the fence supports.
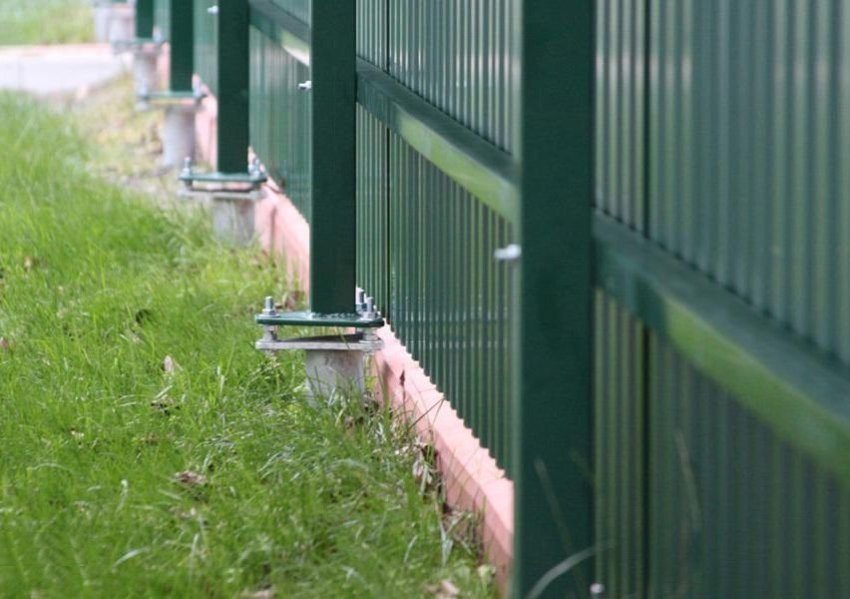
The method of flange fastening of metal profile posts makes it easy to dismantle the old fence and build a new one
DIY fence made of corrugated board with columns: metal supports or brick pillars
How to make a fence from corrugated board correctly and accurately? This is within the power of those who like to equip the territory with their own hands. You can do without the involvement of specialist masters, save money and enjoy the process. A fence made of corrugated board with your own hands, the video of which you could see on the Internet, is a completely doable task.
Preparatory activities
Having decided to install a fence made of corrugated board with your own hands, first of all, space is freed up around the perimeter of the territory. The size of the future fence is determined. In the corners of the proposed fence, stakes are hammered, which are subsequently connected with a nylon cord.
Using a tape measure, an extremely accurate measurement of the sides of the site and the total length is made fence... The locations for the installation of support pillars are outlined, gates and wickets for the passage. To give the structure strength, it is recommended to position the supports so that the distance between them does not exceed 2.5 - 3 m.
Installation of support pipes
Supporting metal pipes are installed in prepared pits. At the locations of the marks for the supports, holes are drilled to the depth of the pillars. The length of the support pipes is determined based on the height fence and taking into account the depth of immersion. For reliability, a third of the total length of the pipe is lowered into the ground. Pits are arranged with a drill around the entire perimeter at the same distance.
Useful advice! In order not to measure the distance between the supports each time with a tape measure, you can use a cord, the length of which will be equal to the distance between them. This will speed up the process and eliminate measurement errors.
The installation of the pillars on one line of the site must be carried out exclusively vertically and make sure that they do not knock out of the same plane. You can check the position of the supports using a level or plumb line. The pipes are installed first at the end points of one row. With the help of a cord stretched at the top between the two end supports, the height of all other pipes is fixed.
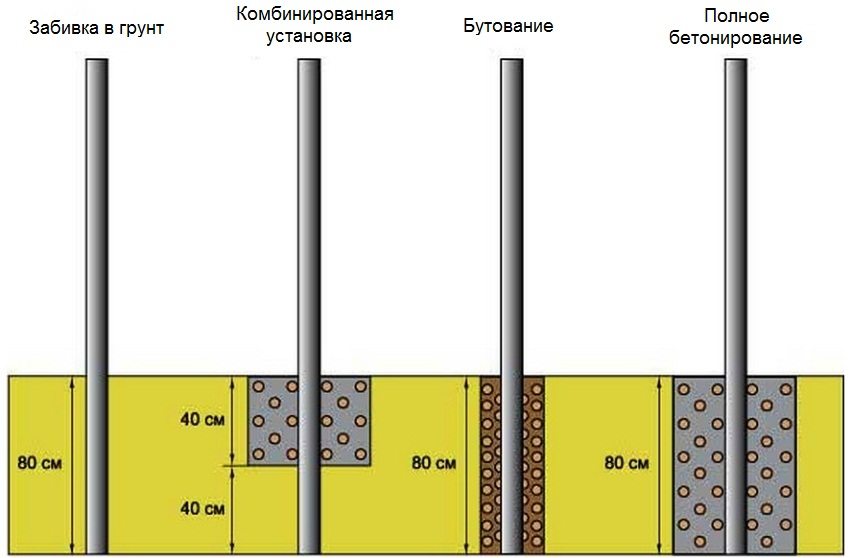
You can adjust the height of the pipes by adding the required amount of soil to the bottom of the pit. The support pipes are buried with wedges, avoiding their displacement. A crushed stone pillow is laid at the bottom of the pit, after which the pits with pillars are poured with concrete. It is very important to remove air from the solution using bayonet. In this state, you need to leave the supports for three to four days until the concrete has completely set. Correct installation of support pipes affects the entire structure of the fence made of corrugated board (photo examples confirm this).
Fastening transverse lags to support pillars
For the installation of transverse lags with their own hands, use square or rectangular pipes. We cut the pipes into pieces of the required size. The number of transverse rows is set based on the height of the fence itself. For two-meter fence it is quite possible to do with two rows. Make sure that the cross pipes are located 200 mm from the ground and from the edge of the support.
The lag is fastened by welding strictly at an angle of 90 °. You can check the horizontal of the pipes using a level, and this must be done around the entire perimeter of the structure. After the installation of the entire frame is completed, it is necessary to grind the attachment points and treat the entire structure with a primer or paint. The video will tell you how to properly attach the transverse joists.
Installation of profiled sheets
After the frame is ready, we proceed to the installation of corrugated sheets with our own hands. Fence decking, with sheet dimensions 2.0x1.2 m, type C8, is the most suitable for fencing structures. The sheets are attached to the transverse pipes with self-tapping screws for a metal profile of the corresponding color. The overlapping profiled sheets are joined, covering the previous sheet by one wave.
Useful advice! Before you start attaching the corrugated board to the logs, make holes in the attachment points with a diameter of one millimeter less than the diameter of the screws. This will help save time and consumables during the installation process.
If the site on which it is mounted fence, has an uneven surface, this is taken into account when installing support pipes and pouring concrete. The depth of the holes for the support posts is adjustable depending on the landscape of the territory. Below are photos of the fence on an uneven area.
Corrugated fence with brick pillars
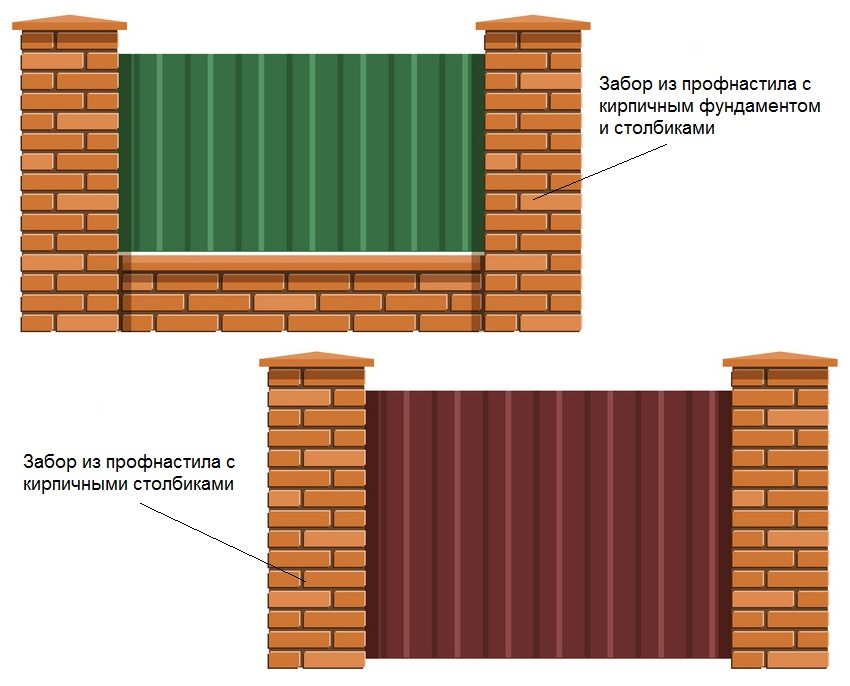
The device of a fence made of corrugated board with your own hands (photo instructions can be found on the Internet) will be more costly if you impose a brick on the metal supports. But the type of such a fence will be more presentable.
With the help of pegs, the perimeter is fixed and the thread is pulled. A trench is dug along the perimeter for the strip foundation with a depth of 0.7 m. The dimensions of the strip foundation (side) are selected individually. The recommended dimensions of the concrete base are 15-20 cm. The bottom is well compacted.
In order to avoid deformation of the foundation, a 20 cm sand cushion is arranged at the bottom of the ditch. The sand is moistened with water and compacted.
We install with our own hands a wooden formwork with a height of at least 10 cm and strengthen it with jumpers. Then we install a pre-prepared frame made of reinforcement.
After installing the formwork, we place metal support pipes, which will subsequently be lined with bricks. Fill with concrete. A prerequisite is that all metal supports must be in the same plane. We stand for 3-4 days.
After the concrete has set, we attach the consoles to the metal supports at an angle of 90 °. Fastening is carried out using bolts or welding at a distance of 200 mm from the ground level and from the upper edge of the pipe. Later, transverse joists will be mounted on these consoles. In the photo you can see how the console is attached.
Let's start laying brick pillars. The column is usually laid out with a side size of one and a half bricks. For strength, we strengthen each row of brickwork with a reinforcing tape. Fill the space inside the masonry with cement mortar. We cover the finished posts with caps-lids to prevent moisture ingress and give the structure a finished shape. The video below will help you understand the technique of laying brick pillars.
Fastening of transverse logs and corrugated sheets is done in the same way as in the case of metal posts.
Useful advice! If fence from a profiled sheet is installed on the foundation, it is necessary to cover the concrete surface of the foundation with cardboard. This will save the bottom edge of the corrugated board from damage.
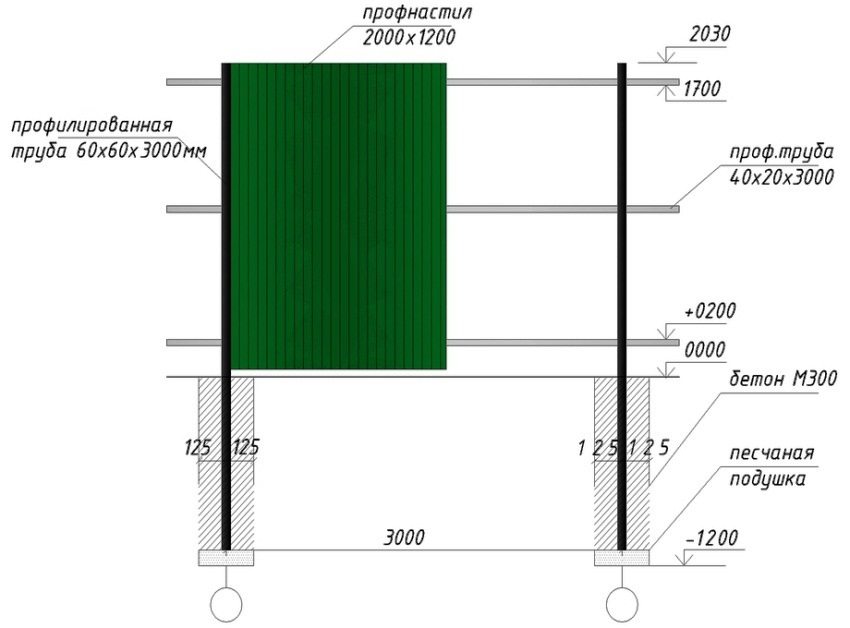
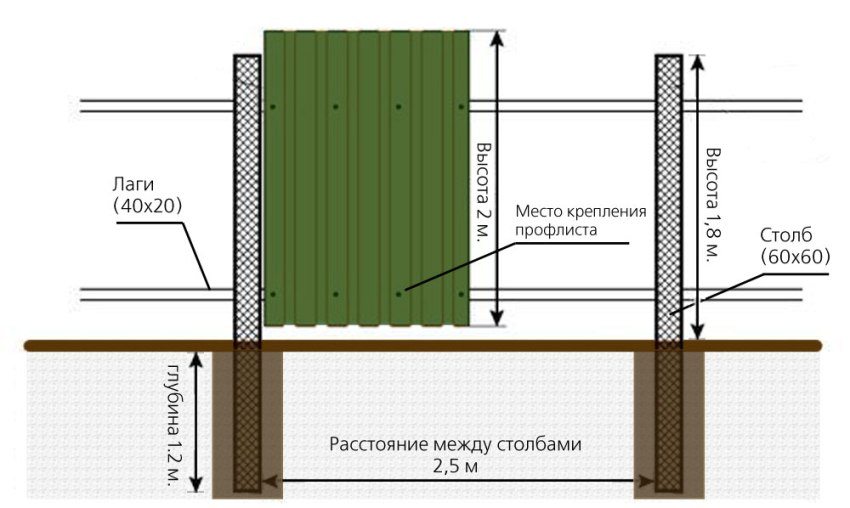
Drawing of the construction of a fence made of corrugated board with metal pipes with a section of 60x60 and 40x20 mm
Below is a video of installing a fence made of corrugated board with your own hands.
If the technical methodology for arranging a fence from corrugated board is observed, it will turn out to be smooth and neat.
The degree of popularity of using wall sheeting for installing a fence with your own hands is explained by the positive characteristics and unique properties of this material. It is equally well combined with pillars made of facing bricks and natural stone, it can be adequately combined with a wrought-iron fence, as well as support other buildings on the site in a color scheme. It all depends on your desires and capabilities. And let them always match for you.
