Doors are an integral part of any premises, both residential and industrial. They serve for space zoning, as well as for protection and preservation of heat. At the same time, the installation of the door leaf also provides for the installation of the casing, which gives the opening a finished and aesthetically attractive look. Platbands for wooden doors differ in a variety of shapes, sizes and installation methods. This is what this article will discuss.
Content [Hide]
- 1 What is a platband: features and purpose
- 2 Species variety of door casings in shape and design
- 3 Platbands on wooden doors: features of the choice of material
- 4 Sizes of platbands as a criterion for choosing the desired model
- 5 Capital as a type of design of platbands on the front door
- 6 Rules and nuances of choosing wooden cashing machines
- 7 Installation of door frames: general rules and recommendations
What is a platband: features and purpose
The opening without cashing has an unattractive and unfinished appearance, so it is important to choose the right one for a specific type of door. And first you need to have an idea of what the door trim is. Cashing is planks that are installed around the perimeter of the doorway on both sides. Main function platbands - this is a masking of the technical gap that occurs between the wall and the box after installation. They cover structural details and installation traces, which include the ends of the box, fastening screws and foam.
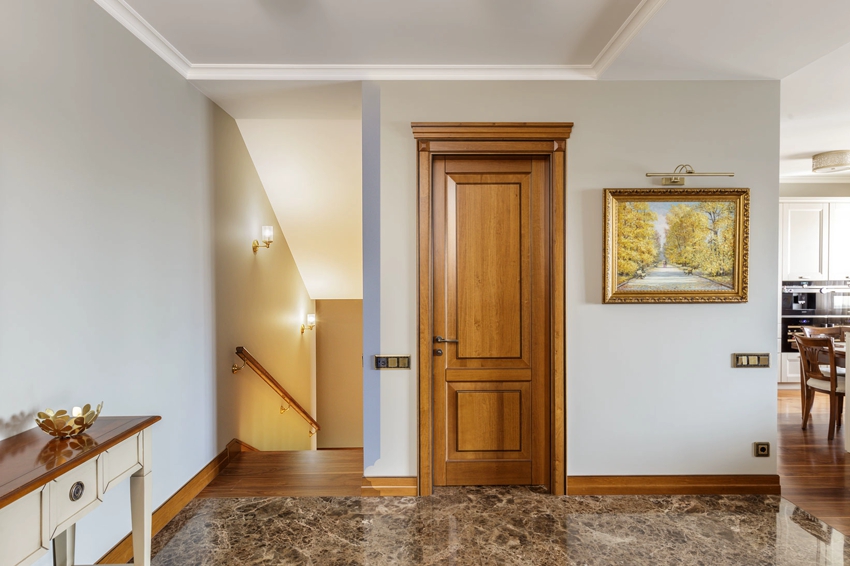
Also, these finishing elements protect the room from drafts, thereby contributing to the retention of heat. Door casters also have a decorative function. Provided that the model is correctly selected, the platbands will not only mask the flaws of the doorway, but also serve as a decoration and a special element of decor in the room. Thus, the decorative casing on the door is, at first glance, an imperceptible, but very important touch that transforms the room and gives it a complete look. Therefore, it is necessary to approach the choice of this part especially carefully and scrupulously, having previously studied all the features and analyzed all the details.
Species variety of door casings in shape and design
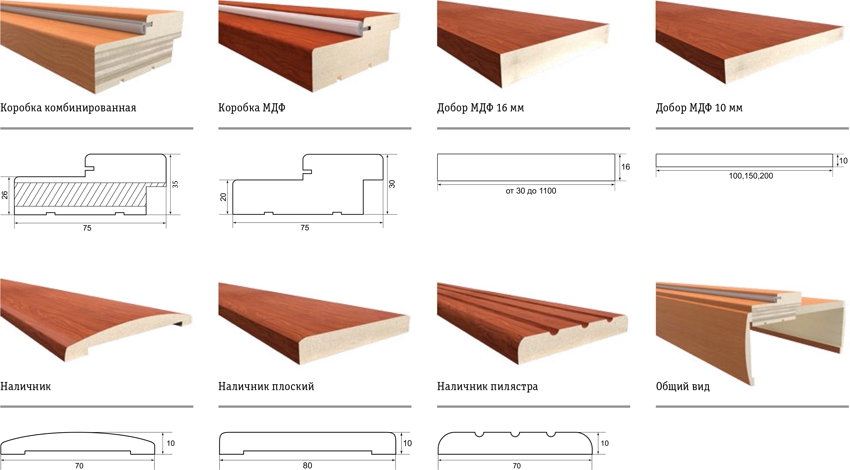
Door cashing has a special classification, according to which it is divided into certain types, taking into account a number of characteristics. The main criterion of difference is the shape, design and installation method of these strips. Platbands, which are mounted along the perimeter of the door opening, are rectangular, but differ in the design of the front side. Thanks to this feature, they are divided into:
- flat;
- curly;
- semicircular.
Platbands of the entrance door of a flat shape are distinguished by a flat surface, judging by the name, and in cross-section the bar is a rectangle. A semicircular cashing has a convex surface and, depending on the design idea, can look like a crescent moon or a falling drop. Platbands of flat and semicircular shape are the most common types that are installed on interior doors.
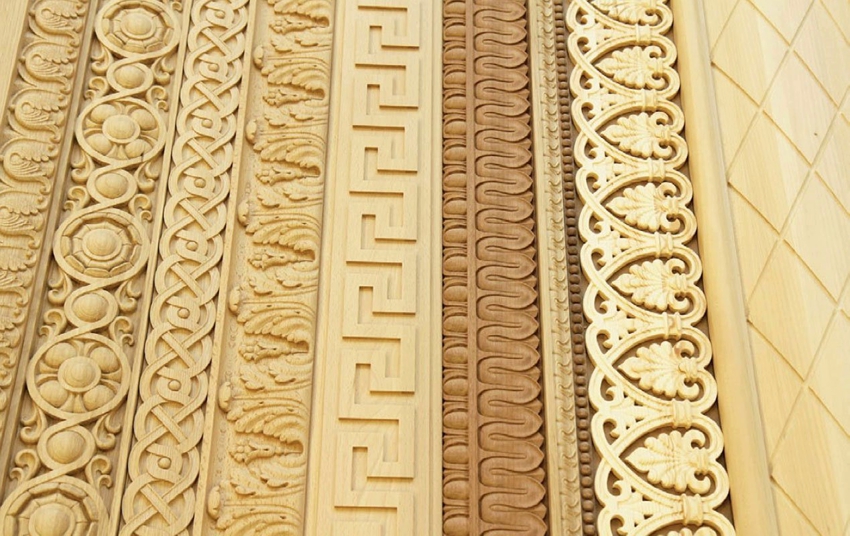
Curly door trim is a less common option as it is more expensive to manufacture. The main distinguishing feature of curly platbands is the presence of a certain relief pattern on the surface of the planks. The relief goes along every detail in the form of curly grooves and depressions, which alternate with elevations similar to rollers.
Useful advice! Curly platbands on wooden doors are particularly original and attractive, so it is better to choose them for decorating doorways of entrance doors.
Overhead and telescopic door trims
Door casters are also classified according to the method of installation. Depending on how and with what materials the strips are attached to the box or wall, they are divided into overhead and telescopic. Overhead strips are the most common, as they are easier to manufacture and install. For their fasteners, nails, screws, liquid nails, sealant or adhesive solution are used. It is not recommended to use glue for the installation of wooden casters, since the wood itself is heavy and this type of fastener will be unreliable.
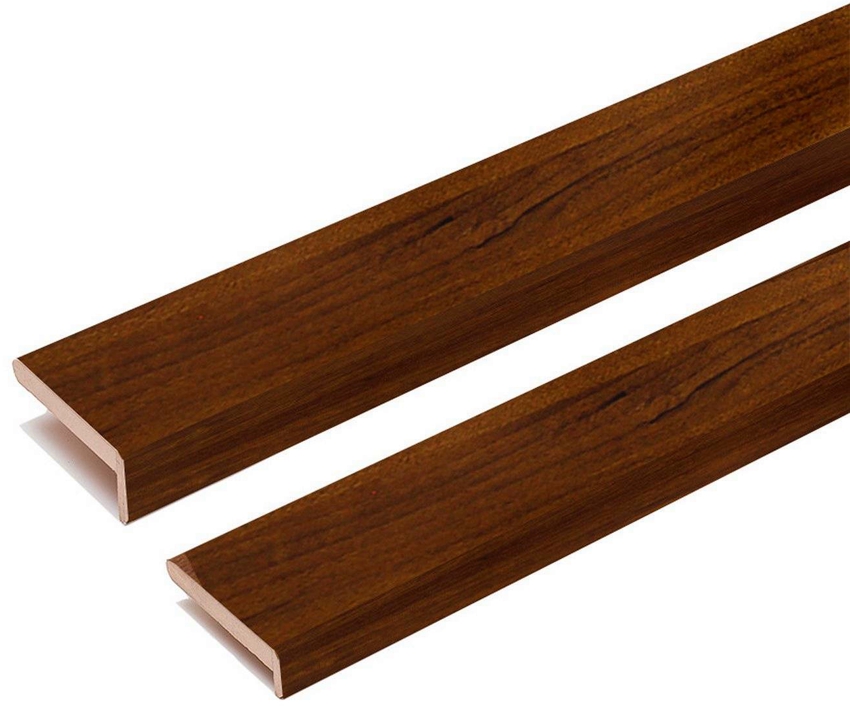
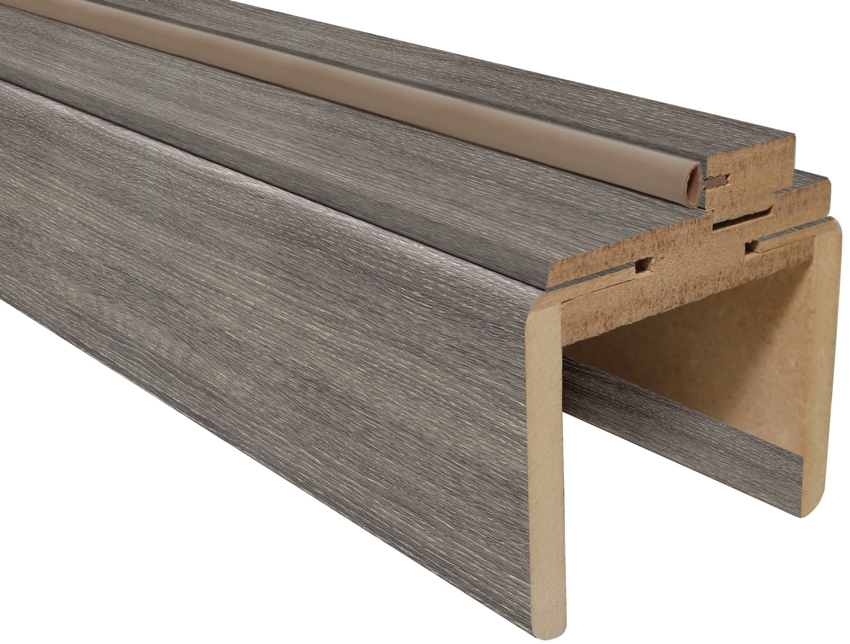
The telescopic strips are fixed without the use of glue, nails or self-tapping screws, they are fixed on the base due to their special shape. L-shaped platbands on one side have a rounded shape, which contributes to their smooth fit directly to the wall, and on the other side they are bent in a certain way. During installation, they fit into the grooves of the box, ensuring a tight connection.
Installation of doors with telescopic platbands makes it possible to avoid the use of special accessories when the thickness of the box does not exceed the wall thickness by more than 15 mm. If necessary, the telescopic strips can be moved in the range of 1-2 cm. Thus, they perfectly mask the technical gap between the box and the wall. Telescopic platbands can be attached not only to the box, but also to the extensions. In cases where the distance between the wall and the frame is more than 20 mm, then the simultaneous installation of extensions and platbands on the front door is inevitable. Most often, this method of fastening with extensions is used when installing entrance doors, when the opening has a thickness that exceeds the width of the box.
Classification of cash machines on the door by the method of docking
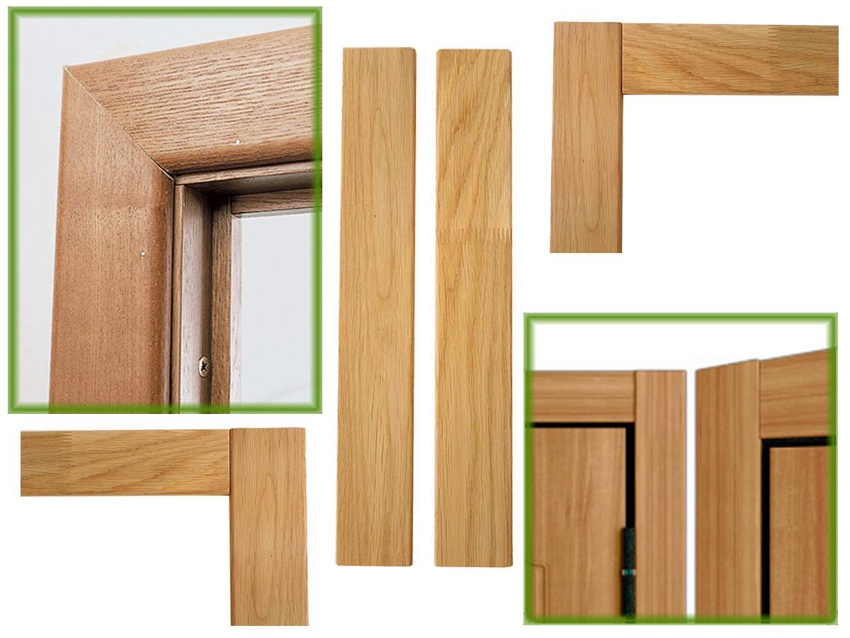
Platbands are divided into types depending on the method of their joining. The planks are interconnected at the top of the opening. The contact angle is the basis for this type of classification of platbands. At the same time, the ends of the strips are connected at an angle of 45 or 90 degrees. To connect the ends of the cashing at an angle of 45 degrees, each of them must be cut at the docking point. This method is considered the most common and most suitable for planks with various surface shapes.
Note! The most difficult stage in installing platbands on the front door is the accuracy of marking the planks at an angle of 45 degrees. The general appearance of the entire structure will depend on the correct marking.
Before attaching the platbands that are joined at an angle of 90 degrees, you must select one of the joining directions. It can be horizontal or vertical. This method of joining is suitable for straight strips with a rectangular section, but not suitable for curly or semicircular cashing. The features of their surface, when docked, will form a hill at the point of contact, creating an ugly appearance.
Platbands on wooden doors: features of the choice of material
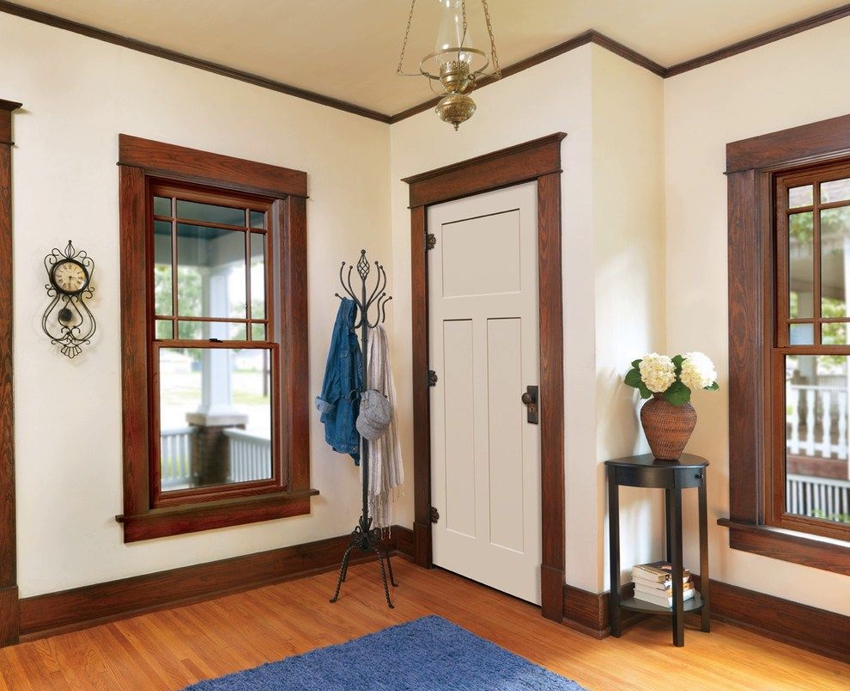
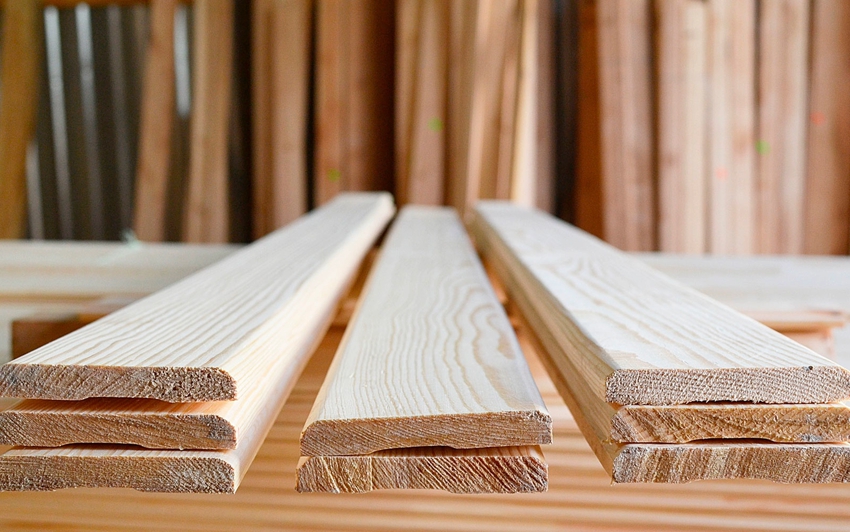
In the manufacture of platbands, a variety of materials are used, which have their own advantages and disadvantages. In this case, it is necessary to take into account, first of all, the material from which the doors are made. Accordingly, for wooden doors, it is best to select a wooden casing. Wood is considered the most sustainable material. Various breeds are used in the production of platbands. The most budgetary option is planks made of soft trees, which include pine and linden. The most expensive materials in this segment are oak, beech and wenge.
Wooden planks are universal, as they fit almost all door leaves. In their choice, the main thing is to choose the desired initial tone or use the appropriate paint, varnish, wax or stain. Platbands made of wood are characterized by ease of installation and a long service life, provided they are properly maintained.
Along with a lot of advantages, wood has its own disadvantages. The main one is sensitivity to temperature extremes and high air humidity, which leads to swelling, decay and deformation of the product, if the processing procedure for parts is not followed. The untreated surface of the platbands very often darkens, which leads to the loss of its original appearance. It is possible to return presentability only after the restoration of the material by filling cracks, cleaning darkened areas, treating with an antiseptic and coating with paint and varnish.
It is permissible to use MDF and plastic strips as cashing, but only for interior doors. Exterior wood canvases must be framed only with wooden platbands.
Sizes of platbands as a criterion for choosing the desired model
The size of the cashing is influenced by such factors as the dimensions of the doorway and its location, the shape of the platbands and the width of the technical gap between the wall and the frame.
The width of the door casing on different doors in apartments or houses depends on the size of the door leaf, the dimensions of the frame and the chosen shape of the slats. Standard doors with dimensions 80x200 cm require the installation of platbands with a width of 6 to 10 cm. The most optimal width is 64 mm. It allows you to completely close the technical gap and partially cover the wall. Cashing with a width of more than 64 mm, even not exceeding the 70 mm mark, will look rough on standard doors, so most manufacturers still adhere to a slat width of 64 mm.
The width of the technical gap between the wall and the door frame is an important indicator when choosing the width of the casing. During the installation of standard-sized doors, it does not always come out to install a 64 mm casing, so you have to take wider or narrower models. The choice depends on such factors:
- arrangement of furniture;
- non-standard dimensions of the door structure;
- the location of the door opening close to the adjacent wall, or very close to the adjacent doors;
- decorative design of the door leaf with a mass of elements arranged in such a way that excludes the use of a wide strip.
It is necessary to adhere to the rule that the width of the casing is several mm higher than the width of the technical gap. According to the requirements of SNiP, this difference must be at least 30 mm. The most optimal option is 40 mm, which allows you to hide all traces of installation and create a beautiful frame for the doorway.
Shape and dimensions of wooden door frames
The width of the cashing also depends on its shape. Flat models comply with the aforementioned 64mm standard. Products with a surface in the form of a semicircle are 70 mm wide. For curly strips that differ in relief surface, it is permissible to install wide platbands on doors with dimensions ranging from 85 to 150 mm.
Helpful advice! If it is impossible to completely get rid of the technical gap between the wall and the opening, and the installation of a wide plank is impractical, then it is best to use a sealant to match the plank.
Telescopic platbands have their own special parameters. Models in the range from 60 to 80 mm are considered the standard width. The most optimal width for this form is considered to be 75 mm. However, the peculiarity of the structure of telescopic cashing assumes the selection of other dimensions, and not just width. Here, the thickness of the strips and the length of the groove element are of importance.
Telescopic platbands are produced with different dimensions, depending on the type and model:
| Platband type | Plank width, mm | Plank thickness, mm | Mounting element length, mm |
| Flat strips | 75 | 8 | 10 |
| 10 | |||
| 8 | 20 | ||
| 10 | |||
| Drop-shaped platbands | 16 | 10 | |
| 20 |
Capital as a type of design of platbands on the front door
By purchasing a door, each owner of a house or apartment strives to ensure that the entrance to his home looks as attractive as possible. An important part of the design, in addition to the canvas itself, is the installation quality of the door frame and the compliance of the frame with the overall structure. At the same time, the choice of door cashing in terms of design is a purely individual approach, a matter of everyone's taste. Some prefer simplicity and minimalism, choosing straight or semicircular strips, others prefer pretentiousness and grace in the form of beautiful curly trims.
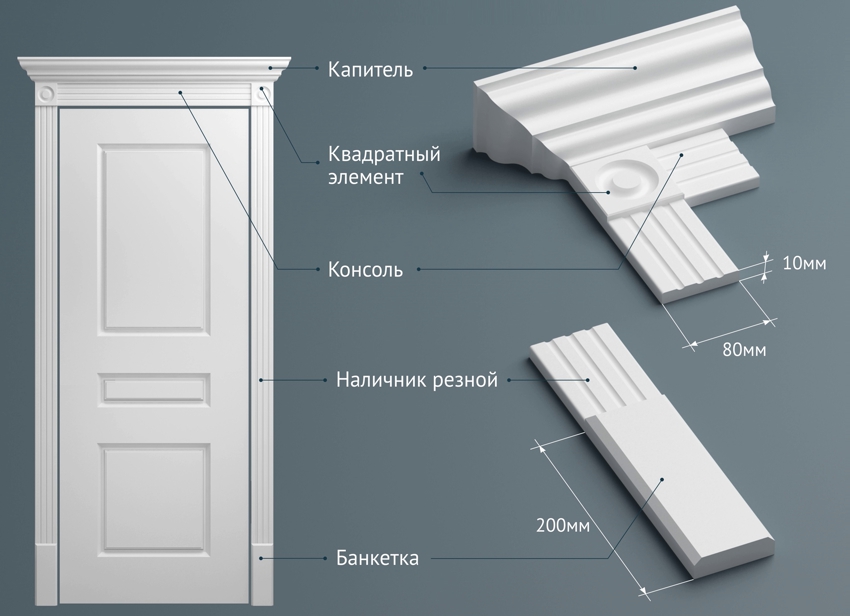
At the same time, in order to emphasize the beauty of the door frame, it is not necessary to take curly cashing. Other options that transform the door leaf are also effective. These can be capitals - additional decorative elements as overlays that are attached to the top of the front door casing. A capital is a type of entrance decoration, which was invented in antiquity. If we consider it significantly, then this is the top of the column with stylized elements in the form of flowers, leaves, branches, inherent in a particular style of architecture. Modern design welcomes this kind of classic style doorway decoration.
In addition to decorative, the capitals also perform a number of additional functions, in particular, they visually increase the height of the doorway, thereby imparting solidity and high cost to the entire structure. They are installed mainly from the side of the entrance to the house, and in the middle, at the exit, they do without them. Externally, the capital looks like a column from ancient times. The overlays located at the top of the vertical planks form a single composition.
Decorative cornices and carved door frames
Often, a specially selected platband with a pattern similar to the design of decorative columns is installed between the capitals. This element is called a cornice and is distinguished by a beautiful curly ledge that looks like a visor. The cornice connects perfectly with the capital, however, it looks pretty attractive even without it.
Helpful advice! When using carved platbands on a door in a wooden house, you can arrange window openings in the same style.
It is possible to decorate a doorway not only with the use of capitals and cornice, other decoration options are also possible. The most popular of these is carved slats on doors. As you can see in the photo, door trims with carvings are wooden strips that can be either flat or convex in shape, but with characteristic rounded edges, which are decorated with a pattern carved into wood.
The pattern on the carved platbands is applied using a sharp tool or a special machine, or using the burning technique. The cost of such cashing is much higher, but beauty justifies the means. With the help of carved platbands, you can create a special and unique style in the design of your home.
Rules and nuances of choosing wooden cashing machines
Most manufacturers produce complex door designs with a ready-made frame, leaves and trims, which simplifies the process of choosing door strips. At the same time, the complete set does not always correspond to a given room or its design. In such cases, an individual approach is required, so it is important to take into account a number of nuances when choosing a cashing.
The first and most important parameter is the size of the door trims. If there are significant defects along the perimeter of the box after installation, then you should give preference to wide strips that completely cover the technical gaps and drawbacks of box installation and wall decoration. However, it should be remembered that platbands wider than 100 mm will visually make the structure heavier, and it will look ridiculous, so it is better to focus on standard sizes.
Narrow strips less than 64 mm wide should only be purchased for narrow doors or due to nuances in the layout, for example, when the opening is close to a perpendicular wall or furniture.
The length of the planks is also important when choosing a cashing. Calculate it based on the parameters of the door frame. The planks should slightly exceed the length of the vertical elements. That is why most planks are made in the standard size of 220 cm.
The casing material should correspond in structure, texture and color to the door leaf, which, in turn, should be combined with skirting boards and furniture. If a cable is planned to be pulled over the door, then it is necessary to purchase a casing with cable channels that are located inside the cavity of the strips.
You also need to consider the type of room. The best choice for entrance doors is specially treated wooden planks or metal trims. Openings to the kitchen and bathroom can also be decorated with ceramic tiles, but this option will look harmonious if the room is tiled with the same material.
Related article:
Replacing a door lock: causes of breakdowns and detailed instructions for eliminating them
Common causes of broken locks. Types of locks. Replacement of cylinder, lever and crossbar devices. Replacement of the larva. Professional advice.
Installation of door frames: general rules and recommendations
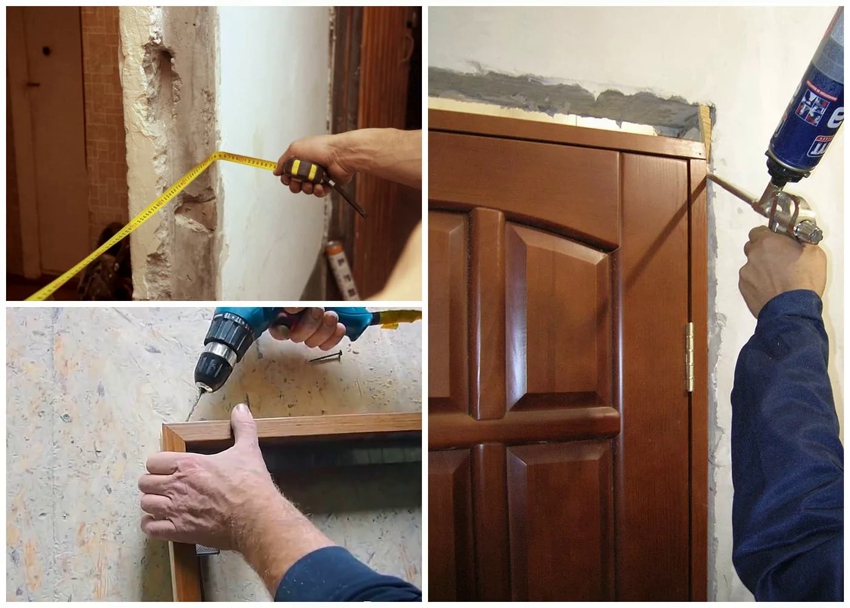
To install platbands on the door with your own hands, you need to accurately measure, and also take into account a number of nuances regarding installation. If you have a desire and a tool, then doing it yourself will not be difficult.
Important! Before installing the platbands, it should be borne in mind that five strips should be purchased for facing one door structure. Two pairs will go to each side vertically, and one is divided in half - each part of it is attached to the top of the opening.
After taking measurements, you should prepare a place for fasteners and the strips themselves, as well as carry out a number of preparatory measures, in particular, you will need to process the surface of the door opening.
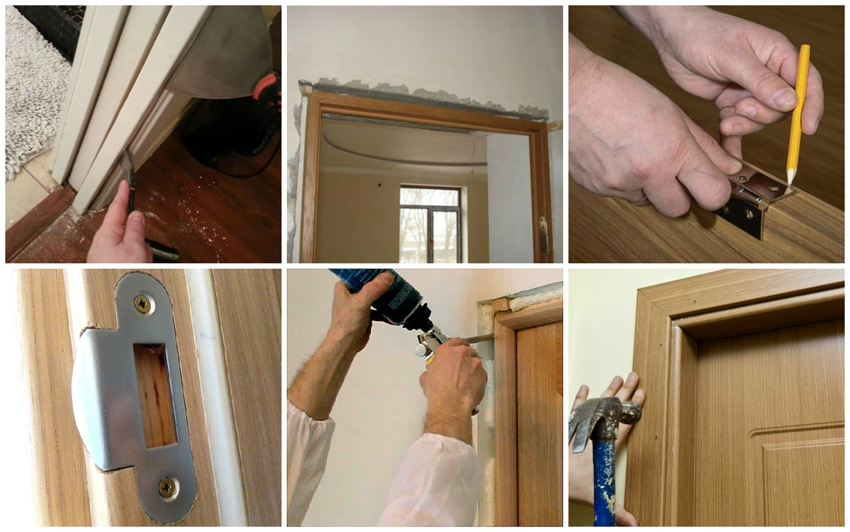
Before attaching the platbands to the door, you need to take care of closing the voids between the box and the wall. For this purpose, polyurethane foam is used. After complete solidification (not earlier than in a day), all protruding fragments of dried foam should be carefully removed. In order for the plank to adhere better to the surface, the cuts should be made as close to the wall and the box as possible. At the same time, you must trim with the utmost care so as not to touch the visible part of the box.
Do-it-yourself platbands on wooden doors: surface preparation
It happens that the surfaces of the box and the wall lie in different planes, then it should be done so that the resulting drop is smooth and does not exceed 3 mm. If the discrepancy goes beyond these limits, it will not be possible to install the cashing exactly. There are two ways to solve this problem: drill a recess in the wall to form a niche for the platband, or cut the plank itself.
The first method should be used if the door frame is located deep in the wall. At the same time, before attaching the platband to the door, you should attach it to the surface of the door frame and draw the line of contact of the strip to the wall. Then make an incision along the box using a suitable tool that matches the base material. Next, a grinder or a chisel makes a recess for the bar along the drawn line. To check the depth of the groove, the platband must be periodically applied to the wall. Places of recesses in excess of the expected rate can be putty using a suitable compound.
The second method is good when the cashing has a certain margin of thickness. In this case, you need a plane to work. With its help, it is necessary to remove a thin layer of wood from the wrong side. There is no rush here, so as not to remove extra mm that can no longer be restored.
Before installation, it is necessary to prepare the platband itself. It should be carefully inspected, as during transportation or improper storage, damage can occur on the slats, which can only be repaired by cutting the ends. Pruning should be done on the side that is in contact with the floor.
Installing platbands on the door: marking the planks
After you have prepared the wall and planks, you need to make the markup. You can correctly mark the length of each casing by applying it to the place of fastening. The desired length should be marked depending on the angle of the notch and the location.
Helpful advice! It should be remembered that marks for cutting the length must be applied to each plank in accordance with its installation location. This is due to the fact that the floor level in different places fluctuates in the range of several millimeters, and sometimes even centimeters. In order not to get confused where exactly to set this or that bar, it is better to number them.
First of all, the marks are applied to the bar, which is attached from the hinge side. It must be applied to the installation site with a small gap of 3-4 mm. This is to ensure that the door hinges do not touch the bar during operation. From the side of the lock, the platband is also applied with a small indent from the corner of the box with a rounding. If there are additions in the design, then a bar is applied along with them.
It is relatively easy to measure the vertical bar. It is enough to attach it to the installation site and add 3-4 mm from the intersection of the corner of the box in the middle with the strip. For joining the planks at an angle of 45 degrees, this mark will be final, a gash will be made from it. To dock the platbands at 90 degrees, add the width of the plank to the resulting length.To determine the length of the horizontal strip, it should also be applied to the surface and symmetrical marks should be applied, retreating from the corners inside the box by 3-4 mm.
How to install door trims: trimming planks
After marking, all platbands should be filed at the desired angle. For this purpose, various tools are used: a miter saw, a miter box, a jigsaw, and even a saw with fine teeth. Regardless of the tool used, care must be taken to maintain a slight offset from the mark. This is an important condition, since it is necessary to maintain the kerf width, which ranges from 1 to 3 mm, depending on the material and tool.
For trims that are trimmed at 90 degrees, the open ends on vertical planks are the best option. With this method of trimming, the places on the vertical slats will be covered by the horizontal cashing. The open ends of the upper planks will be at the top, which makes them almost invisible.
On telescopic platbands, in addition to cutting the length of the strips, an incision is also made from the side of the element placement, which enters the grooves of the add-ons or the door frame. The undercut from the side allows the horizontal part of the plank to fit snugly on the box and press against the wall.
Installation of platbands on the door: how to do it yourself
After the listed series of preparatory works, the direct installation of cashing takes place. However, before you nail the platbands on the door, you need to decide on the installation method. Its choice depends on the material from which the strips are made.
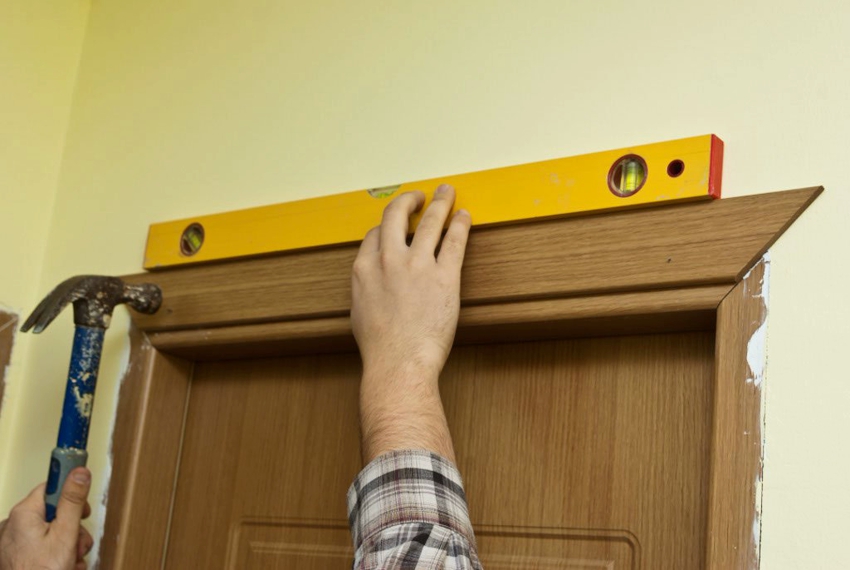
You can check the vertical and horizontal accuracy of the installed cashing using the building level
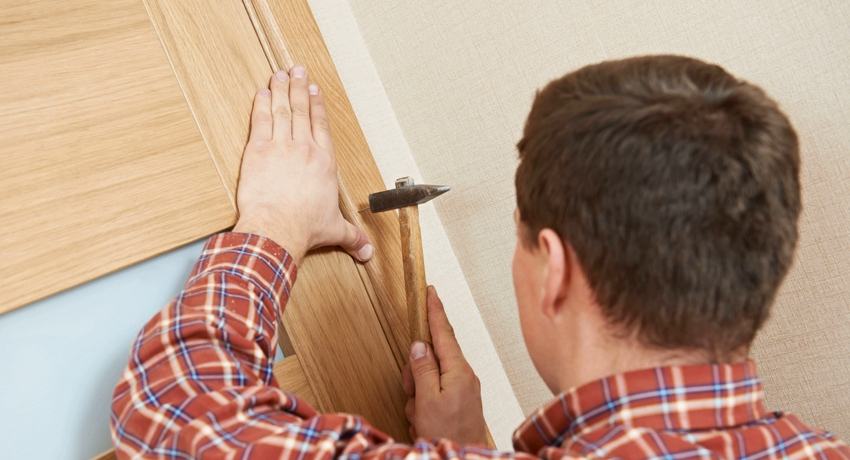
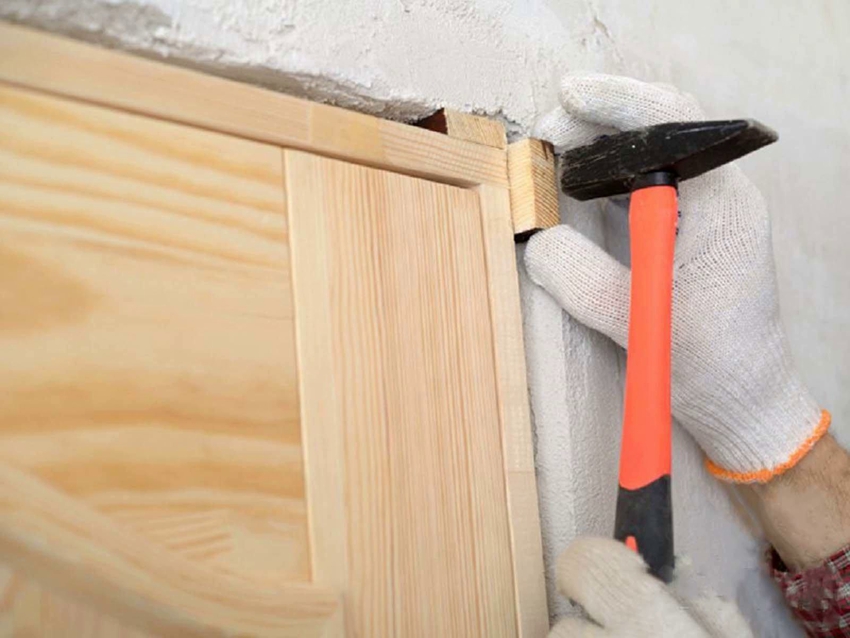
Platbands made of wood and MDF can be easily nailed using special thin nails without hats, hairpins, or screwed with self-tapping screws. Installation must be started from the side strips, in accordance with the marks on them. Good fixation of cashing is ensured, provided that the distance between studs or screws does not exceed 50 cm.If intensive use of doors is expected, then this range must be reduced to 20 cm.
Helpful advice! To avoid mistakes when fixing the planks and to be able to make adjustments, you should not hammer in all the nails at once - it is enough to nail the platband in the center and below, while not hammering the nails to the end. Thus, all three platbands are fixed and only after a complete adjustment of the ends are they finally fixed.
You should know that it is possible to fasten the platbands not only with the help of nails and self-tapping screws. Liquid nails are also suitable, provided that the wall surface is perfectly flat. The adhesive is evenly applied and distributed over the entire length of the strip. For the purpose of fastening, the cash is tightly pressed against the box and the wall for 1-2 minutes. This time is sufficient for reliable fixation.
Platbands on the door are an important element of the door frame design, on which the complete appearance of the entire interior depends. Therefore, the choice of this part must be approached responsibly and take into account all the nuances: from the type of material of manufacture to the features of installation. Correctly selected and fixed door strips will help create a cozy and comfortable atmosphere in any room.
