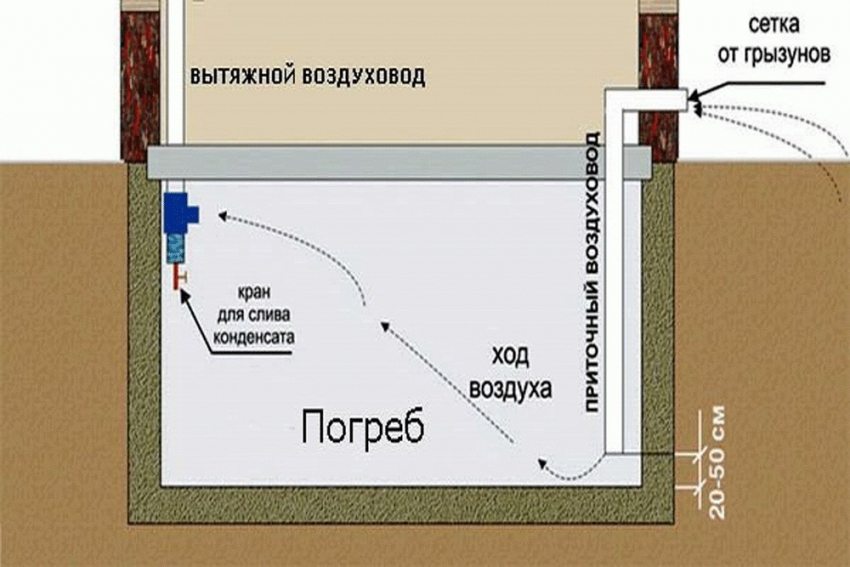
A design such as a cellar is often set up in the country, under a house or outbuilding. The cellar is used for storing fresh food and preserving, and for its efficient operation, the correct microclimate must be created in it. An important element of its provision is the extractor hood in the cellar: how to make ventilation correctly - you can learn from numerous instructions and thematic videos. Ventilation can be natural or forced.
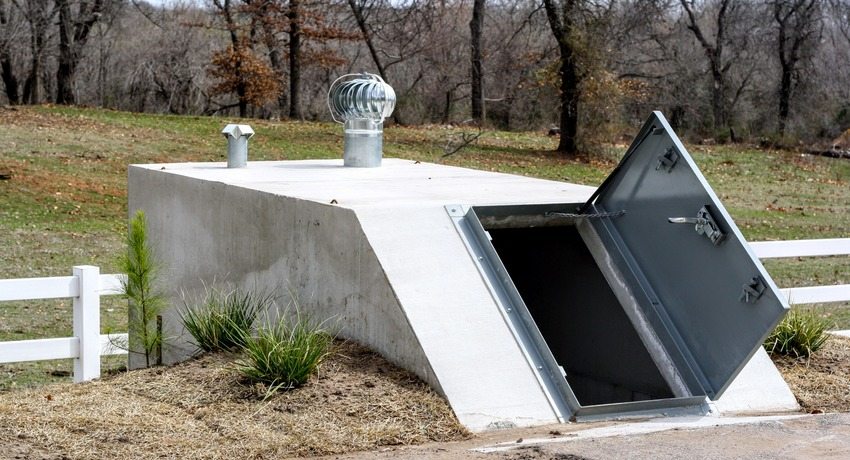
A properly made hood in the cellar prevents the formation of condensation on the walls of the storage and protects the harvested crop from decay
Content [Hide]
- 1 Extraction device in the cellar
- 2 Natural ventilation
- 3 Installation of forced ventilation of the cellar with two pipes and one
- 4 Deflector for ventilation in the cellar: how to make a device with your own hands
- 5 How to properly ventilate a cellar with high humidity, draining the cellar
- 6 Basement microclimate control with ventilation system
- 7 Materials for the manufacture of ventilation systems
- 8 Fan types for forced ventilation system
- 9 Hood in the cellar: how to make ventilation correctly, assembling the system and checking its performance
- 10 Recommendations for arranging the hood
Extraction device in the cellar
There are several options for providing a microclimate in the storage using ventilation. Air circulation can occur naturally, or maybe with the help of special fans. In addition, the ventilation system can be equipped with additional devices that will increase the efficiency of its functioning.
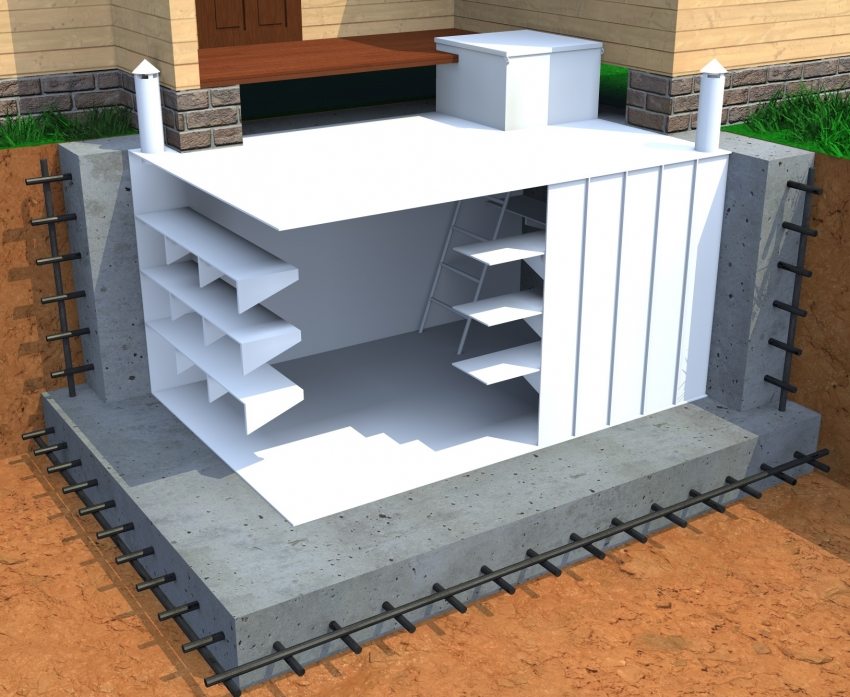
The main element of any ventilation system is pipes. There are usually two of them:
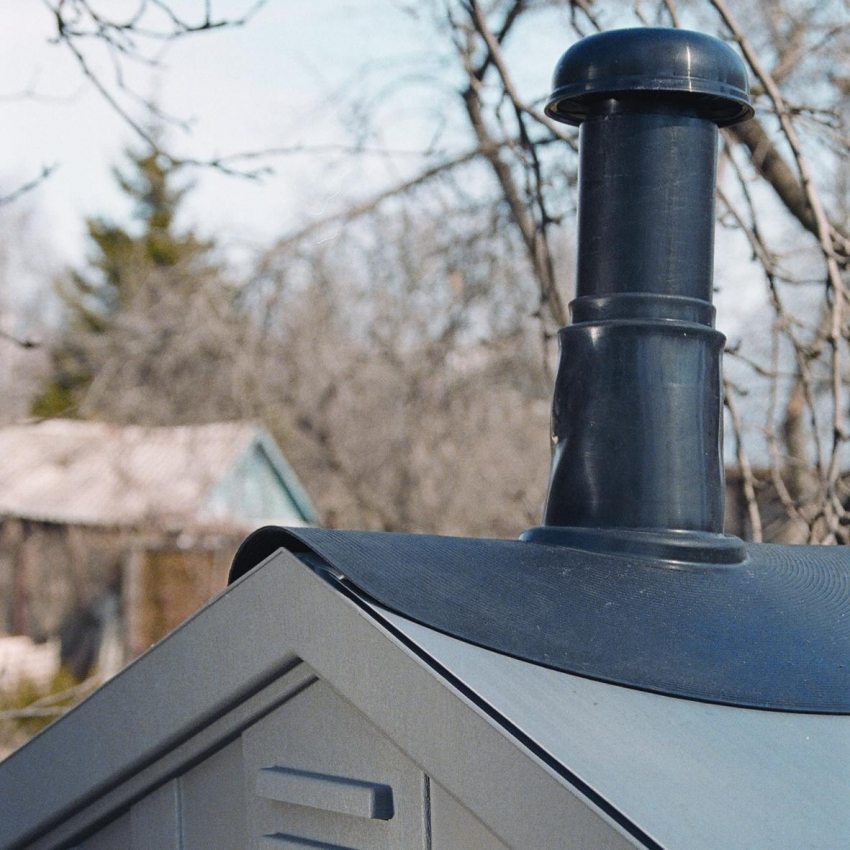
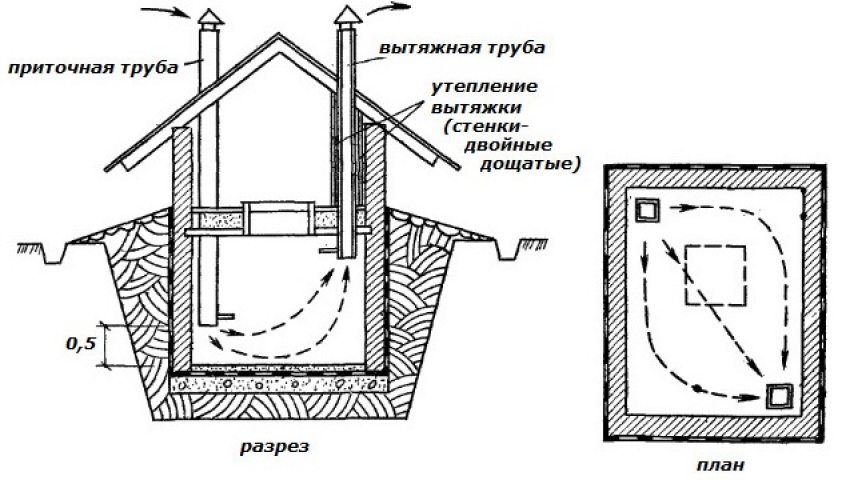
- Exhaust pipe - through it air leaves the room. It is mounted in the upper corner of the basement, and it should protrude about 0.5 m above the ridge. Condensation can accumulate in the chimney, so it must be additionally insulated with mineral wool or other materials.
- Inlet pipe - serves to supply fresh air to the storage, mounted in the corner opposite to the exhaust pipe. The opening of the supply pipe should be located approximately 40-60 cm from the cellar floor, and its outer end should be significantly raised above ground level.
In addition to pipes, when arranging the air ventilation system, dampers, fans, deflectors are used, as well as special climatic equipment, if necessary.
Natural ventilation
The easiest way to ensure optimal temperature and fresh air in the basement is to install natural ventilation.
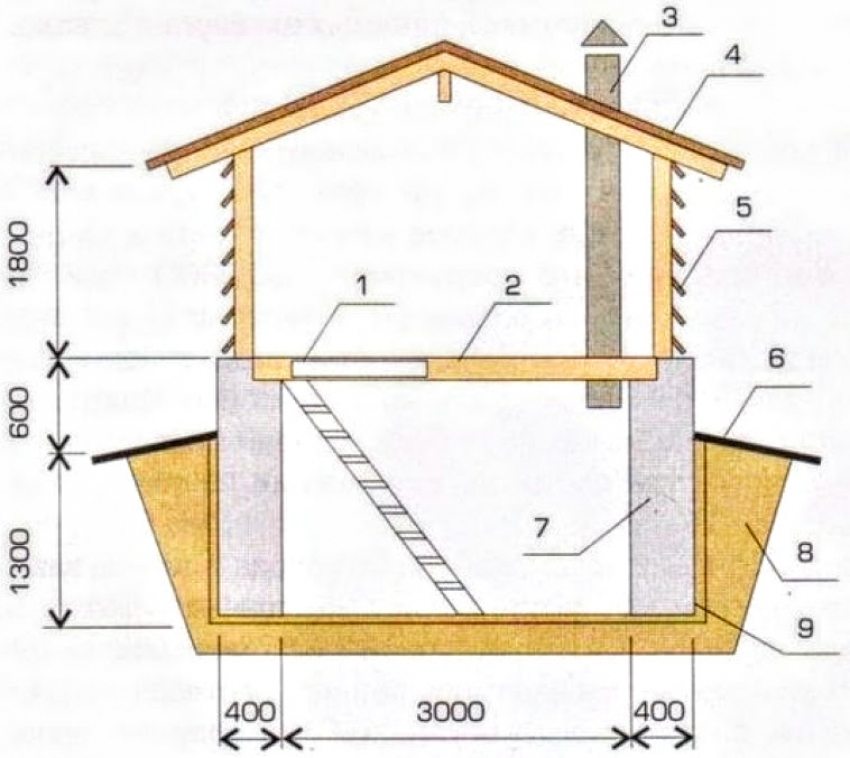
Cellar 1.3 m deep: 1 - hatch into the cellar; 2 - insulated floor; 3 - ventilation; 4 - superstructure; 5 - louvered grill; 6 - blind area; 7 - rubble concrete wall; 8 - clay castle; 9 - bituminous putty
By arranging proper ventilation of the cellar in a natural way, you will receive the following benefits:
- Low construction cost. When installing natural ventilation, you only spend money on building materials, which are not so much needed for it.
- The possibility of installing the system not only during the construction of the basement, but also after its completion.
- Ease of installation. It does not take much time and effort to create a system of natural air circulation in an underground storage.
The disadvantages of such a ventilation system in the cellar include the fact that with its help it will not be possible to clearly regulate the temperature regime. In addition, if the outside temperature is the same as in the basement, then air circulation simply will not occur.
Helpful advice! If the products in the storage need a certain temperature regime, then it is better to use a forced ventilation system. It will allow you to precisely control the microclimate in the basement.
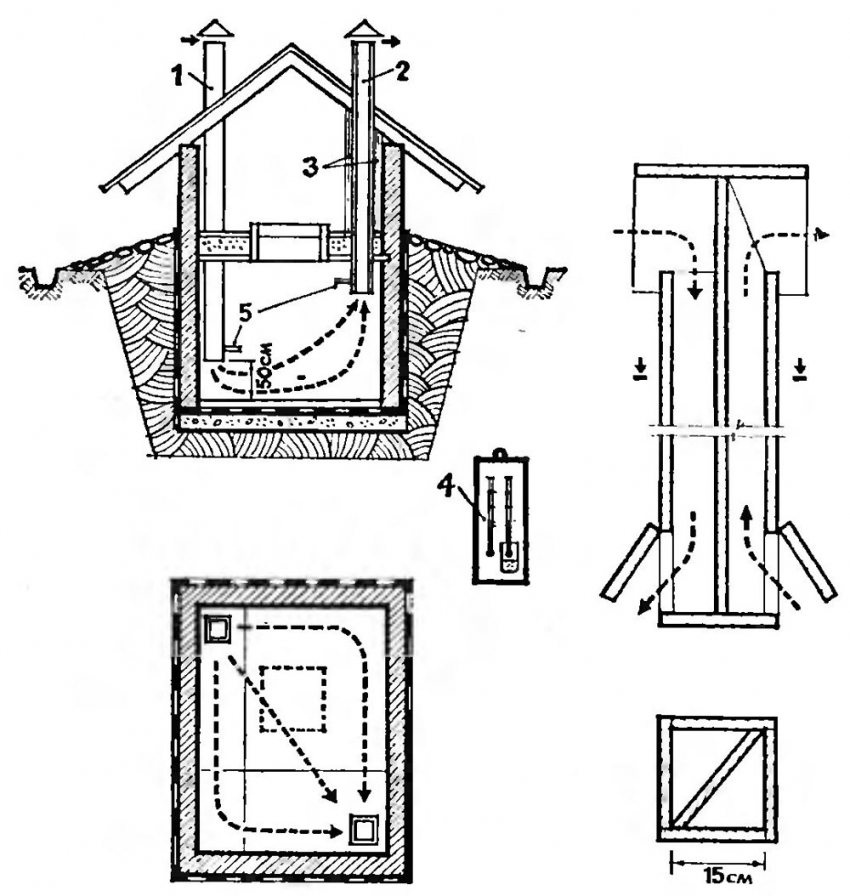
Correct ventilation device: 1 - supply pipe; 2 - exhaust pipe; 3 - insulation of the chimney; 4 - psychrometer and thermometer for temperature and humidity control; 5 - adjusting valves
Installation of a natural ventilation system
In order for the air in the basement to circulate naturally, two pipes are needed. The material of the pipes can be different, recently PVC pipes are often used - they are inexpensive, lightweight and durable. Also, ventilation pipes can be metal, plastic and even reinforced concrete. The cross-section of pipes is selected depending on the storage volume. For example, the optimal section of a ventilation pipe in a basement with an area of 6-8 m2 is 120x120 mm.
If you are going to make a hood in a cellar with one pipe, then its section should be larger. For example, for the same basement of 6-8 m², it starts from 150 mm. Using only one pipe is possible in cases with small storage facilities. With this design option, two channels are located in one pipe at once - supply and exhaust. Each of them is equipped with its own damper, with the help of which the intensity of the inflow and outflow of air is regulated.
When installing a natural hood in a cellar with your own hands, you need to take into account a number of nuances:
- the higher the chimney opening is, the greater the efficiency of air circulation in the system;
- external pipe exits must be covered with special visors, otherwise rain water or snow will fall into them;
- the fewer turns and bends the pipes have, the better ventilation will be;
- both pipes must be of the same diameter.
Natural ventilation for small storage is a simple and effective option for a cellar hood. How do you make the same efficient system for large storage? In this case, you cannot do without forced air injection.
Installation of forced ventilation of the cellar with two pipes and one
As a rule, a forced air circulation system is installed in two cases. The first of them is the presence of a large storage area of over 40 m². The second option is a basement, which is not used for storing food, but as a gym, playroom or other similar room.
In both cases, the installation of a forced-type ventilation system will not only ensure the flow of air and maintain the set temperature, but also allow you to get rid of excess moisture and dampness. The last point is very important if sports or other expensive equipment is installed in the basement.
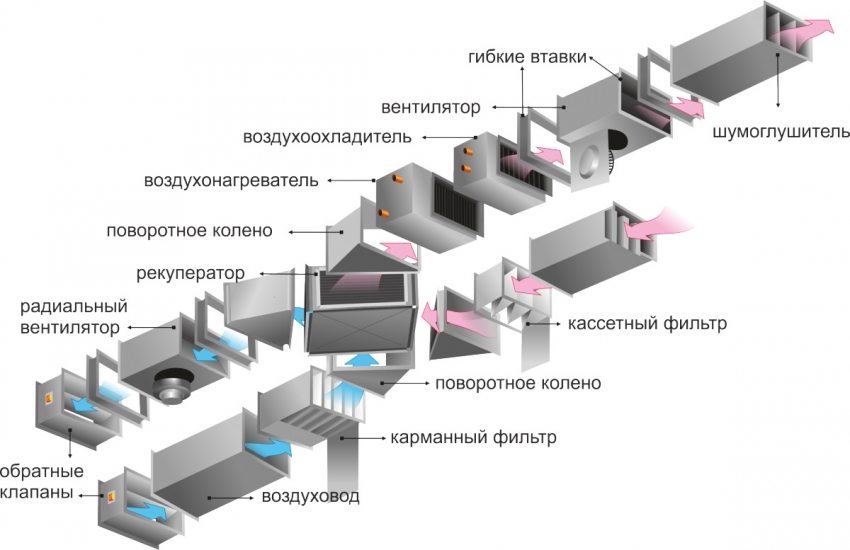
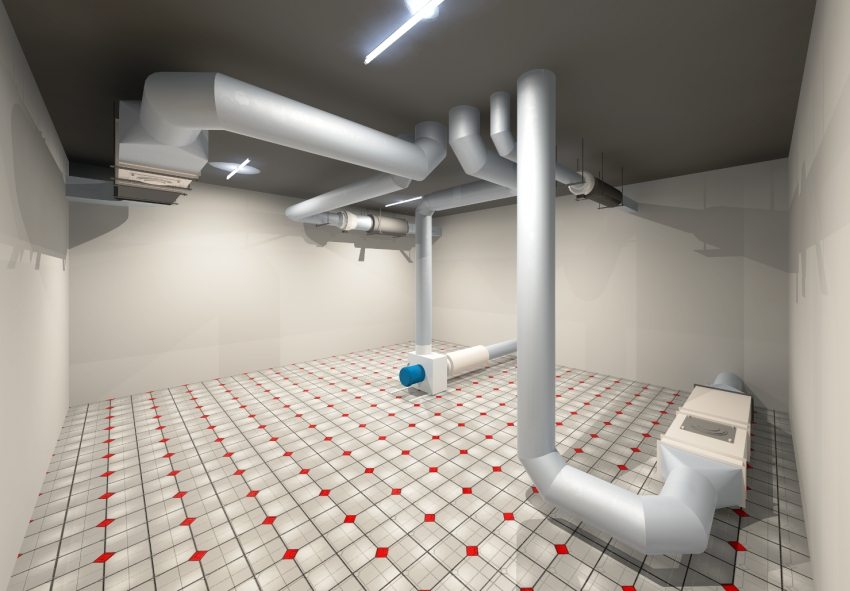
Supply and exhaust ventilation device automatic type
Unlike natural, the forced ventilation system in the cellar is characterized by the following advantages:
- Air circulation does not depend on the temperature difference in the basement and outside.
- Not only cooling is possible, but also air heating in the room, as well as its filtration.
- With the help of special devices, you can easily adjust the intensity of air circulation.
The disadvantages of this option include the need for regular maintenance, more complicated installation compared to the natural system, and the high cost of components. In addition, the functioning of the forced system depends on the availability of power supply, which means that you will have to install additional wiring. And in the event of a power outage, the system will stop functioning altogether.
Options for arranging a forced ventilation system
There are several types of forced air circulation systems in underground storage. The first of these involves the use of electric fans.
Helpful advice! If you decide to use fans, be sure to take care of their protection from moisture and other adverse influences that affect the equipment underground.
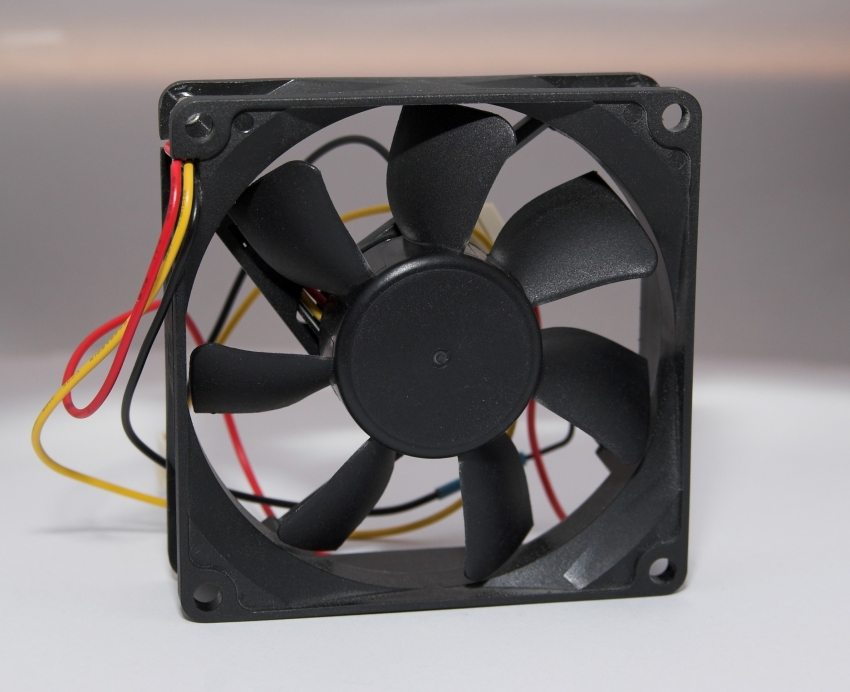
There can be two or one fans in the arrangement of forced ventilation in the cellar. One fan is mounted on the chimney on the side of the storage, and the air must be blown out with its help. Two fans are an option for larger rooms. In this case, the second is placed in the supply pipe and serves to pump air into the storage.
The fans can operate in several modes, so you can control the air inflow and outflow, and maintain the required temperature in the basement. Power can be supplied from the main power grid if the basement is located under a residential building or garage, as well as from a separate power generator.
If you are installing forced ventilation in the cellar under the house, then it will be easier to provide power supply to the fans than in a separate underground storage. In the latter case, the wiring and equipment must be additionally insulated from moisture.
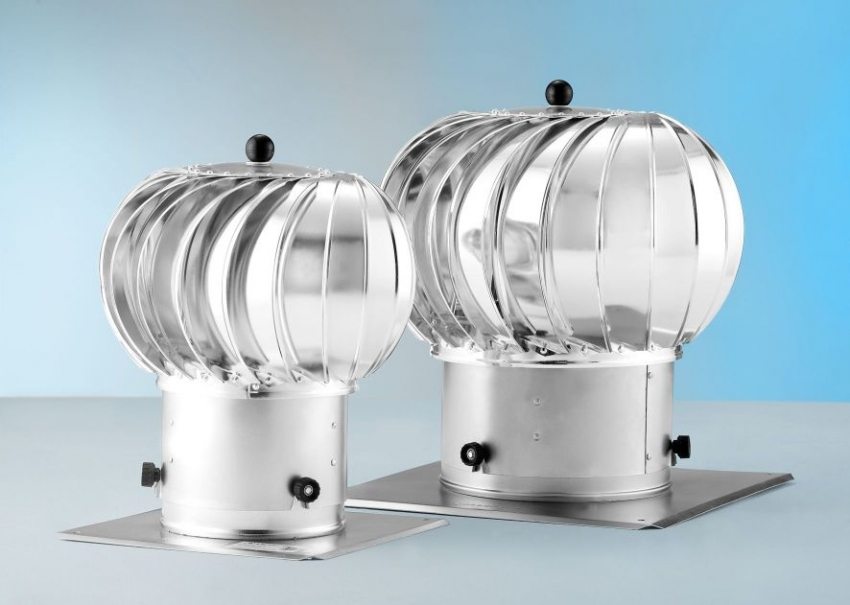
The second version of the forced system involves the use of wind energy instead of electricity. For this, a special device is mounted on the chimney - a deflector, which catches air flows and transfers energy to the fans. It is worth dwelling on the deflector in more detail.
Deflector for ventilation in the cellar: how to make a device with your own hands
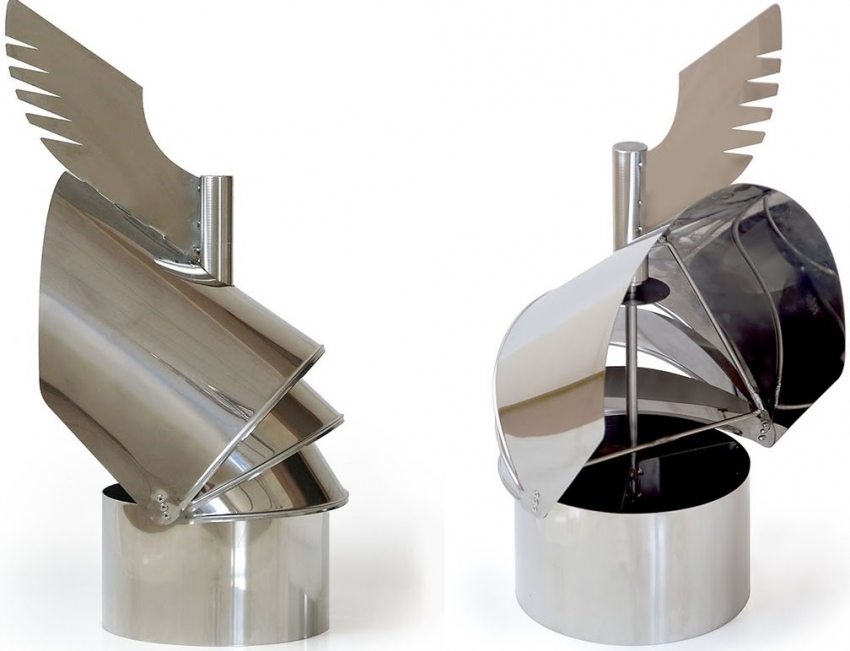
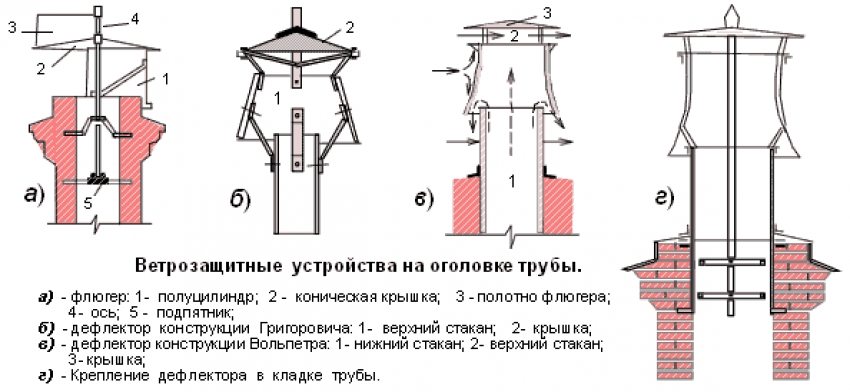
The principle of operation of the deflector is that the air flows, dissecting against the diffuser, create increased draft in the ventilation pipe, due to which air circulation is carried out. The use of deflectors allows you to save on electricity, as well as increase the efficiency of the forced ventilation system. In addition, this design can be successfully used in a natural type system.
There are several types of deflectors. Let's consider the most popular ones.
ASTATO - a deflector that can be powered by an electric motor or from the wind. The design of the device implies the presence of a special sensor that automatically turns off the mechanical traction when there is sufficient wind force. This version of the device is beneficial to use in cases where the wind strength is not always sufficient to ensure normal air circulation. The electric motor in such models is quite economical, so you don't have to worry about excessive energy consumption.
Deflector-vane - rotates exclusively due to the force of the wind, good because it can adjust to any direction of air flows.The disadvantages include the fact that the bearings that are part of the structure need regular lubrication and periodic replacement. In addition, if you use such a deflector in the ventilation circuit of the cellar, then keep in mind that at low temperatures, its mechanism may freeze.
Static deflector - a relatively new model, which is characterized by the presence of an ejection fan. At a relatively high cost, it has such advantages as a reduced noise level during operation, high efficiency, and moisture removal from the system.
Rotary turbine - installs in areas with stable strong winds, so this design is not very popular.
In addition, there are spherical and H-shaped deflectors, Grigorovich deflectors and other options. The choice of model depends on the characteristics of the ventilation system and the area in which the basement is located.
Helpful advice! The Grigorovich deflector is considered the easiest to manufacture, therefore, if you are installing a conventional supply and exhaust ventilation system, it is best to use it.
Making a deflector with your own hands
This device is most often made of galvanized or stainless steel sheets, as well as plastic. Plastic models are cheaper than their steel counterparts and look more attractive, but do not boast of durability. In addition, plastic deflectors are very sensitive to high temperatures, so you should not install them if the ventilation system combines the functions of a chimney.
Before proceeding directly to the manufacture of the deflector, it is necessary to calculate its parameters. The deflector height is calculated using the formula: H = 1.7xD, in which D is the diameter of the ventilation pipe. The hood width is 1.8 times the diameter and the diffuser width is 1.3 times the diameter.
Do-it-yourself drawings of the ventilation deflector are made on cardboard or thick paper, after which metal or plastic parts are cut out from them. To work you need the following tools and materials:
- paper or cardboard for drawings;
- scissors for metal for cutting parts;
- sheet of metal or plastic;
- marker or construction pencil;
- drill with drills of various diameters.
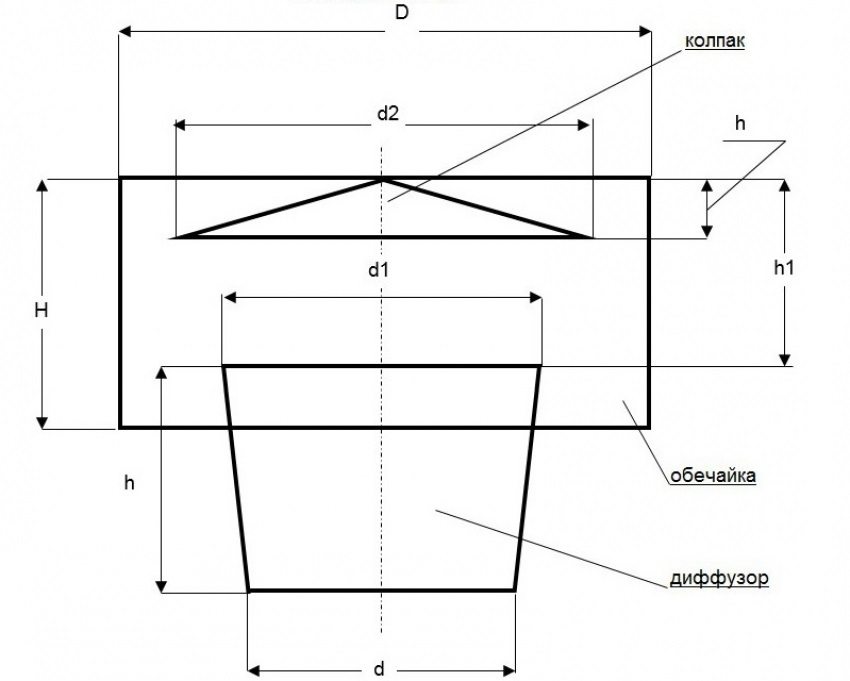
Deflector sketch: d - pipe diameter; d1 = d * 1.26; d2 = d * 1.7; h = d; h1 = d * 0.7; h2 = d * 0.25; D = d * 2; H = d * 1.2
It is also recommended to use personal protective equipment when working, that is, special glasses and gloves. The deflector itself is made in the following order:
- The product outlines are transferred from the drawing to the metal sheet. This includes sweeps of the hood, outer cylinder, struts, and diffuser.
- Using metal scissors, these parts are cut out.
- The parts are connected to each other using a rivet gun.
- The finished deflector is installed on the pipe head and secured with clamps.
When installing ventilation in the cellar, the installation of the deflector is a very crucial moment. It is best to install the device with two people, since work is usually carried out at a height. First, the lower cylinder of the structure is fixed at the outlet of the ventilation pipe. This is done using clamps or special bolts with dowels. After that, a diffuser is attached to the cylinder, on top of which a protective cap is installed. It is recommended to additionally treat the joints of parts with bolts with a special anti-corrosion compound.
The deflector occupies a very important place on the hood diagram in the cellar, therefore, special attention must be paid to its assembly and installation.
How to properly ventilate a cellar with high humidity, draining the cellar
There are situations when a storage facility is being built in an area characterized by a high level of groundwater or a climate with high humidity. High moisture content in the air can negatively affect the condition of the food stored in the cellar.
In addition, with a single-pipe cellar ventilation system, moisture often condenses on its walls, and in the cold season it freezes. Thus, it can freeze in several layers and completely block the ventilation hole. To prevent this from happening, it is necessary to equip a forced ventilation system with a reinforced hood.
With the help of forced extraction, humidity can be significantly reduced in any type cellars... How to make even a large enough room dry? To do this, you must use not only the ventilation system, but also pre-dry the cellar. To do this, you need to take out all the products from it with your own hands before arranging the ventilation in the cellar, and then carry out the drying work.
There are several ways to drain the cellar:
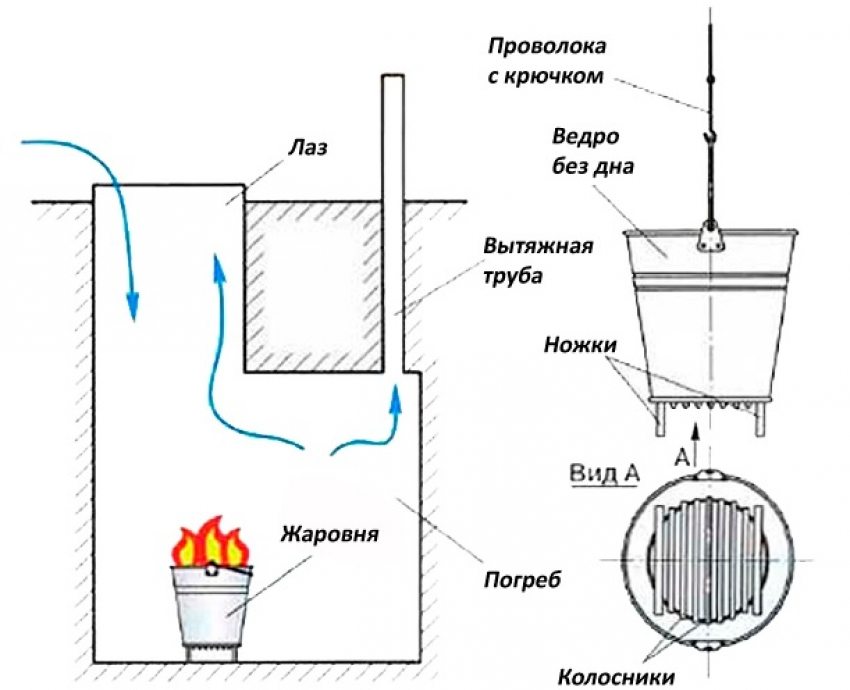
- With the help of an iron stove or a brazier - a brazier or a bucket of coals is lowered into the basement, the fire is maintained until the room is dry enough. Before starting this drying in the cellar, you must open the door and other openings. It is best to light the fire with sawdust or wood chips, and if necessary, the operation can be repeated several times.
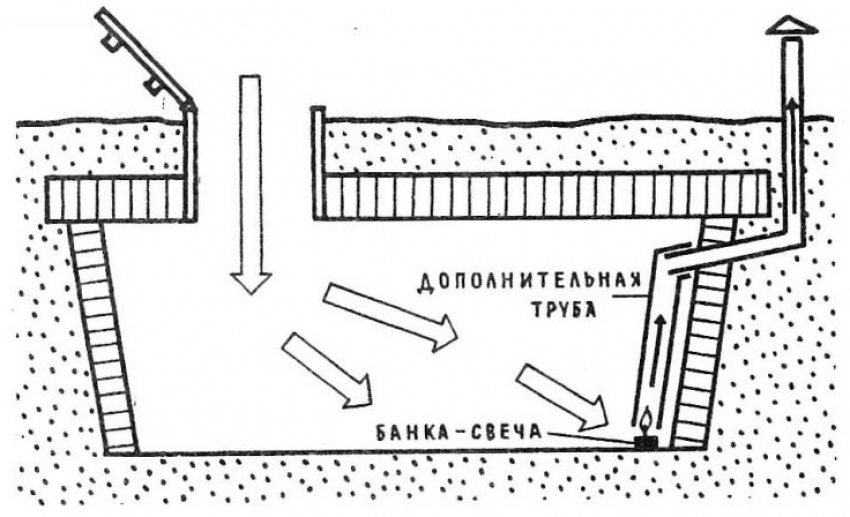
- Using a candle - the candle is installed under the hood in the cellar. The correct use of this method implies a small size of the cellar, otherwise it will not be effective enough. Drying a basement with a candle is easier than using a brazier, but it also takes longer. This usually takes several days, during which the candles will have to be changed regularly.
- Using a special dehumidifier - a good option for large storage facilities, allows you to quickly get rid of humidity in the room. A dehumidifier can be used in addition to the usual supply and exhaust ventilation system if moisture often accumulates in the cellar.
You need to choose the appropriate option for draining the basement depending on its size, as well as the time and opportunity you have. Installation of an effective ventilation system will allow you to do this less often, but even the highest-quality ventilation will not be able to completely eliminate the need to dry out a wet cellar, if its waterproofing was not performed during the construction of the room.
Basement microclimate control with ventilation system
There are several options for making different types of cellars colder. You can initially dig a hole at a greater depth, you can pay more attention to thermal insulation, or you can use special microclimate control systems. According to the type of temperature control, there are two types of ventilation systems:
- Automatic - works offline. In such a system, there are special sensors that monitor the temperature in the cellar and turn off and turn on the fans when it needs to be lowered or raised. The main element of such a system is the different versions of cellar thermostats, which can be bought in specialized stores.
- Mechanical - works with the direct participation of a person who monitors the temperature and humidity levels in the storage. In such a system, the intensity of the fans, as well as the position of the dampers on the supply and exhaust pipes, are manually adjusted.
Helpful advice! When choosing the type of ventilation system, focus on how accurately you will need to maintain the temperature. If the tolerances are greater than two degrees, then a mechanical system will do.Otherwise, it is better to give preference to automatic microclimate control.
Materials for the manufacture of ventilation systems
Diy ventilation schemes in the cellar involve the use of various types of pipes. Today, the most popular of them are asbestos cement and low pressure polyethylene.
Asbestos-cement ventilation pipes look like slate, therefore they are also called slate. They are characterized by a high level of strength and reliability, as well as durability and resistance to corrosion. They are sold in long lengths, so the ventilation system can be made from whole pipe pieces. Polyethylene pipes will most likely have to be welded together; this will require special tools and skills.
Less commonly, metal pipes are used for the air circulation system. They are quite cheap and easy to install, but the metal is susceptible to corrosion and rots quickly enough in the ground. In order to prevent this from happening, metal pipes can be covered with a layer of anti-corrosion enamel before burying them in the ground or additionally protected from moisture with waterproofing materials. In addition, moisture condenses more strongly on a metal surface than on a plastic one, so it is better to use them in combination with a forced ventilation system in the cellar. How to make the correct hood from metal pipes? This is best done for storage under a residential building or garage.
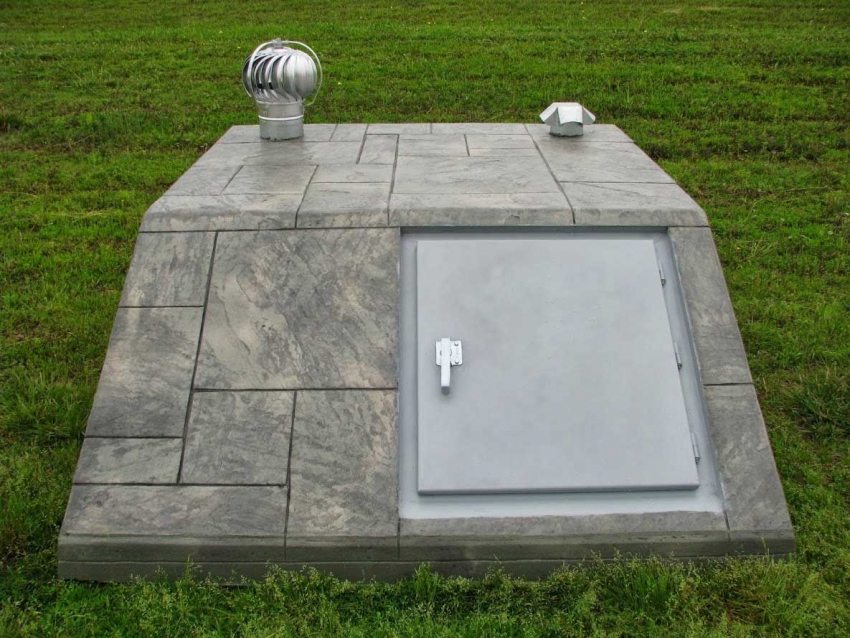
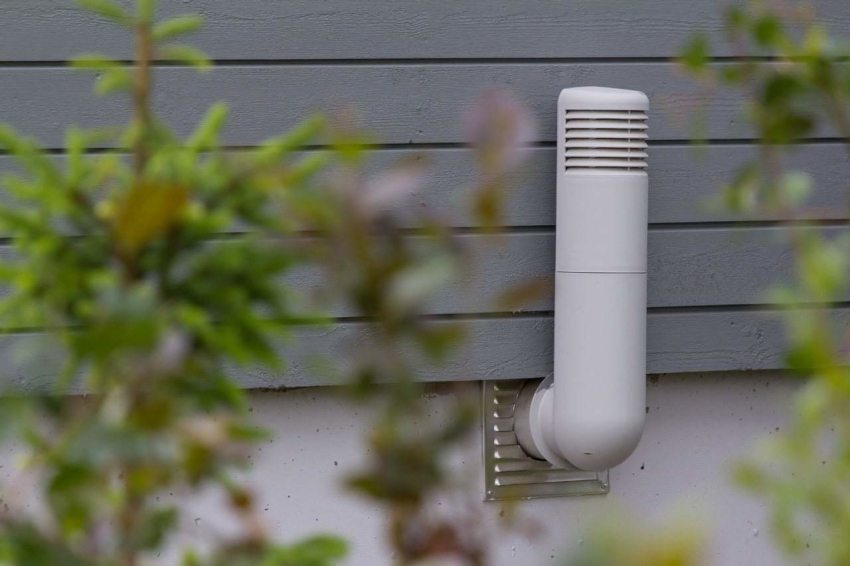
When using any material, the openings of the exhaust and supply pipes must be protected from moisture and debris. To do this, a special cap and grill are installed on them, which can be made of any materials.
Fan types for forced ventilation system
In order for the air to circulate properly in the cellar, several different types of fans can be used. According to the principle of operation and location, they are divided into duct and axial.
Duct fan characterized by an average level of performance and can be installed anywhere in the ventilation pipe. It also consumes little electricity, so this is a good option for saving money. The most efficient are considered to be amplitude-type duct fans.
Axial fans installed near exhaust or supply openings. They are more demanding in terms of electricity, but they also provide a more powerful air flow. Complete with a fan, a special valve is installed on the outlet pipe of the system, which prevents cold air from entering the room.
Hood in the cellar: how to make ventilation correctly, assembling the system and checking its performance
After you have decided on the type of air circulation system, selected the type of pipes and fans, made or purchased a deflector, dampers and other components, you can start installing the hood. This is done in the following order:
- If you install the ventilation system after the storage is built, then a hole is drilled in the ceiling for the ventilation pipe.
- An exhaust pipe is installed in the hole under the ceiling. On the street, its end should be raised above the surface by at least 15 cm.
- A hole is drilled in the wall opposite to the exhaust hole near the floor. It should be located not lower than 2 cm, but also not higher than 5 cm.
- A supply pipe is mounted in the hole. From the outside of the cellar, its opening must be too high, since there must be a pressure difference between the inlet and outlet openings to create natural draft. This is more relevant for the natural air circulation system, but it also makes sense for the forced one.
- The end of the supply pipe on the street is closed with a deflector or a special protective grill.
- Inside the cellar, special dampers are installed on the pipe, the gap adjustment of which will allow you to adjust the intensity of air circulation in the system.
After the system is mounted, it is necessary to check the efficiency of the hood in the cellar. How to do this correctly with the help of improvised means? To do this, you can bring a sheet of paper to the opening of the supply pipe. If it wobbles, then the system is working properly. Another option is to check with lighted paper or other source of smoke. The smoke should quickly dissipate and be drawn out of the basement.
Recommendations for arranging the hood
Regardless of which type of basement air circulation system you choose, a number of general points should be taken into account during installation:
- it is best to lay the ventilation system at the stage of construction of the storage facility. In this case, special channels must be left in the walls, into which ventilation pipes will subsequently be installed. This will save you not only time and effort, but also financial resources. The ventilation scheme should be immediately included in the basement project;
- how to make the ventilation of the cellar in a private house uniform? To do this, it is worth using the supply and exhaust pipes of the same diameter. If the basement is characterized by high air humidity, then the diameter of the chimney may be slightly larger. Remember that the inlet pipe should in no case be larger than the exhaust pipe, as this will trap air inside the storage, which can lead not only to spoilage of food, but also to increased gas content in the room. The last moment is dangerous for human health;
- do not place the supply and exhaust pipes next to each other. This will lead to poor performance of the entire system. It is best if the holes are located on opposite walls of the basement;
- if the cellar is located under an outbuilding, then the entrance hatch or door can play the role of a chimney;
- plastic pipes for sewage can be used as ventilation ducts. They are characterized by a suitable diameter and are relatively inexpensive;
- the part of the exhaust pipe, which is located outside the cellar, must be properly insulated. Otherwise, condensation may form on its inner surface during the cold season, which, when frozen, can clog the exhaust hole.
Helpful advice! It is possible to insulate pipes so that condensation does not form on them, not only in the part where they come to the surface, but also along the entire length.
There are many options for how to make different types of ventilation in the cellar with your own hands. You can use one or two pipes for this, arrange air circulation in a natural or forced way, install fans, deflectors, temperature control systems and climate sensors.
The shelf life of food directly depends on the efficiency of the ventilation system, as well as health, if we are talking about a gym or other frequently visited premises. It is best to lay the exhaust scheme directly into the storage plan, so you will spend less time installing it and will be able to use the basement immediately after its completion.
