Installation of socket boxes is not difficult. However, the nuances of this process largely depend on the surface material. This article describes in detail the features of mounting socket boxes in plasterboard partitions and concrete walls. Recommendations for the selection of products and the step-by-step technology of their installation will help you understand this process and do the work yourself.
Content [Hide]
- 1 Why is it so important to install socket boxes in the house?
- 2 Selection of products and recommendations for the installation of socket outlets
- 3 Tool for mounting socket boxes: what kind of crowns are needed for concrete and brick
- 4 How to install the socket for concrete: installation technology
- 5 How to properly install outlets in drywall
Why is it so important to install socket boxes in the house?
The connection of wiring devices to the power cable must be secure. The rules stipulate that each socket is mounted together with a protective case - a socket. This back box or sleeve provides protection against electric shock.
Wall-mounted sockets, as well as street models, are already equipped with a protective case that meets safety requirements. Devices of built-in type during installation should preferably be equipped with socket-outlets.
Main functions of socket outlet boxes:
- Structural - glasses securely fix and hold the socket in the wall.
- Protective - the box prevents dust, moisture and foreign objects from entering the wiring device.
- Protection against electric shock - glasses for installing sockets in concrete walls and partitions are made of dielectric materials, thanks to which the supporting structures are protected from current from the contacts.
- Aesthetic - the seat made of plastic or metal provides a flat surface around the outlet, so the entire installation area looks neat.
- Fire safety - if a fire occurs inside the outlet, the flame will not be able to leave the box.
Useful advice! If the glass has jumped out of the wall or is simply poorly fixed, it can be secured with a self-tapping screw that should be screwed into the base. For concrete surfaces, add a dowel. An alternative to this method is a glue gun. When working with drywall, the socket boxes are fixed with a plaster solution. First, the surface must be treated with a primer (PVA glue is suitable).
Selection of products and recommendations for the installation of socket outlets
Wall material is the first thing to consider when choosing a wall box. On this basis, existing types of products can be divided into two categories: for solid walls and for thin partitions.
Solid walls include bases made of solid materials. These include aerated concrete, brick, concrete and reinforced concrete. For such materials, socket boxes are used without additional clamps. To fix the product in the wall, a building mixture (alabaster or gypsum) is used.
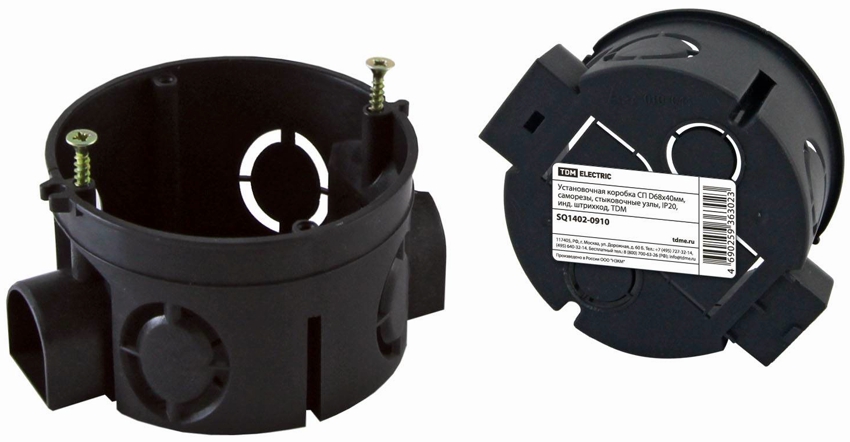
Such cups are provided with mounting holes for wires. They are placed in the bottom or in the walls. Before installing the socket into a concrete wall, you just need to break the jumpers and squeeze out the plug to free the hole.
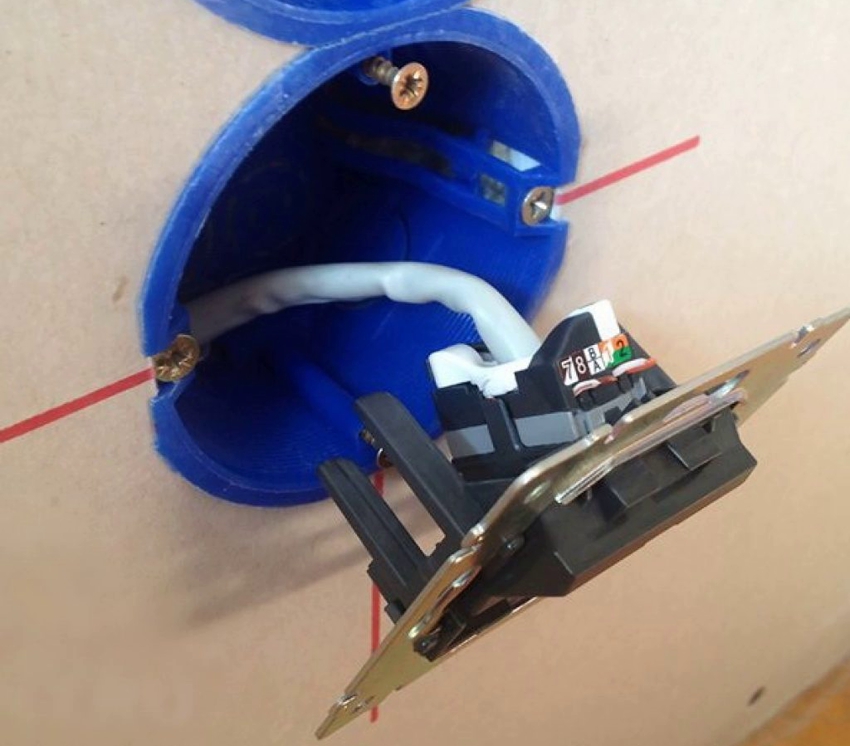
Thin baffles are made of composite materials. These include plastic boards, plasterboard and plywood sheets, chipboard, etc. For such surfaces, mounting boxes are used, equipped with fastening legs made of metal or plastic. They press down to securely fix the glass in the hollow wall. The legs are held inside the box with screws that adjust their position.
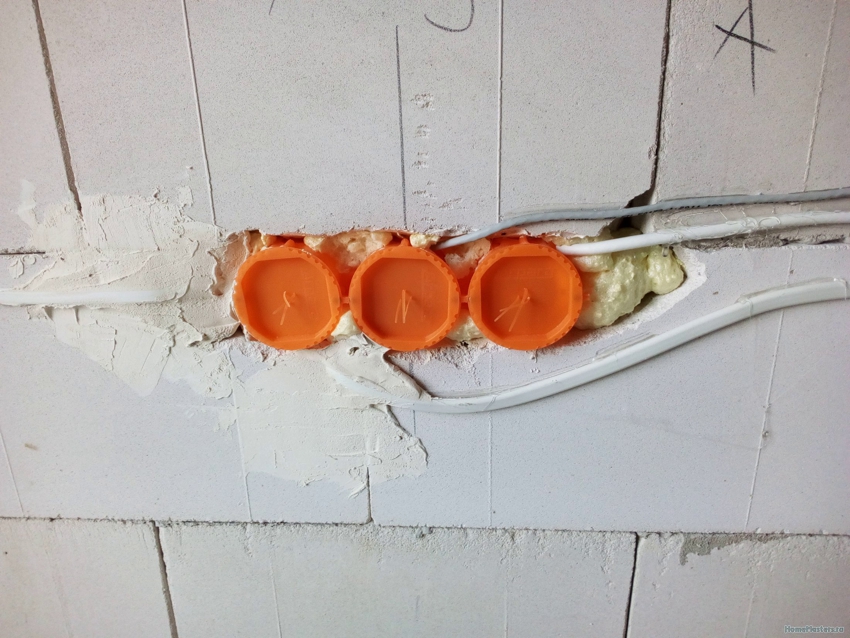
To install triple sockets, glasses are used, in the side of which there is a special mechanism for fastening. Products of this type can be combined into whole blocks, fastening them using the method of groove joints.
What are the requirements for glasses for an outlet?
The material from which the box is made must have a sufficient safety margin. Quality products can easily withstand the force that is applied in order to remove the plug from the socket. In this case, the junction box should remain in the wall, and not be pulled out after it. To ensure these conditions, manufacturers equip glasses with special grooves, ribs and hooks. All these elements are located on the outside. This rule applies to glasses that are fixed in the wall with building mixtures.
Technological holes have two functions: they provide access for wires to the outlet and enhance the degree of fixation of the box inside the wall. After installing the socket into the concrete, pulling out the glass will no longer work. You will have to break the plastic or destroy the section of the wall around it.
Most boxes are made of plastic. Several types of these raw materials are used in production. There are also metal sockets for wood. But still it is worth giving preference to the plastic ones. This material, unlike metal, has dielectric properties. In addition, the purchase of a plastic socket box will be cheaper.
Important! Before buying a glass, you need to make sure that there are ribs necessary to fix the socket. Manufacturers mold them on the inside of the product.
Metal sockets have one more drawback. From the inside, they have a perfectly smooth surface. The mounting spacers on the outlets simply have nowhere to hook, so wiring devices can fall out.
Plastic cups must not support combustion. This requirement is of particular importance if it is planned to install a socket in drywall and other composite partitions. With brick and concrete walls, the risk of fire is much lower.However, a short circuit in the outlet can cause wallpaper or nearby furniture to catch fire.
Mounting distances between socket outlets and other standards for electrical installations
Before installing the socket into the wall, you need to choose the optimal location for its placement. The standard mounting distance between the centers of the glasses is 71 mm. This value is used in cases when you need to organize several outlets at once in one place. Wiring devices are classified as sources with increased danger, so the points for their installation are selected taking into account safety requirements.
Basic rules for the placement of electrical installations:
- between the gas pipe and the socket - at least 0.5 m;
- it is advisable to install electrical installations from the side where the handle is on the door and at a height of no more than 1 m from the floor;
- in the bathroom, it is allowed to install sockets with an indentation of at least 0.6 m from the bath, shower and washbasin in order to exclude splashes;
- the distance from the floor depends on the purpose of the outlet. If an electrical installation is necessary to connect large household appliances, its installation is carried out at a height of 1 m from the coating. This rule applies to dishwashers and washing machines, electric stoves, refrigerators. For universal sockets, a height of 0.3 m is sufficient;
- in the kitchen, where small appliances are located on the table, the socket blocks for it are installed at a height of 0.1 m above the level of the working surface;
- parameters for sockets for a wall-mounted TV in the kitchen are selected individually;
- the correct installation of the socket box also provides for the norms for the placement of boxes horizontally. There must be at least 0.15 m between the socket and the door frame. The same applies to the floor, corners and ceiling of the room;
- the electrical installation is mounted with an offset of at least 0.5 m from the heating radiator.
Important! It is strictly forbidden to install sockets over gas and electric stoves, as well as heating appliances. The exception is the "warm floor" system. Installation of electrical installations in the premises of saunas and baths is not allowed. In addition, regulations prohibit the use of walls that face the street for organizing wiring and placing outlets.
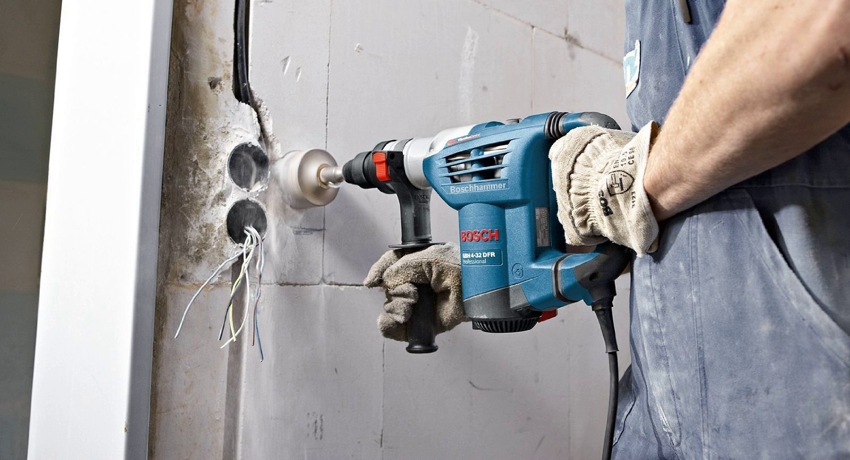
Tool for mounting socket boxes: what kind of crowns are needed for concrete and brick
The choice of the crown depends on the installation technology and the material of the walls with which you will have to work.
For domestic purposes, several options are used:
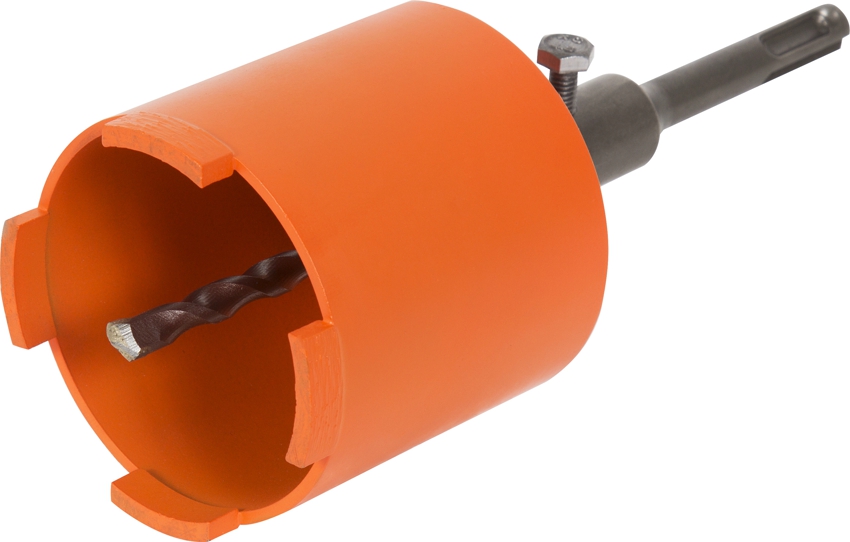
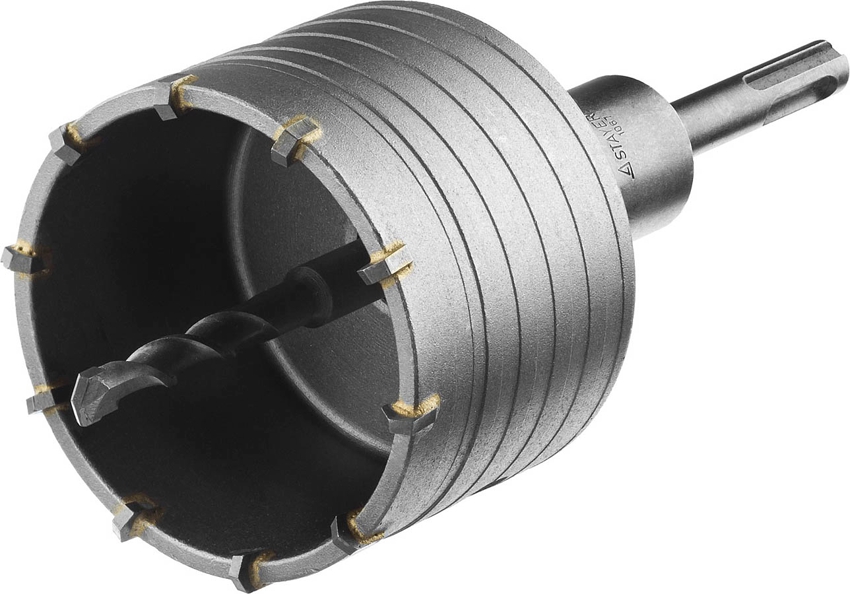
- Carbide Bits - The cutting edges are tipped from Pobedite or other hard metal. Suitable for dry hammer drilling.
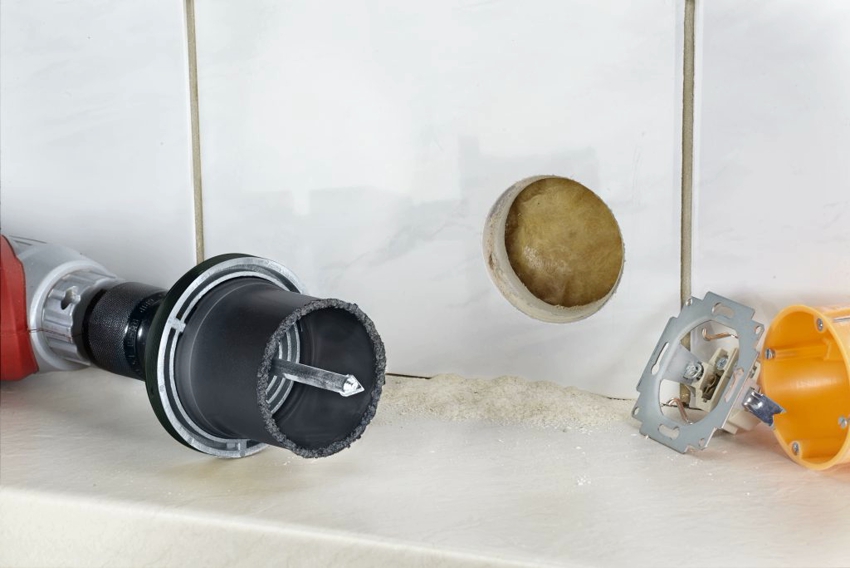
- Tungsten carbide bits - designed for working with concrete, brick, stone. They can be used for installation of socket outlets under tiles or shell rock.
- Diamond Bits - Diamond coated cutting edges. Suitable for non-impact drilling of solid concrete walls (wet and dry).
The shank of the bit must be suitable for the chuck of the tool that will be used for drilling.
By the shape of the shank and the type of attachment, the following types of crowns are distinguished:
- with a hexagonal tip;
- with triangular shank;
- SDS Plus and SDS (suitable for most drills and hammer drills for domestic use, their diameter is 10 mm);
- SDS Top (for semi-professional rotary hammers, diameter - 14 mm);
- SDS Max (for professional rotary hammers, 18 mm diameter).
To install the socket outlets in a concrete wall with your own hands, you will need the following set of tools and consumables:
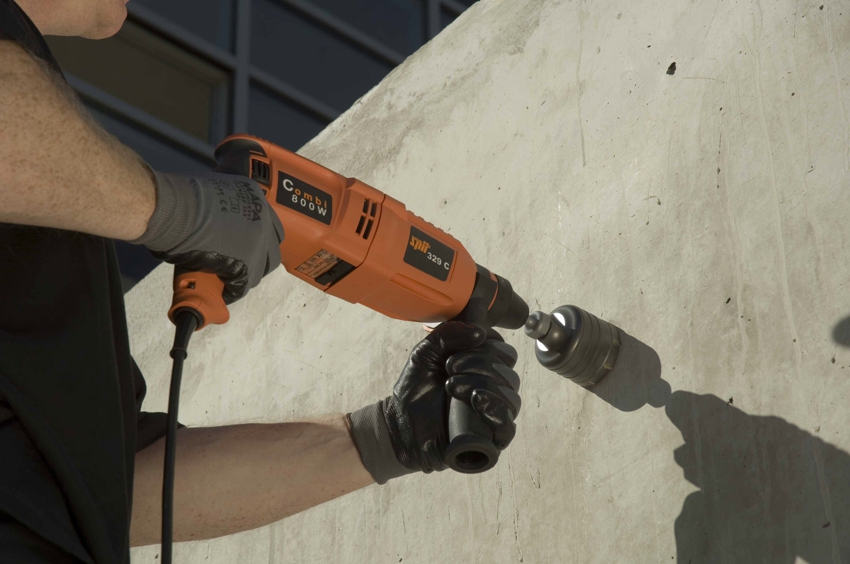
- electric hammer drill with a chuck corresponding to the SDS Max or SDS Plus standard;
- drill for concrete (length over 6 cm, diameter within 5-8 mm);
- hammer and chisel (alternatively, a steel blade for a hammer drill is suitable);
- a concrete bit of the appropriate size with a shank for a hammer drill (SDS Max or SDS Plus);
- respirator and goggles;
- a container for preparing a gypsum mixture;
- putty knife;
- gypsum powder;
- mixer attachments on a drill for mixing the components of the solution.
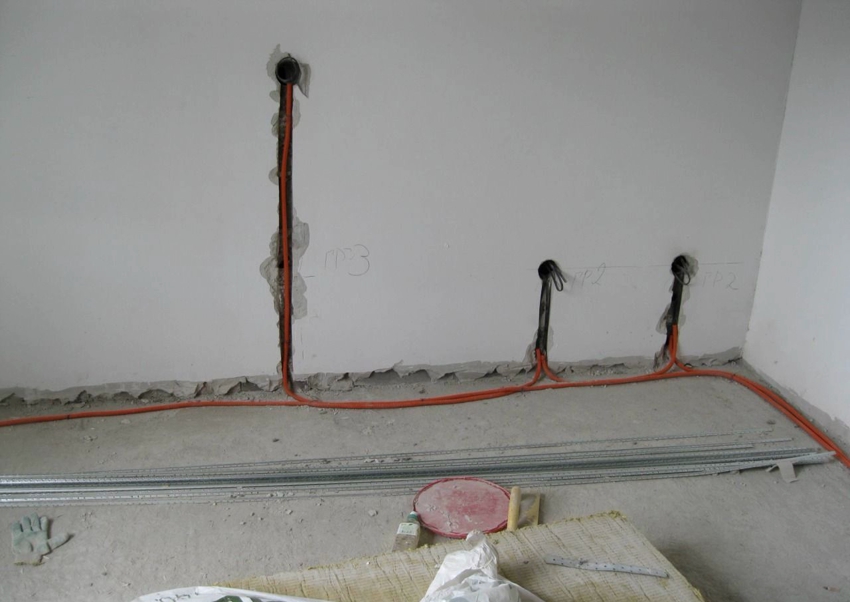
Note! Do-it-yourself installation of socket outlets can only be started after the wiring is fully organized in the room. In some cases, additional cable can be laid. However, a grinder with a diamond disc is used to form the strobes for its installation, which leads to the release of fine dust into the room.
Pobeditovye and tungsten carbide crowns for flush mountings on brick and concrete
The decisive factor when choosing a bit is not only the drilling method and the wall material. The size of the holes, their number and the budgetary possibilities of the buyer also matter.
Tungsten carbide and pobedite tips are distinguished by the most affordable prices. Their resource is designed for a small number of holes. Such crowns are suitable for beginners who want to do their own installation work. The diameter of the holes for the socket must correspond to the size of the plastic cup. Taking this requirement into account, a crown with an identical size is selected.
Related article:
Socket: diameter, depth and other parameters of products for concealed installation
Installation of sockets inside the wall. An overview of standard parameters and recommended dimensions when working with concrete and drywall.
Cobalt, tungsten and carbon hard alloy is applied to the cutting edges of the victorious bits. This soldering is durable, so the nozzle can be used for drilling brick and concrete walls by percussion method. But it will not withstand contact with steel reinforcement.
Tungsten carbide bits are excellent for drilling brick, concrete and ceramic tiles. These crowns greatly simplify the work when it is required to install a socket in a wall that is already tiled. Tungsten carbide nozzles are intended for power tools (hammer drill, drill), the power of which is at least 800 W. In this case, a bumpless drilling method should be used.
Useful advice! When the bit hits the reinforcement, the soldering is removed from the cutting edges. It is therefore advisable to have a similar sized diamond tip on hand to apply if required.
How to choose a diamond core bit for concrete
Diamond grit, which is applied over the cutting edges of the bit, effectively copes with drilling such hard materials as granite, concrete, stone, reinforced concrete. She is not afraid of fittings.
According to the degree of hardness, there are three types of spraying on diamond drill bits for socket holders:
- "T" (hard) - for working with high-quality concrete, used at low speeds.
- "C" (medium hardness) - for drilling reinforced concrete;
- "M" (soft) - for working with hard concrete.
Diamond core bits are used for dry and wet drilling. In the second case, the cutting device is periodically cooled during operation using liquid. Dry drilling bits are used in domestic conditions. They are suitable for working with concrete and brick walls. In this case, a bumpless drilling method is used with a drill or perforator.
Advantages of dry crown crowns:
- the possibility of drilling reinforced walls;
- high speed of hole formation;
- large working resource;
- minimum amount of dust;
- low noise level;
- in the process of drilling, the walls retain their integrity.
Wet drill bits are used for industrial purposes. In such devices there is a fluid supply, which eliminates overheating of the tool. These drill bits are designed to create deep holes when drilling through granite, reinforced concrete or marble walls is required.
How to install the socket for concrete: installation technology
The installation of socket outlets in a concrete wall can be done independently or you can hire professionals for these purposes. There are many construction and finishing companies online. The list of their services also includes the installation of sockets. Experts will help to cope with the laying of cables and plunging wiring devices (junction boxes, switches, sockets, etc.).
The cost of installing the socket boxes depends on the material of the wall, the volume of the proposed work, as well as the remoteness of the object. In the capital, the cost of connecting one device is about 600-700 rubles. This price does not include cable laying and wall decoration. Therefore, many owners of apartments and private houses prefer to cut out sockets on their own.
Work on the organization of outlets is carried out in several stages:
- marking in the installation area;
- cutting out the mounting holes;
- installation and fixing of the socket box;
- finishing the wall;
- installation of a wiring device and connection of power cables;
- installation of the outer cover.
Important! Carrying out any work with the wiring, including the installation of socket boxes, it is imperative to turn off the electricity.
How to make holes correctly for installing socket outlets in concrete
First you need to decide where the sockets will be located in the room and how many there will be.
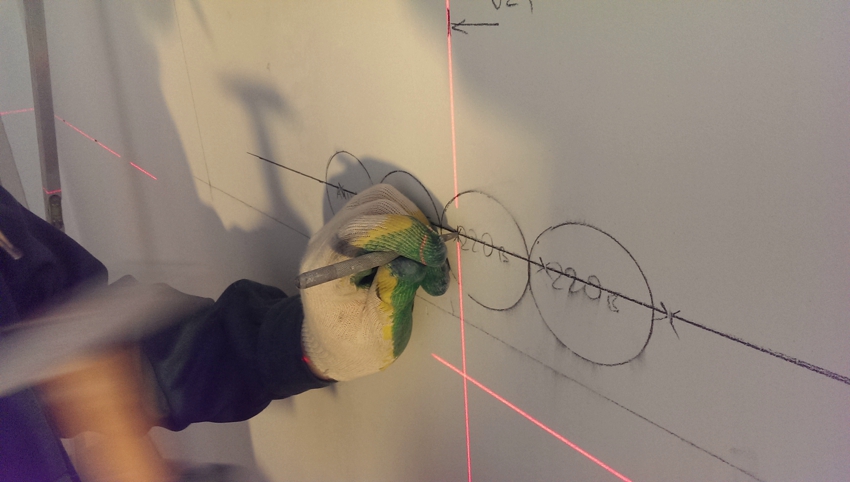
How to make the markup correctly:
- To begin with, the height of the future outlet is determined. To do this, using a tape measure, you need to measure the distance from the coating to the intended installation point.
- If there is no floor covering in the room, add 5 cm to this indicator.
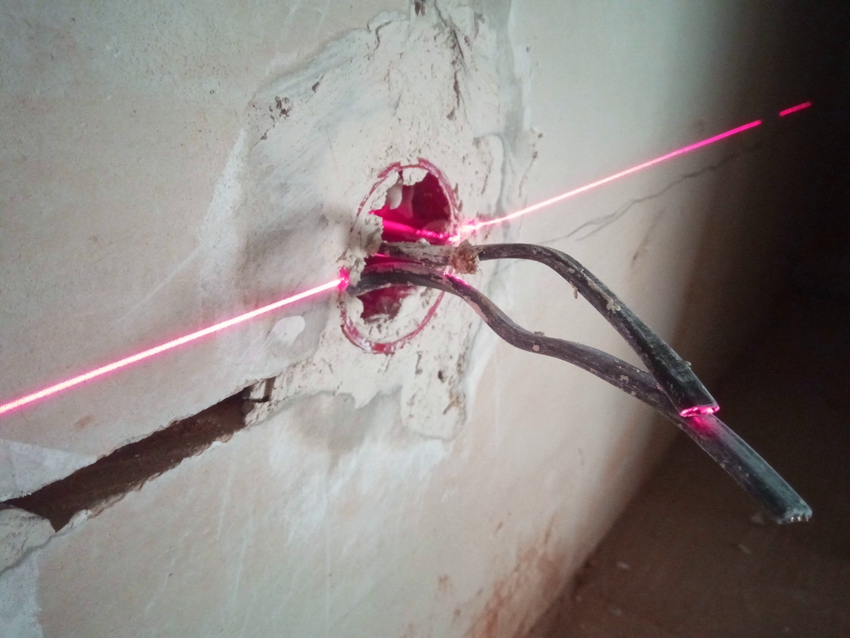
- Then horizontal and vertical lines are drawn. This must be done so that they intersect at the point where the box will be installed. To make the lines straight, it is advisable to use a building level.
- All that remains is to attach the socket to the wall and draw a pencil around its outer contour.
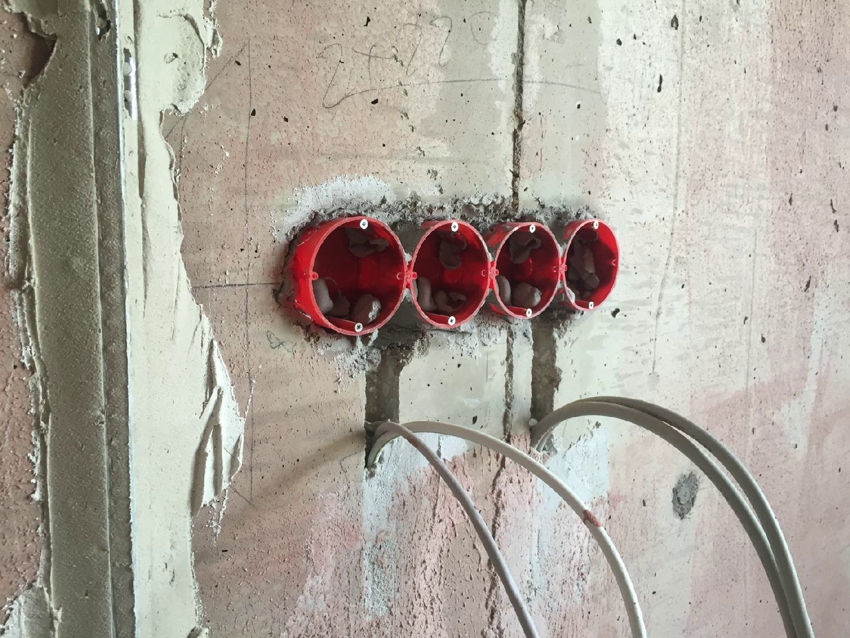
If it is planned to install several socket outlets, first a horizontal line is applied to the wall (taking into account the height from the floor). Having determined the center of the first glass, you need to draw a vertical line through this point. With an indent of 71 mm, the center of the second socket is outlined, etc.
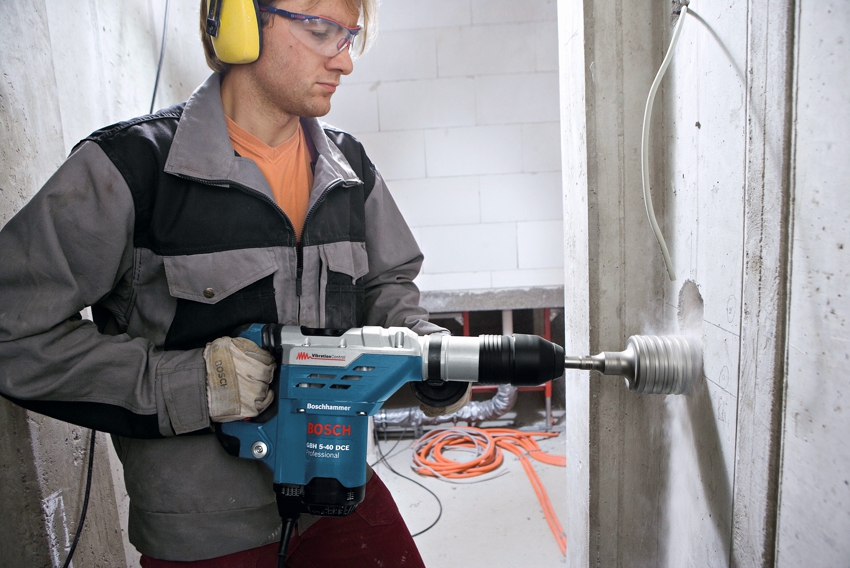
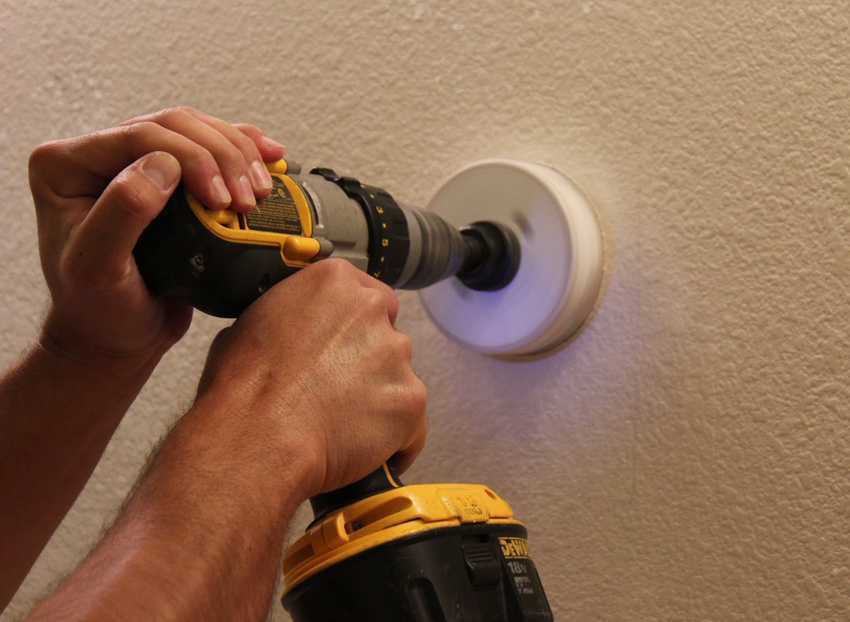
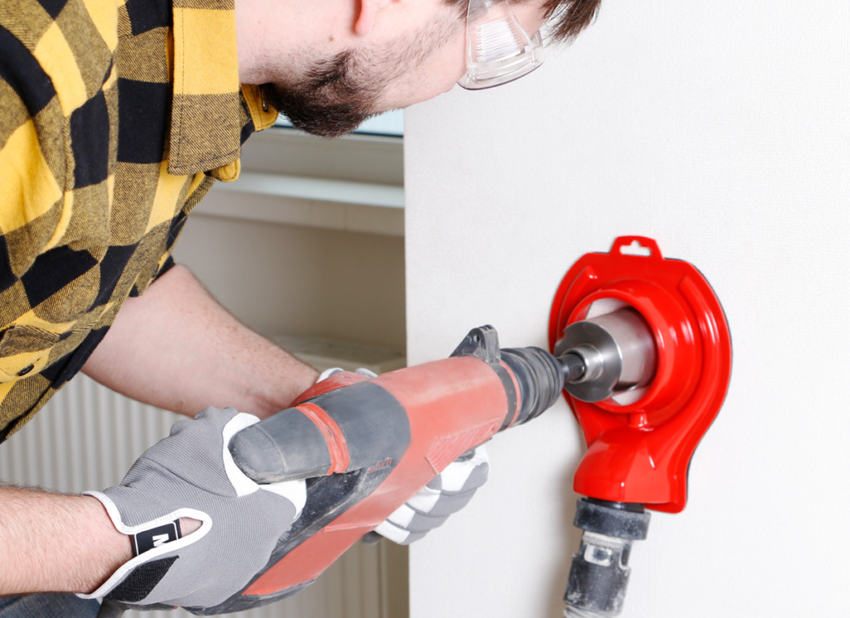
Using a power tool and a victory crown, a hole of the required size is made in the wall. A drill is installed in the center of the nozzle. The tool must be positioned so that it falls exactly in the center. If a standard size socket (67-68 mm) is used in the work, a 70 mm crown can be used for work.
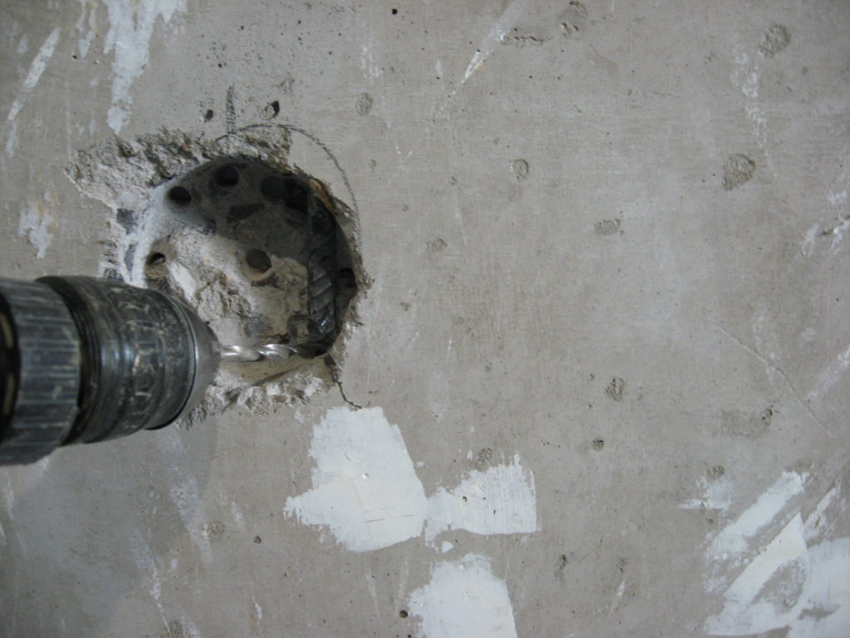
After a hole has been made in the wall, you need to pull out the crown and knock out the remaining concrete from the base. For this, a hammer and chisel are used. Depending on the layout of the wiring, you need to make a strobe in the wall to bring the power cable to the outlet.
Note! If the wall is made of high-strength concrete and has reinforcement, then a diamond core bit should be used. For work, a nozzle of the appropriate rigidity is selected. If reinforcement gets in the way of the crown, it can be cut. To do this, you need to put the instrument in bumpless mode.
Installing the socket: how to fix the junction box in the wall
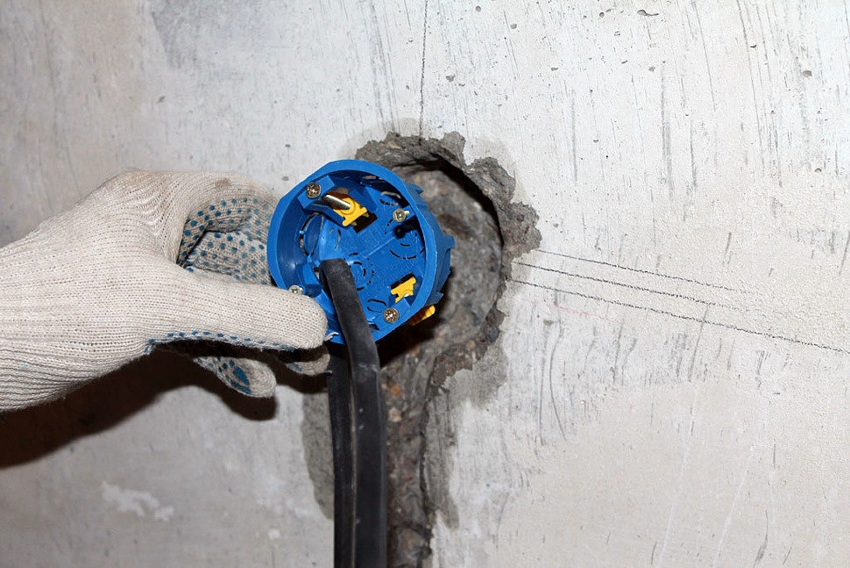
Insert a glass into the hole cleared of debris. If the seat is formed correctly, the product will fit freely in width. In this case, there should be a small margin of space in depth - about 5 mm.
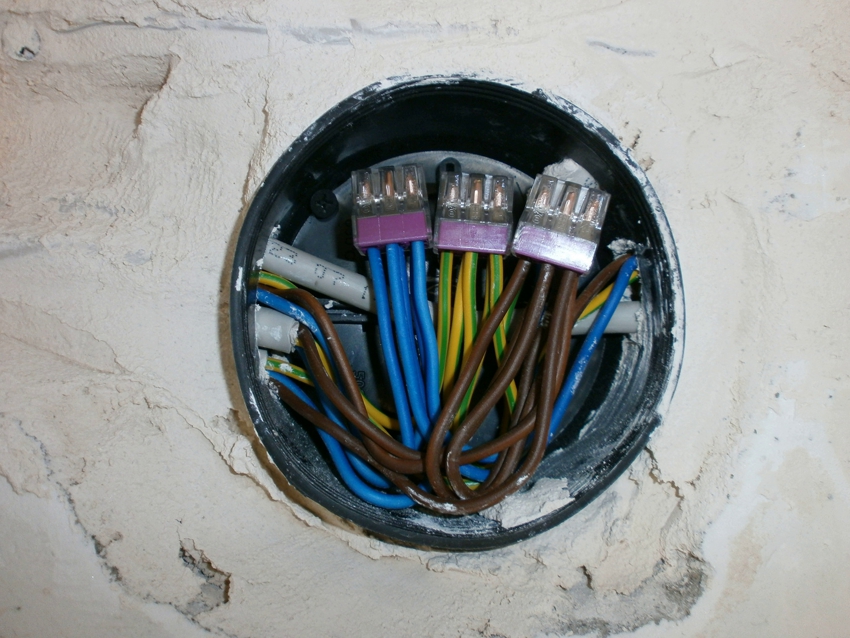
In the socket, partitions are removed that cover the technological holes. Wires (always de-energized) are wound in them and the box is inserted into the wall. Alabaster or gypsum is used to fix the socket in concrete.
The solidification time of a pure gypsum solution is from 3 to 5 minutes. Therefore, all work must be carried out as quickly as possible, and the mixture itself must be prepared several times in small portions. In addition, you should regularly clean the container from hardened plaster. A 3-4 liter plastic bucket is suitable for preparing the solution. To make the mixture homogeneous, you must use a mixer attachment. In this case, the drill or hammer drill switches to shock-free operation.
So that the wires do not interfere during operation, they must be folded inside the box with a bay. In 2 min. before mounting the box, the seat must be moistened with water. When the liquid is absorbed, the walls of the hole are smeared with plaster. A spatula is used to apply the material. The back of the glass with a threaded wire is also treated with a solution and inserted into the seat. The position of the socket is immediately adjusted so that its edges coincide with the plane of the wall, and excess mortar is carefully removed.
How to properly install the socket outlets before plastering the walls
It is recommended to install the socket outlets in the already plastered walls when all cables are laid. If you have to work in a rough finish, the thickness of the finishing layer must be taken into account. For this reason, the mounting boxes are recessed approximately 1-2 mm in relation to the plane of the wall. Thus, together with the plaster layer, the total figure will be 5 mm.
If several sockets are mounted at once, assembled in one block, a special pattern is used, which prevents the glasses from displacing in relation to each other. This design is leveled, after which the piece is fixed in the hole using wedges-spacers.
The formation of the mounting holes and the fixation of products in the wall using plaster mortar is carried out in a standard way. When the mixture hardens, you can start plastering the walls.
Useful advice! The stores sell special plugs for socket outlets with guiding beacons in the form of antennae.
The plugs are installed on the boxes before plastering the walls. They prevent the mixture from getting inside the glass, eliminating the need to clean it. The guide beacons act as a guide to determine where the socket is located under the plaster. By pulling on the antennae, the plug can be easily removed.
How to properly install outlets in drywall
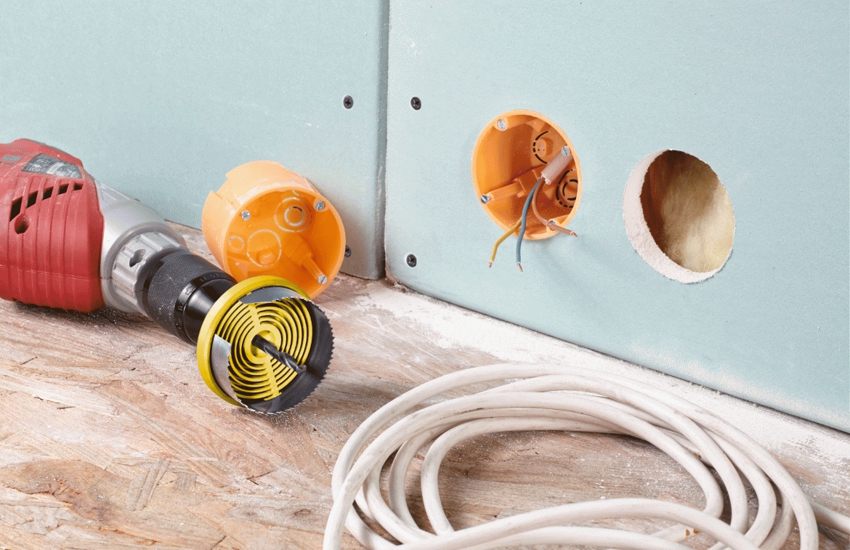
Plasterboard boxes have a completely different structure than brick and concrete boxes. No plaster solution is needed to fix the products in the wall. Therefore, it is easier to work with them, and the installation itself is cheaper. For the formation of holes, special drywall crowns are used. The use of nozzles intended for wood is allowed.
How to install a socket in drywall:
- By analogy with concrete walls, markings are applied to the partition.
- A hole is drilled with a crown, which in diameter corresponds to the size of the socket (68 mm).
- When installing several outlets between the centers of the products, you must maintain the standard distance of 71 mm.
- Partitions are removed in the glass and wires are inserted into the vacant holes.
- The box is inserted into the hole and the spacer screws in the structure are tightened, fixing the product in the partition.
- All that remains is to cut the ends of the wires and install the outlet.
The technologies for installing sockets in drywall and concrete are significantly different. Working with solid walls is much longer and more difficult. But even a drywall that is relatively easy to use requires careful attention to all the nuances. The reliability, durability and appearance of the outlet will depend on how correctly the installation of the glasses is.
